September 28, 2025 · Kuba Rogut
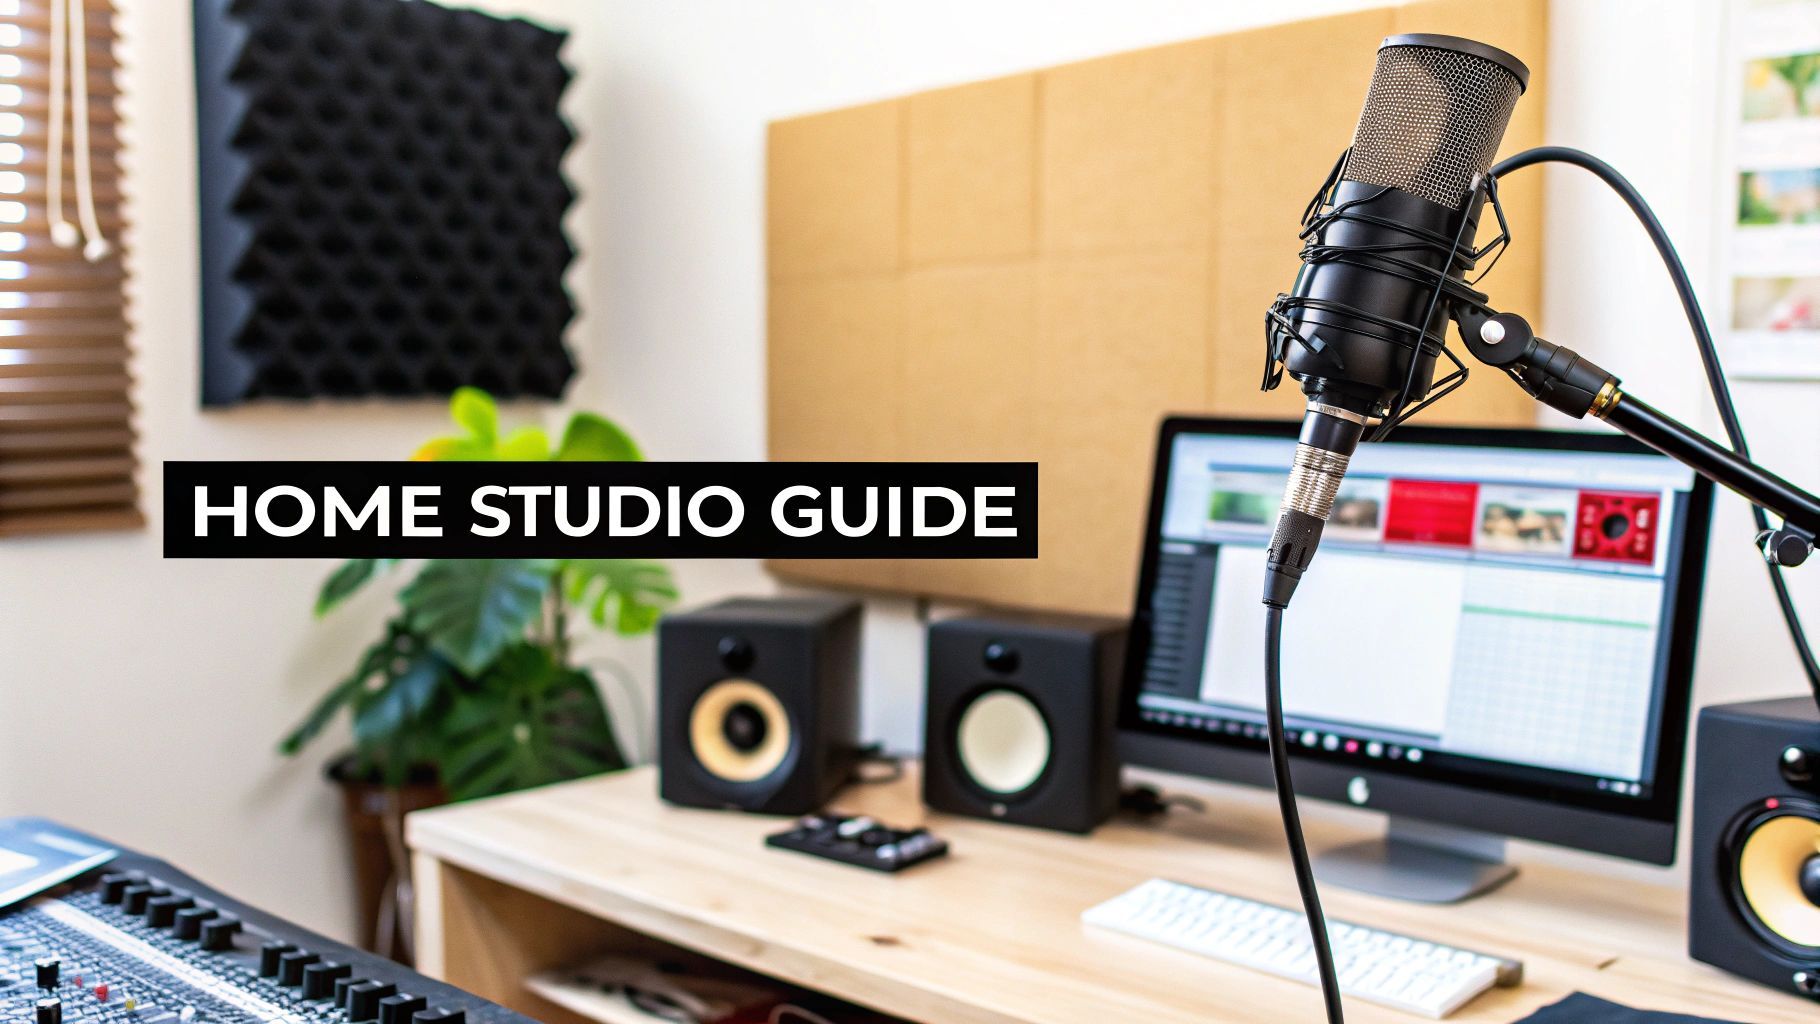
So, you're ready to turn a corner of your home into a creative powerhouse. The thought of building a studio can feel overwhelming, packed with technical jargon and a seemingly endless list of expensive gear. But it doesn't have to be that way.
At its heart, a home studio is simply a dedicated space where you can capture and shape sound cleanly and accurately.
This isn't about trying to replicate a multi-million dollar facility like Abbey Road. It's about creating a functional, personal environment that lets your ideas flow without technical headaches. The real goal is to build a setup that serves your specific needs, whether that's recording vocals for a podcast, producing electronic music, or tracking guitars for your next single.
To get this right, you really just need to focus on four foundational areas. Nail these, and everything else will fall into place.
The move toward personalized music creation spaces is more than just a trend; it's a massive shift in the industry. The market for custom home studio setups was valued at a staggering US$ 8.2 billion in 2024 and is on track to nearly double by 2033. This explosion, detailed in market reports like those on Reports and Insights, shows just how many creators are building their own recording environments.
The secret to a great home studio isn't buying the most expensive gear. It’s about making smart, informed choices that maximize the potential of your space and budget. A well-treated room with modest equipment will always outperform an untreated room with high-end gear.
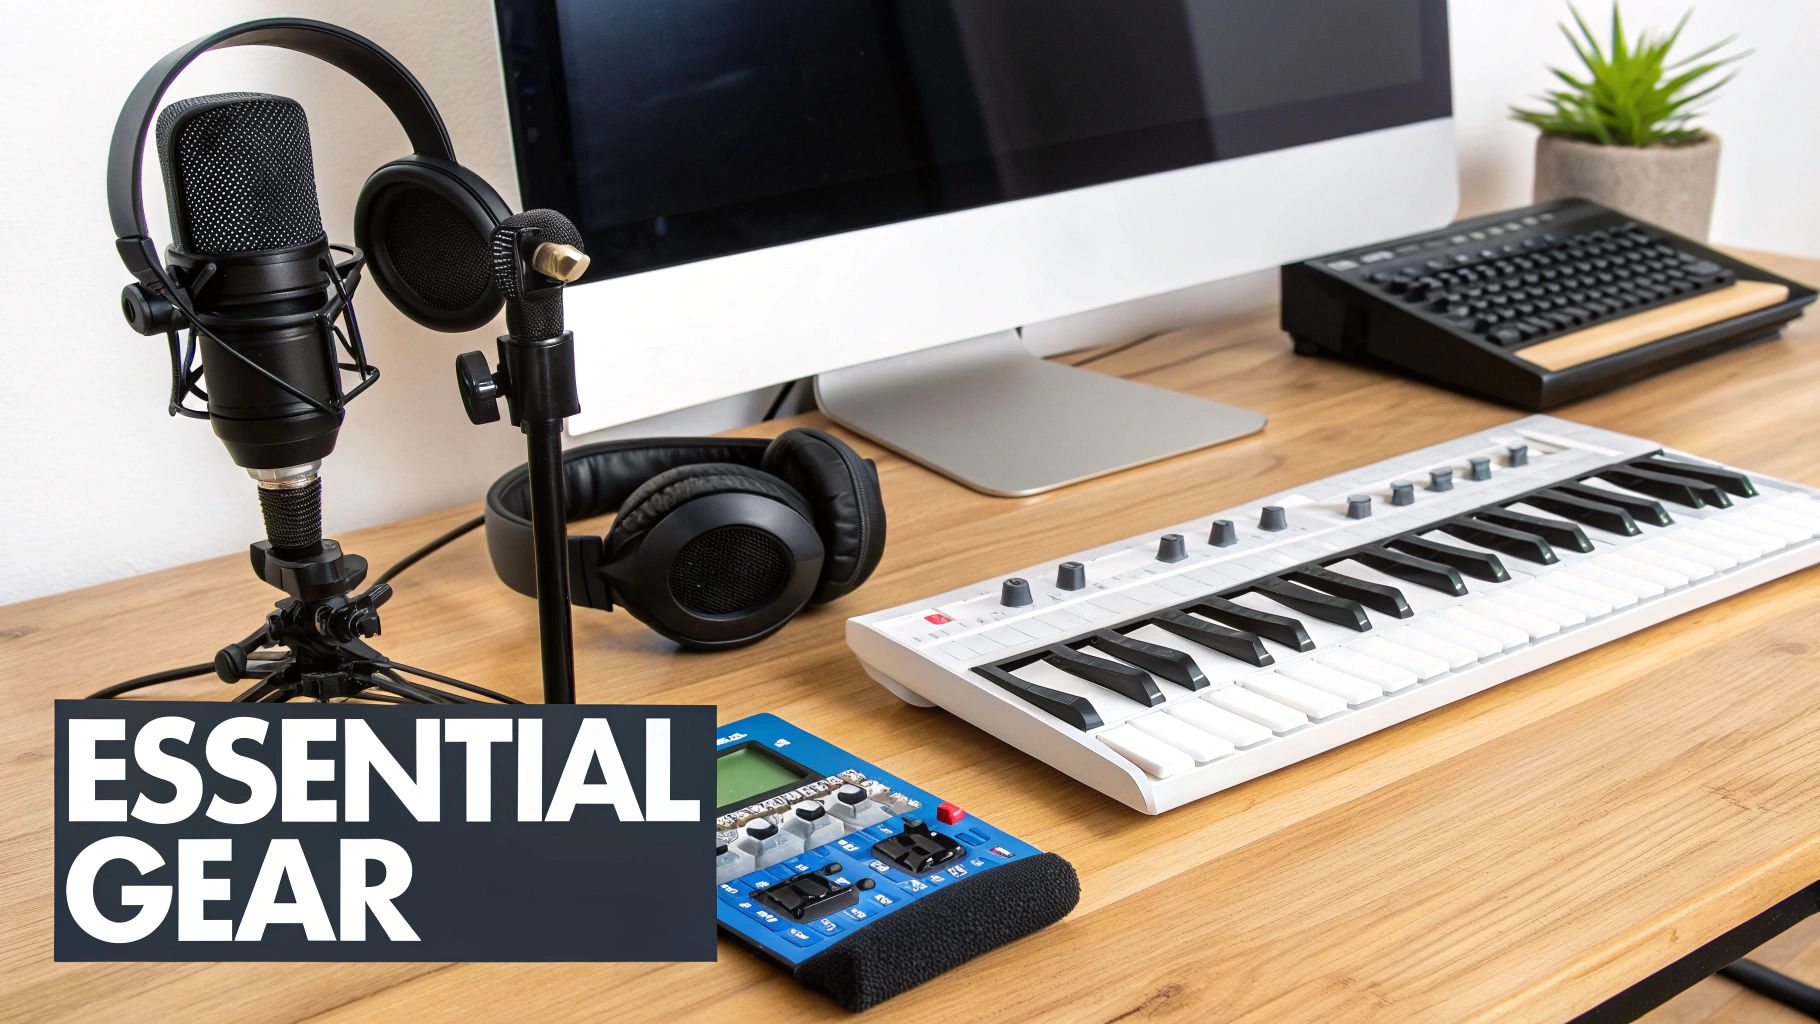
Before we dive into the specifics of acoustic treatment and microphones, let's quickly review the core components you'll need to assemble.
This table breaks down the absolute essentials for getting a functional studio off the ground. Think of it as your initial shopping list.
| Component | Primary Function | Key Consideration |
|---|---|---|
| Audio Interface | Converts analog sound (from a mic) into digital data for your computer. | Number of inputs/outputs you need. |
| Microphone | Captures sound waves and turns them into an electrical signal. | The type of sound source (vocals, instruments). |
| DAW Software | The digital hub for recording, editing, and mixing audio. | Your budget and operating system (Mac/PC). |
| Headphones | Allows for critical listening and monitoring without sound bleeding. | "Closed-back" for recording, "open-back" for mixing. |
| Studio Monitors | Speakers designed for flat, accurate sound reproduction for mixing. | The size of your room. |
| Cables | Connects all your gear together (XLR for mics, TRS for monitors). | Getting the right type and length for your setup. |
Getting these core pieces in place is the first big step. With this checklist in mind, you're ready to start making the decisions that will bring your studio to life.
This guide will walk you through each of these pillars, one by one, with practical advice and clear steps. Forget the overwhelming gear lists for a moment and focus on this blueprint. By mastering these fundamentals, you’ll build a home recording studio that not only works but genuinely inspires you to create your best stuff.
Before you even think about dropping a dime on a fancy microphone or the latest software, we need to talk about the most important piece of gear you already have: your room. I'm serious. The physical space where you record and mix will shape your sound more than almost anything else. Getting this right from the start is the absolute bedrock of a great home studio.
Your first job is to play detective. Walk around your potential studio spots and just listen. Is there a low hum from the fridge? The distant rumble of the washing machine? Traffic noise bleeding through the windows? These subtle sounds are microphone magnets, and they have a nasty habit of ruining what you thought was the perfect take.
Let's be clear: not all rooms are created equal for audio. The shape and size of your space have a massive impact on how sound waves bounce around.
Nailing this initial choice sets you up for success down the road. It’s all about planning before you plug anything in.

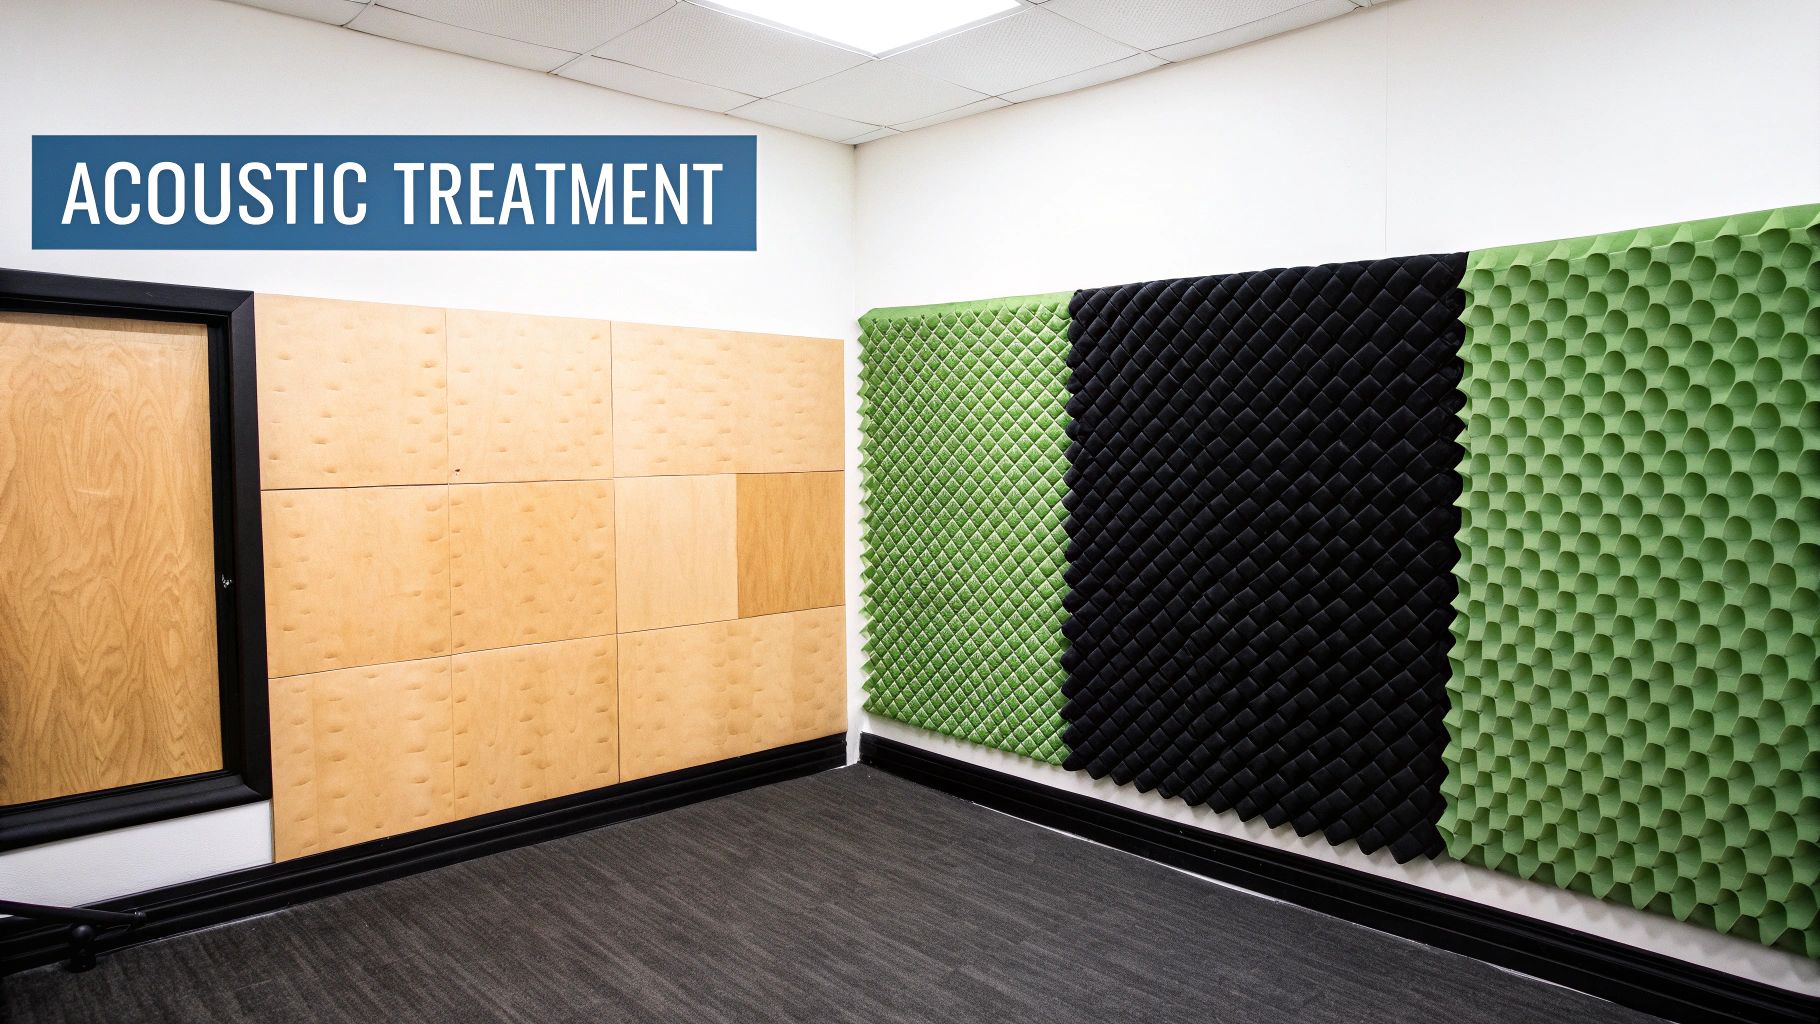
This image really drives home the point that preparation is key. The first tools for building a studio aren't a microphone and an interface; they're a tape measure and a plan.
It’s crucial to get this next part straight because people mix these terms up all the time. Acoustic treatment and soundproofing are two completely different things that solve different problems.
Soundproofing is all about isolation. The goal is to stop sound from getting in or out of your room. This means heavy-duty construction—think double layers of drywall, mass-loaded vinyl, and special sealed doors. It’s incredibly expensive, complicated, and frankly, overkill for most home setups.
Acoustic treatment, on the other hand, is what we're focused on. This is about controlling the sound inside the room. It’s affordable, you can do it yourself, and it makes a night-and-day difference in your recording clarity and mixing accuracy. By placing the right materials in the right spots, we can tame those pesky echoes and reflections.
You're not trying to build a dead, silent chamber like you see in science videos. The real goal is to create a balanced, controlled space where you can trust what you're hearing, without the room itself tricking your ears.
To get there, you have to deal with reflections across the whole frequency range—from the high-frequency flutter to the low-end mud.
The most common problem in an untreated room is something called flutter echo. Try this: stand in the middle of your room and clap your hands loudly. Hear that zinging, metallic ring? That’s flutter echo. It’s the sound of the clap bouncing back and forth between your bare, parallel walls.
Acoustic panels are your first line of defense. These are typically made of foam or dense fiberglass and are designed to soak up those mid and high-frequency reflections.
For the biggest bang for your buck, here’s where you should place them:
Acoustic panels are great for mids and highs, but they do almost nothing for low-frequency energy. Bass is powerful. It has long wavelengths that love to pile up in the corners of a room, creating a boomy, muddy mess that makes it impossible to mix accurately.
This is where bass traps are non-negotiable. These are thick, dense absorbers made specifically to soak up that low-end rumble. If you’re serious about building a home recording studio that produces professional-sounding mixes, you absolutely have to manage your bass.
You’ll want to place bass traps in as many corners as you can, especially where the walls meet the ceiling. This is where bass energy congregates. The moment you install them, you’ll hear the low end tighten up immediately. You’ll finally be able to hear what your kick drum and bass guitar are really doing.
For a much deeper dive into this topic, you can find more specific strategies in our guide on acoustic treatment for home studios.
Now that your room is treated and ready to go, it's time for the fun part: choosing the gear that will actually capture your sound. The world of audio equipment can feel overwhelming, but you only need a handful of key pieces to get a professional-sounding home studio off the ground. We'll focus on the big three—your audio interface, microphones, and studio monitors.
Think of these as the heart, ears, and voice of your studio. They all have to work together to pull your performance out of the air, get it into your computer, and then play it back to you with brutal honesty.
This kind of lean, focused setup is exactly what you should aim for. It's always better to have a few great pieces of gear than a room full of mediocre ones.
If there's one piece of hardware you shouldn't skimp on, it's the audio interface. This little box is the critical bridge between the analog world (your voice, your guitar) and the digital world of your computer. It translates sound into data and back again.
A quality interface handles several crucial jobs:
For most people starting out, an interface with two inputs is the sweet spot. It gives you the flexibility to record a stereo source, like a digital piano, or two separate sources at once, like vocals and an acoustic guitar. When shopping, look for brands known for clean-sounding preamps and stable, reliable drivers.
Your microphone is the first link in your recording chain, and different mics are designed for different jobs—just like a painter has an arsenal of brushes for different textures and details. The two main categories you'll run into are condenser and dynamic microphones.
The explosion in home recording is largely thanks to how accessible professional-grade gear has become. The global market for recording studio equipment was valued at around USD 1.8 billion in 2023 and is expected to climb to nearly USD 3.2 billion by 2032. This isn't surprising when you see the power that affordable, high-quality mics and interfaces have put into the hands of creators. You can find more details about this expanding market on dataintelo.com.
Pro Tip: If you can only buy one microphone to start, make it a versatile large-diaphragm condenser. It will excel on vocals, acoustic instruments, and a huge range of other sources, giving you incredible detail and making it a true studio workhorse.
Knowing which mic to grab for a specific source is a core skill for any engineer. Let's break down the common types to help you make the right call.
A good microphone is like having the right lens for your camera—it captures the subject in the most flattering and accurate way possible. This table compares the most common microphone types to help you decide what you need for your studio.
| Microphone Type | Best For | Pros | Cons |
|---|---|---|---|
| Condenser | Detailed sources like vocals, acoustic guitar, piano, and drum overheads. | Highly sensitive, captures crisp detail and high frequencies. | More fragile, requires phantom power, can pick up unwanted room noise. |
| Dynamic | Loud sources like guitar amps, snare drums, and aggressive vocals. | Very durable, handles high sound pressure levels well, rejects background noise. | Less sensitive and detailed in the high frequencies compared to condensers. |
| Ribbon | Vintage or warm sounds, electric guitar, brass instruments, room ambiance. | Extremely natural, smooth sound with a warm character. | Very fragile, often expensive, lower output signal requires a good preamp. |
Ultimately, a setup with at least one solid condenser and one reliable dynamic mic (like the legendary Shure SM57) will cover 90% of your recording needs in the beginning. If you're also producing video, finding the https://sfxengine.com/blog/best-microphone-for-video-recording means looking at a different set of features, such as directionality and mounting options.
You can't mix what you can't hear accurately. It’s a simple truth. Your favorite consumer speakers or headphones are designed to flatter the music—they often boost the bass and sweeten the treble to make everything sound more impressive.
Studio monitors are engineered to do the exact opposite. They strive for a flat frequency response, which means they don't add their own character to the sound. Their job is to reveal your audio, warts and all, so you can hear problems and fix them.
A few things to remember when choosing and using monitors:
Your Digital Audio Workstation, or DAW, is the absolute heart of your home studio. It’s where every idea gets recorded, every track gets mixed, and every song comes to life. Picking the right one isn't just about features; it's about finding a workflow that clicks with your creative process.
For instance, if you're into live performance or quick beat-making, Ableton Live’s session view is a game-changer. But if you’re on a Mac and want a massive, out-of-the-box sound library, Logic Pro is tough to beat.
The market for this software is huge and only getting bigger. It's expected to hit USD 5.23 billion in 2025 and swell to USD 7.51 billion by 2032, thanks to powerful tools like multi-track editing, AI features, and cloud collaboration. You can dig into more stats about DAW market growth on Coherent Market Insights.
My Two Cents: Don't get caught up in "the best" DAW. The right choice for you will come down to your musical style, your budget, and what computer you’re using. Nail those three, and you'll be far more productive.
Every DAW has its own personality. Some are built for speed, others for massive, complex sessions.
Your operating system is a major deciding factor here. Mac users often gravitate to Logic Pro for its seamless integration, while Windows users might lean toward FL Studio or Pro Tools. If you work across both platforms, Ableton Live is a fantastic cross-platform option that feels consistent everywhere.
Getting your audio interface talking to your DAW is usually a breeze—just plug it in via USB or Thunderbolt. The first thing you'll want to do inside your DAW's settings is find the buffer size. This setting is a constant balancing act between recording latency (the delay you hear) and how hard your computer's CPU has to work.
A lower buffer size like 128 or 256 samples is great for recording vocals or guitar because it minimizes that annoying delay. When you switch to mixing, you can crank it up to 1024 or higher to give your computer more breathing room for all those plugins.
Once you’ve got sound coming through, it’s time to load up the essential tools of the trade: an EQ, a compressor, and a reverb. These are the foundational plugins you'll use on almost every single track to shape your sound.
Here's a pro tip that will save you countless hours: create a project template. Set up a new session with all your go-to tracks—a few for vocals, some for guitars, drum buses, and your favorite reverb and delay sends. Save it as a template, and every time you start a new song, all that boring setup work is already done.
For a much deeper dive into how these platforms stack up against each other, our digital audio workstation comparison guide breaks down the performance and features of each one.
| DAW | Platform | Trial Availability | Price Range |
|---|---|---|---|
| Ableton Live | Mac/Windows | Yes (90-day) | $99–$749 |
| Pro Tools | Mac/Windows | Yes (30-day) | $29.99/mo–$599 |
| Logic Pro | Mac | Included with Mac | $199 |
| FL Studio | Windows/Mac | Yes (limited) | $99–$899 |
Learning a few key commands and optimizing your settings from the start will keep you in a creative headspace instead of fumbling through menus. Don't be afraid to experiment to find what works for you.
And please, back up your work! Set up regular backups to an external drive or cloud service. There is nothing worse than losing hours of creative work to a computer glitch.
Sooner or later, you'll run into a technical snag. If your DAW starts crashing, the first thing to check is your audio drivers—make sure they're up-to-date. If you're hearing clicks and pops, your CPU is probably overloaded. Try increasing your buffer size or "freezing" tracks that are heavy on plugins.
Here are a few other common culprits:
When you're really stuck, the official forums for your DAW are an incredible resource. Chances are, someone else has already solved the exact problem you're facing.
With your DAW now chosen and configured, you're ready to stop tweaking and start creating. In the next section, we’ll get everything fully connected and fine-tune your studio's workflow for maximum efficiency.
You've treated your room, chosen your gear, and installed your software. Now for the part that turns a collection of boxes and wires into a real, working studio: connecting everything. This isn't just about plugging things in; it’s about creating a logical, seamless workflow.
The real goal here is to make the technology fade into the background. When an idea hits, you want to be able to capture it instantly, not spend the next twenty minutes wrestling with cables or troubleshooting a connection. A clean, well-thought-out setup is your best defense against killing creative momentum.
Before you plug in a single cable, you need to understand how your sound is going to travel from the source to your speakers. We call this the signal chain, and it’s the fundamental roadmap of any studio.
Here's the typical journey for a vocal or acoustic instrument recording:
When you play back your recording, the process just happens in reverse. The DAW sends digital audio back to the interface, which converts it back to an analog signal. That signal then goes out through TRS cables to your studio monitors, which turn it back into sound waves you can hear.
Knowing this path inside and out is your secret weapon for troubleshooting. No sound? Just walk the chain step-by-step. Is the mic on? Is the cable plugged in correctly? Is the gain turned up on the interface? You can pinpoint the problem in seconds.
Think of your signal chain like plumbing. A clog or a leak anywhere along the line—a bad cable, a muted track, an incorrect input—stops the flow. A clean, secure signal path is everything.
Let's be honest: a tangled mess of cables behind your desk is more than just ugly. It’s a workflow killer. It makes finding the right connection impossible, introduces potential noise, and is an accident waiting to happen.
Taking a few minutes to organize your cables from the start will save you countless headaches down the road.
It might seem tedious, but this kind of organization is what separates a frustrating space from a functional one.
Your computer is the brain of your entire operation. A few quick optimizations can ensure it runs like a well-oiled machine, preventing those dreaded crashes right after you've recorded the perfect take.
First off, when it's time to record, close everything else. Your web browser, your email, your messaging apps—they all eat up precious CPU and RAM that your DAW needs to perform at its best.
Next, get serious about creating DAW templates. Instead of opening a blank project every time you start a new song, build a starter session that has all your go-to tracks and routing ready. For instance, your template could include:
This one habit can slash your setup time from ten minutes to ten seconds. It’s all about removing the friction between having an idea and getting it down, which is the whole point of learning how to build home recording studio that actually works for you.
Even with the most detailed plan, a few questions always seem to surface when you’re figuring out how to build a home recording studio. It’s easy to get tangled up in the technical weeds, so let’s clear up some of the most common hurdles you're likely to face.
Getting these things straight from the get-go will save you a lot of headaches and keep your project on track.
One of the first things on everyone’s mind is money. "How much is this actually going to cost me?" While there’s no magic number, the real key is budgeting smart. If you want the biggest bang for your buck, put your money into acoustic treatment first. Seriously. A well-treated room with a $300 microphone will sound worlds better than an untreated room with a $1,000 mic. It's not even a close competition.
Let's bust a myth right now: you absolutely do not need expensive, vintage gear to make great-sounding music. That idea is outdated. The quality you can get from modern, entry-level equipment today is astounding—something we could only dream of a decade ago. At the end of the day, your skill behind the controls matters far more than the price tag on the box.
Focus on getting comfortable with a simple, reliable setup. A solid audio interface, a versatile mic or two, and a good pair of headphones are more than enough to produce professional-quality tracks. You can always upgrade piece by piece later, once you figure out what your specific workflow actually needs.
The quality of your music is determined by the person sitting in the chair, not the gear on the desk. A great song recorded on budget equipment will always be better than a bad song recorded in a million-dollar studio.
Another big worry is computing power. "Is my laptop strong enough for this?" For most people starting out, a reasonably modern computer with at least 8GB of RAM and a solid-state drive (SSD) will work just fine. You really only need to think about a high-powered machine once your projects start ballooning with dozens of tracks and layers of processor-hungry plugins. 16GB of RAM is a nice sweet spot if you can swing it.
There's nothing that kills a creative vibe faster than latency—that frustrating delay between performing a note and hearing it back in your headphones. This lag comes from the time your computer needs to process the audio signal.
Fortunately, it’s manageable. Here’s how you can get it under control:
Finally, there’s the classic debate: studio monitors or headphones? While you can definitely get started mixing on a good pair of open-back headphones, monitors give you a more honest representation of your stereo field and low-end. They let you feel the bass in a way headphones simply can't, which helps you make mixing decisions that will translate well to other sound systems, from car stereos to earbuds.
When your studio is ready, bring your projects to life with the perfect sound effects from SFX Engine. Our AI-powered tool lets you generate custom, royalty-free audio for any project, from films and games to podcasts. Get started for free and create the exact sounds you need.