October 10, 2025 · Kuba Rogut

If you're looking for the quickest way to cut down on background noise, it comes down to three things: lower your mic gain, move closer to the mic, and use a noise gate or AI noise reduction software.
Making these simple tweaks dramatically improves your signal-to-noise ratio, which is just a technical way of saying it makes your voice the star of the show, not the distracting sounds around you.
We’ve all been there. You're on an important call, recording a podcast, or streaming to an audience, and the audio is ruined by a humming fan, clacky keyboard, or that weird echo you never noticed before. It sounds unprofessional, and frankly, it's just plain distracting.
Figuring out how to reduce background noise from your microphone is a game-changer for anyone who communicates online.
The good news? You don't need to build a professional sound booth to get crisp, clean audio. Most common noise problems can be fixed by tweaking your setup, your room, and your software. It all boils down to maximizing the sound you want (your voice) and minimizing the sounds you don't.
Before we get into the nitty-gritty, let's tackle the easy wins. These are the small adjustments that deliver the biggest, most immediate improvements.
For instance, try moving the microphone closer to your mouth. I’m talking about a hand's-width away, maybe 4-6 inches. This simple action forces you to turn down the mic's sensitivity (often called gain). Right away, your voice becomes the main thing the mic hears, and all those other noises—the PC fan, the dog barking down the hall—just fade away.
This infographic breaks down the most effective fixes you can try in the next five minutes.
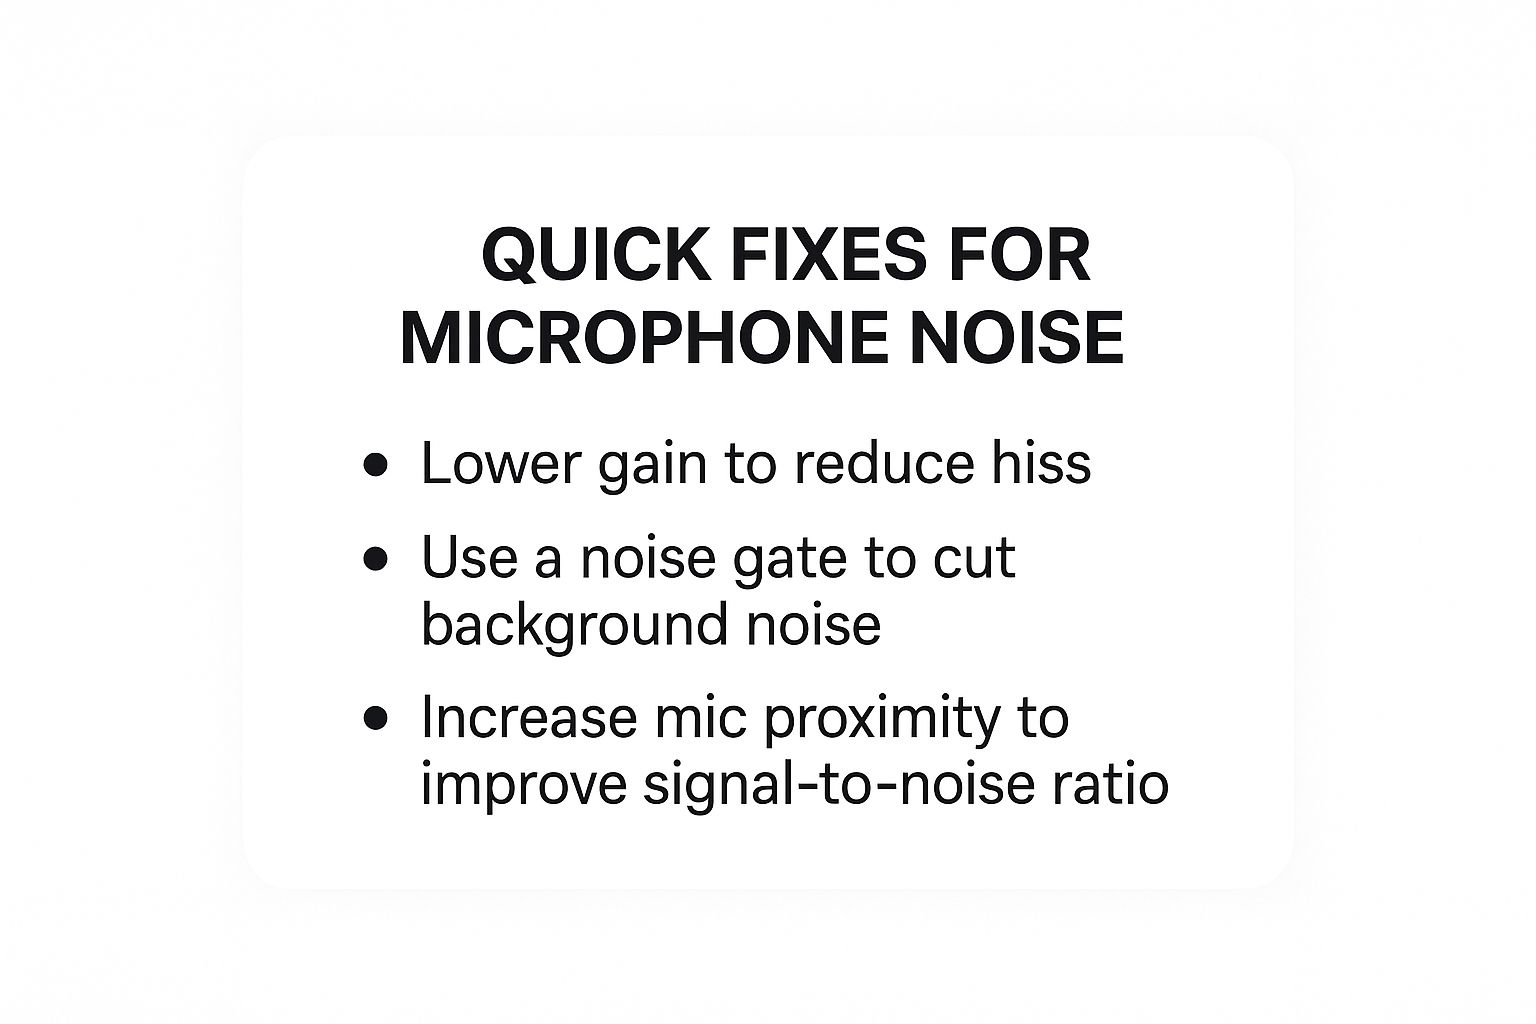
As you can see, blending a physical change like mic placement with a smart software tool like a noise gate gives you a powerful one-two punch against unwanted sound.
In my experience, these foundational techniques alone can solve 80% of the audio issues people face, from annoying hiss to that low, constant room hum. Get these right, and you’re already miles ahead of the game.
To give you a clearer picture, I've put together a quick summary of the different strategies we'll be covering.
| Approach | Key Actions | Expected Outcome |
|---|---|---|
| Hardware | Lowering mic gain, using a pop filter, choosing the right mic type. | Your voice is captured cleanly at the source, minimizing the initial noise pickup. |
| Environment | Adding soft surfaces, closing doors/windows, turning off noisy devices. | The room itself becomes quieter, reducing ambient noise and echo. |
| Software | Applying a noise gate, using suppression plugins, or AI noise cancellation. | Unwanted sounds are digitally filtered out in real-time or during editing. |
This table serves as a road map for what’s to come. By combining tactics from each category, you can create a layered defense that leaves you with nothing but crystal-clear audio.
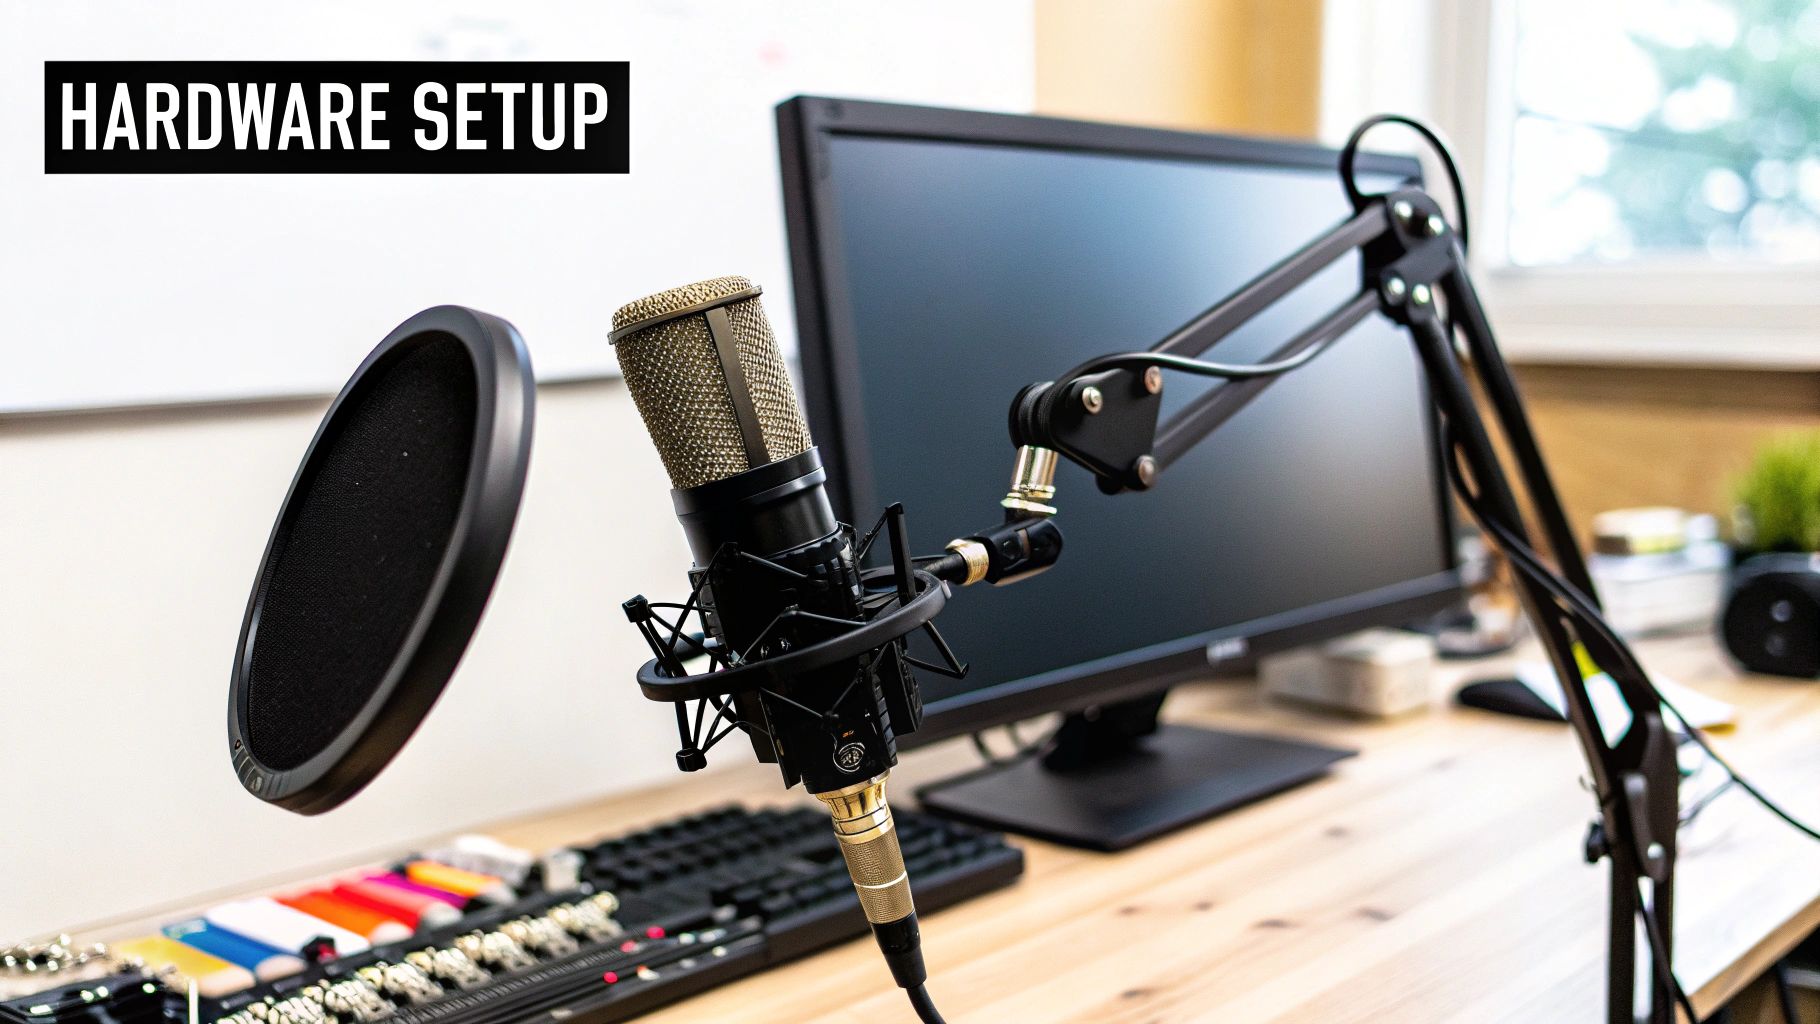
Before you ever open a single software setting, your first and best line of defense against noise is your physical setup. Get this part right, and you’ll capture clean audio from the source, saving yourself a world of pain in post-production.
The microphone itself is the heart of your setup. The kind of mic you're using can either be your biggest ally or your worst enemy, and it all depends on the room you're in.
The two workhorses of the audio world are condenser and dynamic mics, and they couldn't be more different in how they "hear" the world.
Honestly, just switching from a condenser to a dynamic mic can solve a huge chunk of background noise problems instantly. The demand for this kind of clarity is exploding; the global market for noise suppression microphones hit USD 2.5 billion in 2023 and is expected to more than double by 2032. It's a clear sign that everyone from gamers to remote workers is tired of fighting with background noise.
Pro Tip: Most dynamic mics have a cardioid pickup pattern, meaning they hear best from the front. A simple trick I use is to angle the mic slightly away from my keyboard. This tiny adjustment can make typing sounds almost completely disappear from the recording.
Your microphone is just one piece of the puzzle. A few inexpensive accessories can make a night-and-day difference in your audio quality. These aren't just for professionals; they're non-negotiable for anyone serious about clean sound.
First up is a pop filter. This is the mesh screen that sits between your mouth and the mic. Its job is to break up the harsh puffs of air from "p" and "b" sounds, which can create a distorted, thumping sound called a plosive.
Next is a shock mount. This is a cradle that suspends your microphone using elastic bands, isolating it from the mic stand. Without one, any little bump to your desk or heavy-handed typing can travel right up the stand and into your recording as a low, rumbling noise. You can dive deeper into mic setups in our guide to finding the best microphone for video recording.
Finally, get a boom arm. This is a game-changer. It lets you position the microphone perfectly—about 4-6 inches from your mouth—while getting it completely off your desk. This not only improves the richness of your voice but also provides another layer of isolation from desk vibrations.
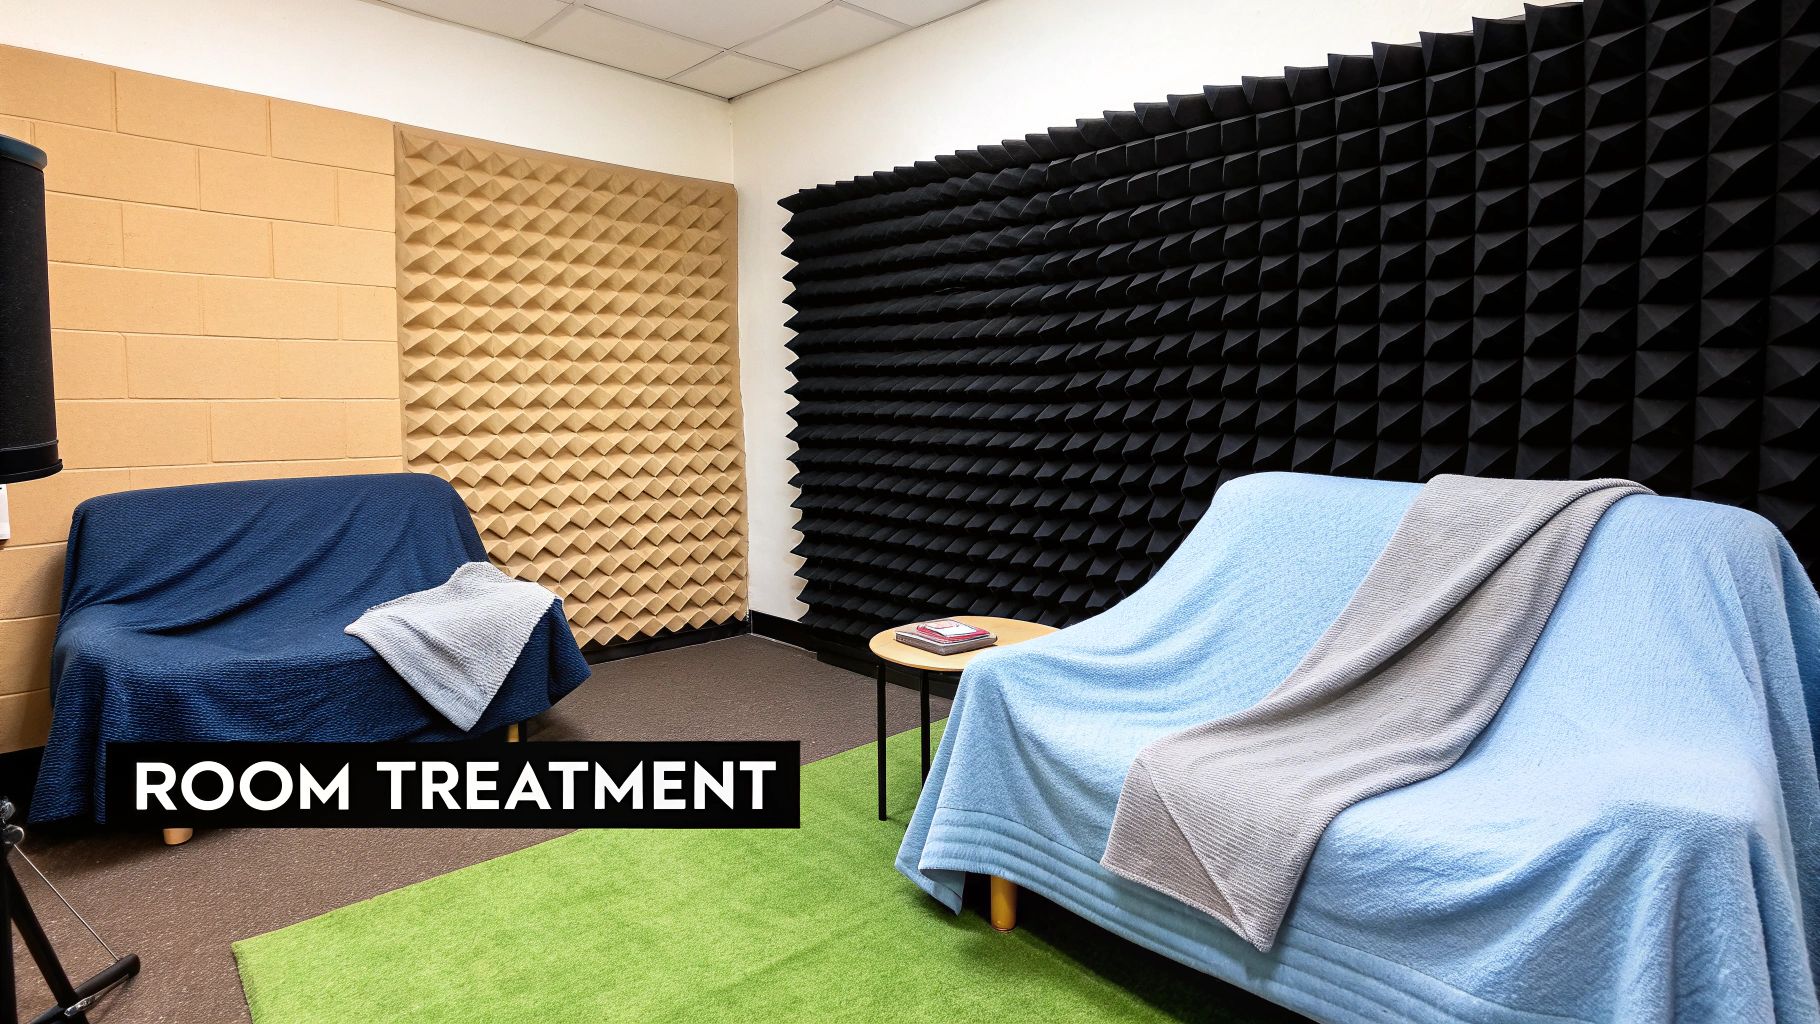
Even the world's best microphone won't save you if your recording space is working against you. The real culprit behind most amateur-sounding audio isn't the gear—it's the room itself. Hard surfaces are the natural enemy of clean recordings. Think hardwood floors, bare walls, and big windows; they're essentially sound mirrors, bouncing your voice all over the place and creating distracting echo and reverb.
But you don't need to build a professional studio to solve this. The key is absorption. Look around your room for anything soft. Heavy curtains, plush rugs, pillows, and even a packed bookshelf can work wonders by soaking up sound waves instead of reflecting them. When I was starting out, I literally hung two thick moving blankets on the wall behind my desk. The difference it made was instant and massive.
Your room is almost certainly louder than you realize. Our brains are fantastic at tuning out constant, low-level sounds, but a sensitive condenser microphone misses nothing. That persistent ambient noise creates a "noise floor" that can manifest as an annoying hiss or hum in your final recording.
The first step is a simple "noise audit." Just sit in your recording chair, close your eyes, and listen for a full minute. You’ll be surprised at what you notice.
Dealing with noise from outside your room is another battle. For more serious sound insulation, you might even consider things like soundproofing solutions with aluminium and UPVC windows to block street noise effectively.
Your microphone doesn't just hear your voice; it hears the entire room. Treating your space is often more impactful than buying a more expensive microphone.
After silencing the obvious noise sources, you can get more intentional with your room setup. This is where basic acoustic treatment comes into play, with the goal of creating an acoustically "dead" space where your voice is the star of the show.
This doesn't have to be expensive or complicated. You can get a great primer on the fundamentals in our guide on https://sfxengine.com/blog/acoustic-treatment-for-home-studios.
Even simple DIY fixes can be game-changers. For instance, arranging furniture to break up long, flat walls helps disrupt sound waves before they can bounce around. A thick area rug does a fantastic job of killing reflections from the floor.
The demand for clearer audio is only growing, with the microphone market projected to hit USD 9.99 billion by 2030. A lot of that growth is driven by the need for better noise reduction in everything from podcasts to smart home devices. Small tweaks to your environment are the single biggest improvement you can make in your own quest to reduce microphone background noise.
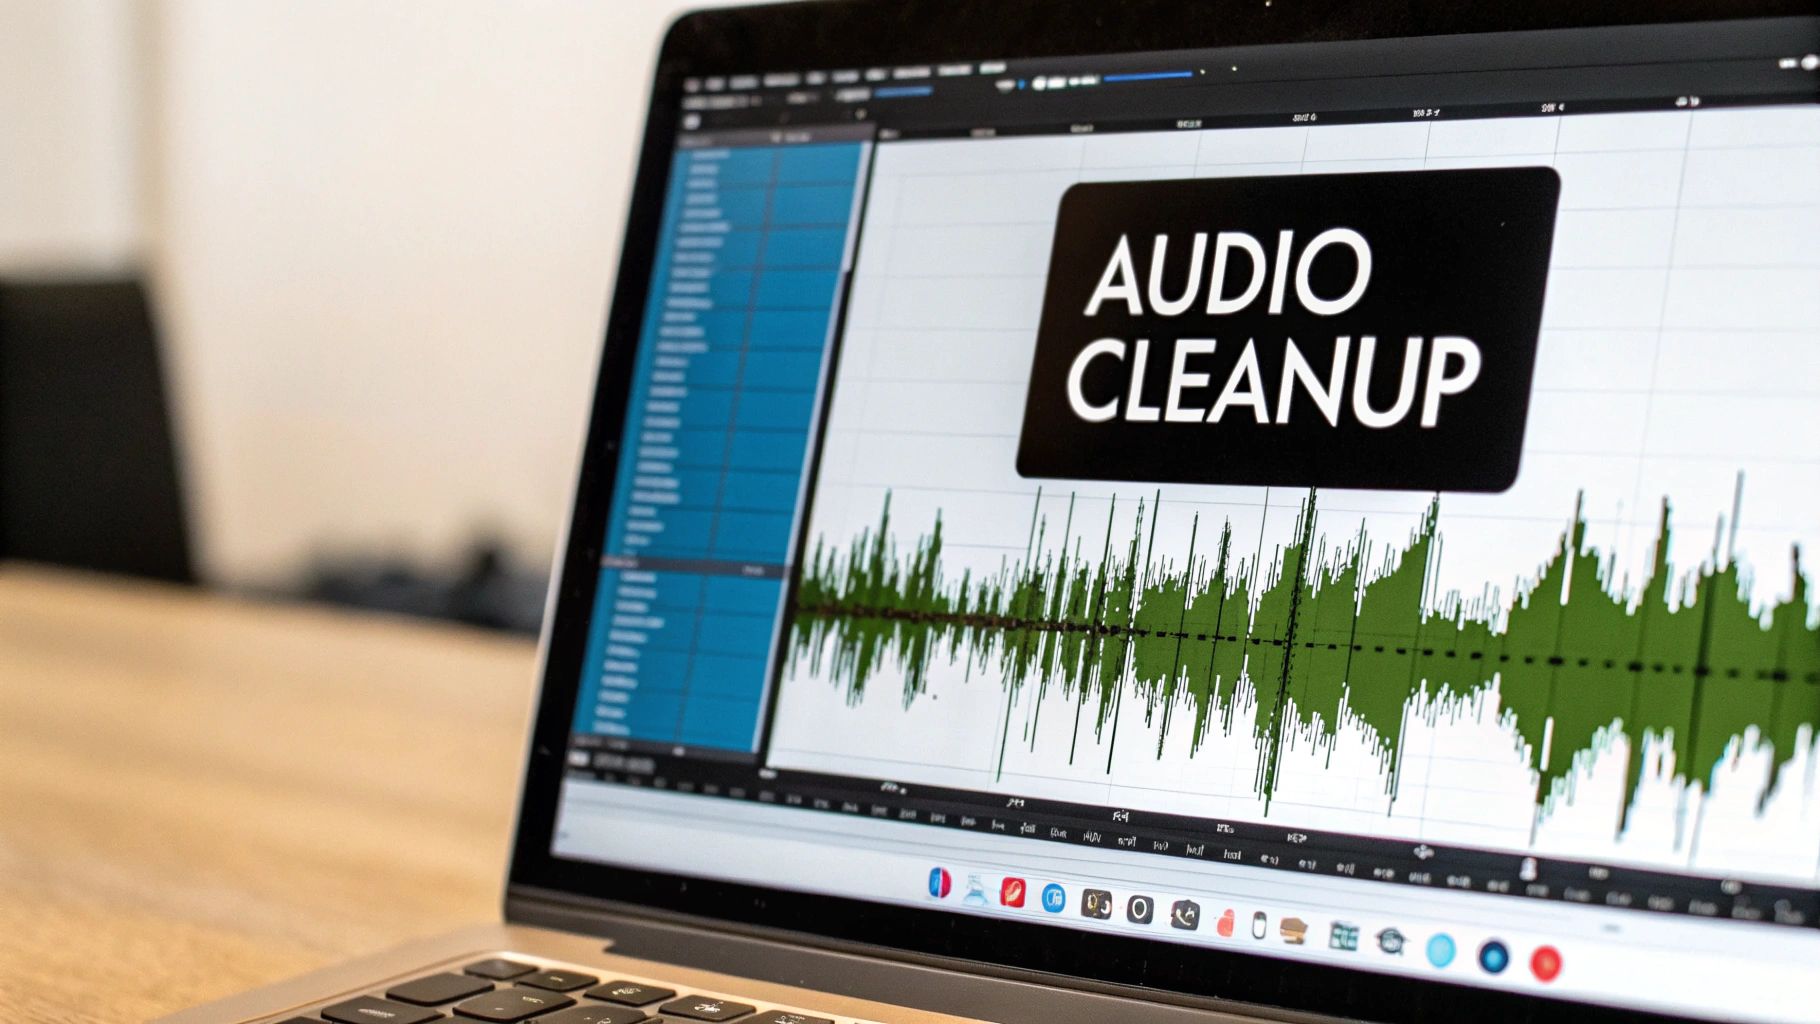
So, you’ve done everything right. Your hardware is dialed in, your recording space is as quiet as a library, but you still hear that faint hiss or low-frequency hum. It's frustrating, I know. But this is where software becomes your secret weapon. Think of it as the final polish that physical tweaks just can't achieve.
Believe it or not, you might already have some powerful noise-fighting tools at your fingertips. Live streaming software like OBS, for example, comes with built-in noise filters that can make an immediate and noticeable difference. It's always worth checking what you already have before buying something new.
Most digital audio workstations (DAWs) and editors include some form of a standard noise reduction effect. The core idea behind these tools is pretty clever: you teach the software what the "bad" sound is, and it subtracts it from your recording.
This usually breaks down into a two-part process:
A great example of this is the classic "Noise Reduction" effect in Audacity. It’s been a lifesaver for podcasters on a budget for years. But there's a catch: it's easy to overdo it. Pushing the reduction too hard can leave your voice sounding thin, robotic, or like you're talking from the bottom of a well. If you're curious about more advanced options, check out our guide on the best audio editing software currently on the market.
When you're using a traditional noise reduction tool, less is almost always more. I always recommend starting with a gentle setting. A 12 dB reduction with a sensitivity around 6.0 is a solid baseline. It's far better to leave a little bit of noise and sound natural than to crank it up and sound like a robot.
Now, let's talk about the real game-changer: artificial intelligence. The latest AI-powered plugins are a world away from the simple noise profiling I just described. They’re smart enough to distinguish a human voice from virtually any other sound in real time. We're talking about unpredictable noises like a dog barking, a baby crying, or the furious clatter of a mechanical keyboard.
This tech is evolving at a breakneck speed. The market for noise suppression components is expected to explode from USD 25.03 billion in 2024 to an estimated USD 86.33 billion by 2034. That growth is almost entirely fueled by AI's uncanny ability to perform adaptive, intelligent noise cancellation.
So, what makes AI tools so special?
Tools like NVIDIA Broadcast or dedicated plugins from companies like iZotope can work wonders. They can make it sound like you're recording in a treated studio, even if you’re actually in a noisy downtown apartment. Thanks to AI, truly professional-sounding audio is more accessible than it has ever been.
Theory is great, but putting these ideas into practice is what really makes the difference. Let's look at how real people build solid workflows to get clean audio, even when their recording space is less than ideal. These aren't just clever hacks; they're consistent habits that deliver professional results time and again.
Take a podcaster I know who lives in a busy downtown apartment. She was constantly fighting street noise, sirens, and the sounds coming through her thin walls. Instead of throwing in the towel, she built a rock-solid recording routine.
First, she only records late at night when the city quiets down. Before hitting record, she runs through a mandatory five-minute "noise audit"—unplugging the fridge, shutting off the A/C, drawing heavy blackout curtains, and hanging a "Recording in Progress" sign on her door. It's a simple checklist, but it guarantees she's starting from the quietest possible baseline.
What about a remote worker taking critical client calls from their living room? They can't exactly ask their roommate to stop moving or turn off the TV next door. Their solution is a smart mix of hardware and software built for serious noise isolation.
They ditched their sensitive condenser mic for a dynamic microphone, which is much better at rejecting sound that isn't coming from directly in front of it. That one change immediately cut down on a huge amount of ambient chatter.
Even better, they run an AI noise suppression tool like Krisp or NVIDIA Broadcast in the background during every call. This software is incredibly good at identifying and filtering out sudden, unwanted sounds in real-time—like a door slamming or a distant conversation—making it seem like they're in a private, sound-treated office.
The most effective approach isn't just about owning the right gear; it's about building a consistent, pre-flight checklist for your audio. A disciplined routine will beat expensive equipment every single time.
No matter your setup, a consistent soundcheck is the one habit you absolutely cannot skip. It's the single best thing you can do to guarantee clean audio every single time. The key is to make it simple and quick, so you actually do it.
This quick three-step process helps you catch problems before they have a chance to ruin your audio. By combining a little environmental awareness with the right tools, you can create a reliable system that delivers crisp, professional sound, no matter where you are. Your audience will thank you for it.
So, you've done everything right with your setup, but there's still a persistent hiss, hum, or buzz that just won't quit. Don't throw in the towel just yet. This is where we get to do a little audio detective work.
The golden rule here is to isolate the problem. You have to think like a scientist and change only one variable at a time. If you think a cable is bad, don't swap them all at once. Replace one, test it, and listen carefully. If the noise vanishes, you've found your culprit. Simple as that.
Different noises are like fingerprints—they often point to specific problems. A low, constant hum probably isn't coming from the same place as a high-pitched whine.
One of the most common issues I run into is a ground loop hum. It’s a distinct 60 Hz buzz that happens when you have multiple pieces of gear plugged into different electrical outlets. The easiest fix is to plug all your audio equipment—interface, computer, and speakers—into a single, high-quality power strip.
When the source of the noise isn't immediately obvious, it's time for a more methodical approach. Always start with the simplest potential fixes and work your way up.
Start by unplugging everything from your audio interface except for your headphones. Is the noise gone? If so, you know the interface itself isn't the problem. Now, plug in only the microphone and its cable. If that annoying hum suddenly returns, the issue is almost certainly the mic or the cable connecting it.
By adding each piece of equipment back into the signal chain one by one, you can systematically pinpoint exactly where the interference is coming from. This process might feel a bit tedious, but it saves a ton of time and frustration in the long run, letting you solve even the most elusive audio gremlins and get back to recording clean, professional sound.
Even after you've tweaked your setup, a few specific questions always seem to come up. I get these all the time. Here are some straightforward answers to the most common snags people hit when trying to kill background noise.
Honestly, no. In fact, sometimes an expensive mic can make things worse.
That high-end studio condenser mic? It's built to be incredibly sensitive and capture every nuance in a sound-treated vocal booth. In your home office with the air conditioner running, it'll pick up everything. A much more affordable dynamic microphone, like the Audio-Technica ATR2100x, is often the hero here. It's designed to reject sounds that aren't right in front of it, making it a smarter pick for less-than-perfect spaces.
The microphone's type (dynamic vs. condenser) and its polar pattern (cardioid, supercardioid) are far more important for noise rejection than the price tag. Your goal should be to match the gear to your room, not just buy the most expensive thing on the shelf.
We've all been there: the dog starts barking, a siren wails past your window, or you drop a pen on the desk. For those sudden, unexpected sounds, software is your best friend.
Modern AI noise suppression tools are shockingly good at catching these one-off sounds in real-time and erasing them on the fly without mangling your voice.
If you're editing a recording later, you can try to zoom in on the waveform and manually cut out the offending spike, but that gets old fast. If you can, the simplest solution is often the best: just pause, wait for the noise to pass, and re-record that sentence.
If you're just starting out and want the biggest bang for your buck, look no further than the noise gate. Think of it as an automatic mute button for your mic. It only lets sound through when you're actively speaking.
A properly set noise gate will instantly silence all that low-level hum from your computer fan or the slight echo in the room during your pauses. The trick is to set the threshold just high enough to block the ambient noise, but low enough that it doesn't clip off the beginning of your words. It's a foundational technique for anyone learning how to reduce background noise from a microphone.
Ready to create custom, professional-grade sound without the noise? SFX Engine offers a free AI sound effect generator perfect for any project. Craft the perfect audio for your videos, games, or podcasts with just a text prompt. Get started for free at SFX Engine.