August 8, 2025 · Kuba Rogut
When you're trying to edit audio and all you can hear is that frustrating hiss, hum, or distant chatter, it can feel like your recording is ruined. But don't scrap it just yet. The quickest way to rescue your sound is often by using the Noise Reduction effect, which you can find in fantastic free editors like Audacity.
The whole process hinges on a clever trick: you isolate a short sample of just the background noise, creating what’s called a noise profile. Then, you tell the software to find and subtract that specific sound from your entire recording. It's like giving it a sonic fingerprint of what to remove.

Nothing tanks a great recording faster than distracting background noise. If you're a podcaster fighting with an air conditioner hum, a video creator whose mic picked up street traffic, or just someone trying to clean up an important voice memo, this is a fundamental skill you'll use constantly.
The core idea behind most noise reduction is surprisingly simple. You're essentially teaching your software what the unwanted sound "looks" like on a waveform. This allows it to remove that noise while leaving the good stuff—like your voice—intact.
This is exactly why getting a clean noise profile is so critical. I always make it a habit to record just a few seconds of pure room tone before I start speaking. That little bit of silence gives my editing software a perfect sample of the noise I want to get rid of later.
Before you start clicking on effects, take a moment to listen closely. Not all noise is the same. The low-frequency drone from a refrigerator needs a completely different fix than the high-frequency hiss from a cheap microphone preamp.
Taking a second to diagnose the problem up front can save you a ton of headaches. Figure out what you're dealing with first, and you'll be on the fast track to a clean, professional-sounding recording.
The battle for cleaner audio has been going on for a long time. The famous Dolby noise reduction system, invented way back in 1966, was born from the effort to quiet tape hiss. That early tech, which could slash noise by up to 10 dB, really set the stage for the powerful digital tools we have today. You can find some fascinating reads on the history and core concepts of noise reduction technology if you're curious.
To help you get started, I've put together a quick reference table. It's designed to help you pinpoint what kind of noise you're hearing and point you toward the best first step to take.
This table is your go-to guide for making that initial diagnosis and choosing the right tool for the job.
| Noise Type | Description | Best First Approach |
|---|---|---|
| Broadband Hiss | A consistent, static-like sound ("ssssshhh") often from microphone preamps, cables, or tape. | Use Audacity's Noise Reduction effect with a clear noise profile. This is its bread and butter. |
| Tonal Hum | A steady, low-frequency buzz (like 50/60 Hz), usually from electrical issues or appliances. | A Notch Filter or surgical EQ is often more precise than standard noise reduction for this. |
| Intermittent Clicks | Sporadic pops, clicks, or crackles from digital errors, vinyl, or mouth sounds. | Manual editing (zooming in and silencing the click) or a dedicated "De-Clicker" plugin works best. |
| Ambient Chatter | Inconsistent, complex sounds like background conversations or distant traffic. | AI-powered tools are a game-changer here, as they can separate a primary voice from chaotic noise. |
Think of this as your starting point. Sometimes these simple fixes are all you'll need, while other times they're the first step before moving on to more advanced techniques.
Before you jump in and start applying filters, you've got to play detective. The very first step—and honestly, the most important one—is to listen carefully and figure out exactly what kind of noise you're up against.
Throwing a generic "noise reduction" filter at your audio is a recipe for disaster. Different problems demand different solutions, and using the wrong tool can leave your audio sounding muffled, watery, and even worse than when you started. You wouldn't use a sledgehammer to fix a watch, right? Same principle. The technique for killing a persistent electrical hum is worlds apart from how you'd deal with a dog barking in the next room.
Mastering audio cleanup starts with your ears. Learning to recognize the sonic signature of each type of noise is the single most valuable skill you can develop.
The most common gremlins in audio are the ones that hang around. These are the steady, droning sounds that create a constant layer of gunk beneath your actual recording. They usually fall into two buckets.
Broadband Noise: Think of the classic "hiss" or "static" from a cheap microphone or an amp turned up too high. It’s that "ssssshhh" sound that's spread across the entire frequency spectrum. This is often caused by a noisy mic preamp, a cheap audio interface, or just the ambient sound of an empty, untreated room.
Tonal Noise: This is that maddening hum or whine that sticks to a specific pitch. The most infamous villain here is the 50/60 Hz electrical hum from bad grounding or nearby power lines. You’ll also hear it from air conditioners, computer fans, and refrigerator motors. Because these noises have a distinct musical note, our ears find them incredibly distracting.
I once spent hours trying to track down a bizarre, high-pitched whine in a podcast interview. It was driving me crazy. I finally opened it in a spectral editor and saw this sharp, unwavering line way up at 15,000 Hz. The culprit? An old CRT monitor the guest still had running in their office, emitting a sound most adults can't even hear anymore.
Then you have the jump scares of the audio world. These are the unpredictable sounds that pop up out of nowhere and ruin an otherwise perfect take. These are often the most frustrating to deal with because a standard noise reduction plugin, which is great for steady hiss, will completely ignore them.
We call these intermittent noises, and they include things like:
You can't fix these one-off events with a broad, set-it-and-forget-it filter. They demand a much more surgical approach. Often, this means getting your hands dirty by manually editing the waveform or using a spectral repair tool to visually "paint" the sound out of the recording.
By first identifying whether your noise is steady and constant or sudden and intermittent, you’ll immediately know which tool to reach for.
You don't need a massive budget or a pro studio to get surprisingly clean audio. In fact, one of the most powerful and reliable tools for this job is completely free. I'm talking about Audacity, the workhorse Digital Audio Workstation (DAW) that has been a go-to for creators on a budget for years.
The magic of Audacity's noise reduction is a simple, yet brilliant, two-step process. First, you have to "teach" the software what the unwanted background noise sounds like. Then, you command it to subtract that specific sound from your entire recording.
This visual guide gives you a quick overview of the whole workflow.
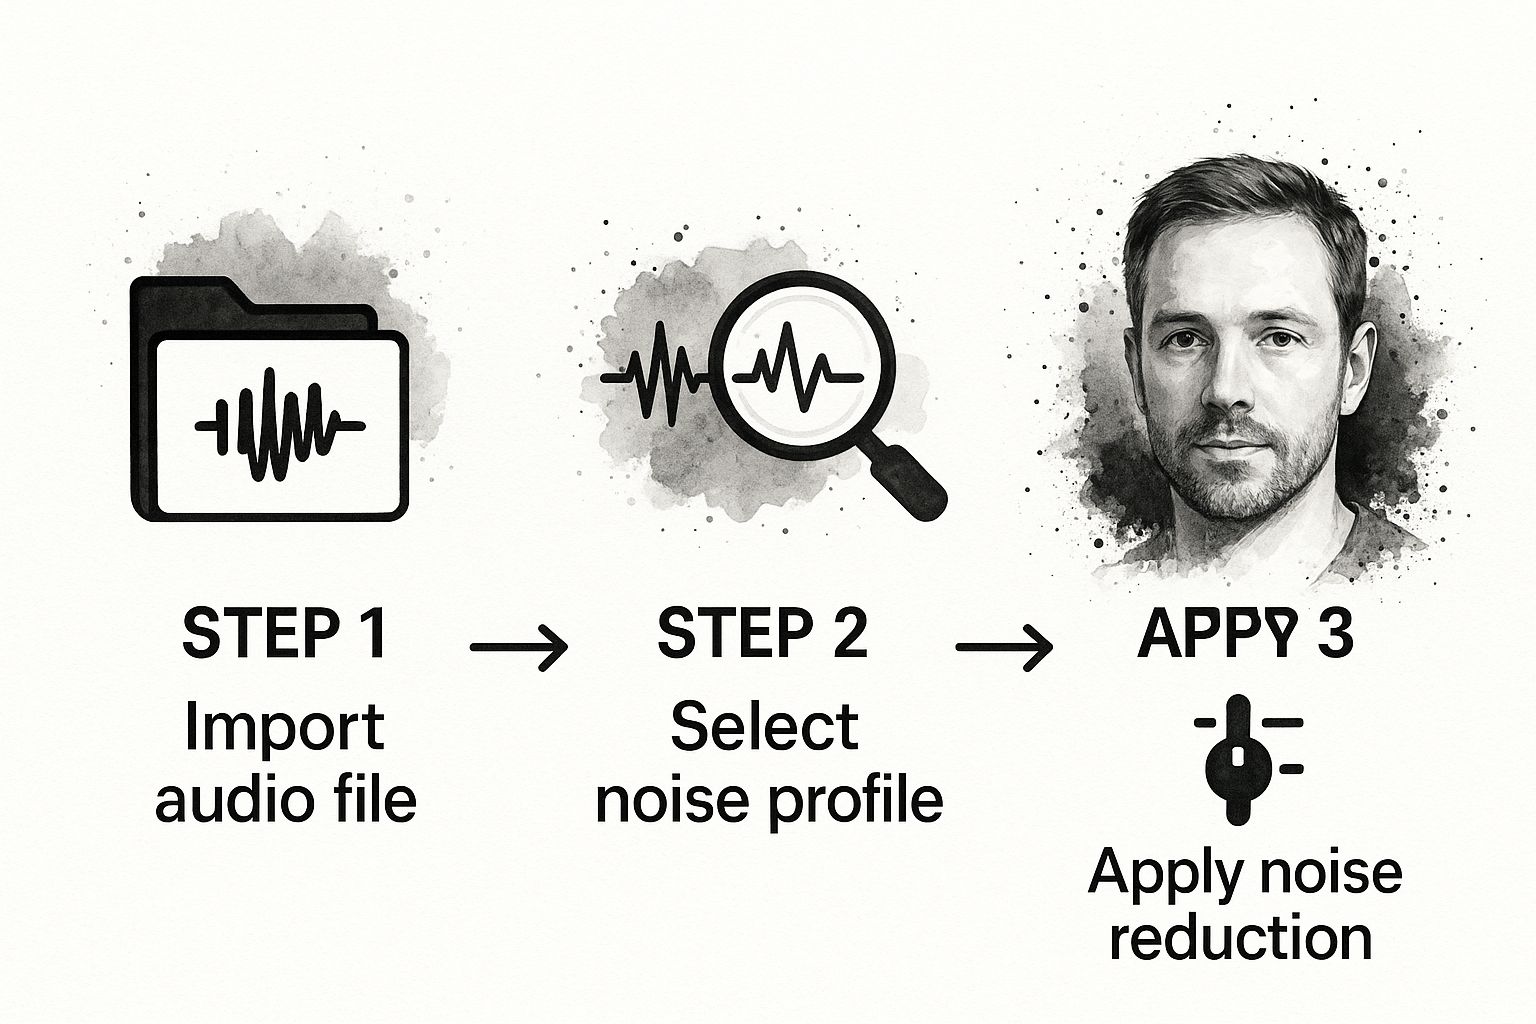
As you can see, it's a logical flow: get your audio in, pinpoint the problem noise, and then apply the fix.
Honestly, this is the most critical part of the whole process. To get good results, you need to give Audacity a pure, clean sample of just the noise. This is what we call a noise profile.
Here’s a pro tip I always share: before you start speaking, just hit record and capture five to ten seconds of "room tone." That’s the sound of your empty room. It might sound like silence to your ears, but your microphone is picking up the subtle computer fan hum, air conditioner hiss, and other ambient sounds you’re trying to kill.
To create your noise profile, just click and drag with your mouse to highlight a few seconds of that recorded room tone. With that section selected, head up to Effect > Noise Removal and Repair > Noise Reduction. A box will pop up—just click the button labeled "Get Noise Profile." That’s it. Audacity now knows the sonic "fingerprint" of the sound you want to remove.
Once Audacity has learned what the noise is, you can apply the fix to your main recording. The easiest way to do this is to select your entire audio track by pressing Ctrl+A (or Cmd+A on a Mac).
Now, head back to the same place: Effect > Noise Removal and Repair > Noise Reduction. This time, you’ll be working with the settings in the bottom half of the dialogue box. There are three main sliders to pay attention to:
The key to getting this right is to use the "Preview" button liberally. Listen to a short clip before you click "OK" and commit to the change.
Always, and I mean always, err on the side of caution. If you get too aggressive with these settings, you’ll end up with a robotic, "underwater" vocal that sounds way worse than the original background hiss. It's much better to leave a tiny bit of noise in the track than to destroy the quality of the voice you’re trying to feature.
While Audacity is a fantastic free starting point, podcasters who do this kind of editing constantly might want to explore the best podcast editing software for more advanced, one-click solutions. But for getting started, you can't beat what Audacity offers for free.

Manual noise reduction, like the techniques we covered in Audacity, works wonders when you have a steady, consistent background hum. But what about the real world? It's rarely that simple. If you're recording on the street with unpredictable traffic, in a café with random chatter, or outside on a windy day, a static noise profile just won’t cut it.
This is where artificial intelligence completely changes the equation. AI tools don't just subtract a single sound; they've been trained on thousands of hours of audio to learn the difference between human speech and everything else. This allows them to intelligently identify and remove complex, shifting noises with incredible precision, often with just the click of a button.
Picture this: you've just recorded the perfect interview, but it was in a busy coffee shop. The final audio is a mess of clattering plates, the hiss of the espresso machine, and other people's conversations. Instead of spending hours with complicated tools, an AI can dive into that chaos, surgically remove everything that isn't your subject's voice, and give you a clean, professional-sounding track in seconds.
For anyone who needs clean audio without a steep learning curve, AI-powered services like theclipbot's AI audio cleanup tool are a lifesaver. Platforms like Adobe Podcast and Descript have even baked this kind of tech right into their editing suites, which is a huge win for podcasters and video creators who are always on a tight deadline.
I once had to salvage a key interview that was recorded on a blustery day. The wind was so aggressive that it completely swallowed the speaker's words in several places. I tried everything with traditional EQs and gates, but nothing worked. As a last resort, I ran the file through an AI tool. The result was genuinely stunning—the wind was virtually gone, and the voice was crystal clear. It saved a piece of audio I was sure was destined for the trash bin.
While a lot of these AI tools feel like pure magic, they're not all created equal. They each have their own strengths, weaknesses, and ideal user. Some are simple, one-off web tools, while others are powerful plugins or full-blown editing platforms.
To help you find the right fit for your projects, I've put together a quick comparison of some of the most popular options out there.
This table breaks down the features and pricing of the leading AI-powered noise reduction tools to help you choose the best one for your needs.
| Tool | Best For | Key Features | Pricing Model |
|---|---|---|---|
| Adobe Podcast Enhance | Podcasters and speakers seeking quick, high-quality voice enhancement on a budget. | One-click processing, part of a free suite of web-based tools. | Free (with usage limits) |
| Descript | Video creators and editors who want an all-in-one transcription and audio/video editing platform. | "Studio Sound" feature for AI cleanup, text-based video editing. | Subscription-based with a free tier |
| iZotope RX | Audio professionals needing surgical control over every aspect of sound repair. | A comprehensive suite of advanced modules for de-hum, de-reverb, de-click, and more. | One-time purchase or subscription |
| Riverside.fm | Remote podcasters and interviewers who want to clean audio at the source. | Built-in noise reduction during recording and post-production "Magic Audio". | Subscription-based |
The world of AI audio is moving fast, with new tools and capabilities popping up all the time. If you're curious about what else AI can do, you might get a kick out of our guide on using a https://sfxengine.com/blog/free-ai-audio-generator to create your own custom sound effects.
Ultimately, the best AI tool for you comes down to your specific workflow, your budget, and how much hands-on control you really need. But for any creator who needs to remove background noise quickly without compromising on quality, these smart solutions are a massive step forward.
Sometimes, the simple one-click noise reduction just won't cut it. You run the filter, and suddenly the voice sounds like it's underwater, or you've traded a background hum for a weird digital gurgle. We've all been there.
When you're dealing with truly stubborn audio problems, you have to break out the big guns. These are the more advanced, specialized tools that audio professionals lean on to rescue a recording from the brink. It’s less about a broad, sweeping fix and more about performing audio surgery.
Instead of carpet-bombing your entire track with a single filter, you can learn to target specific problems with precision, leaving the good stuff—the voice you actually want to hear—completely untouched. Moving beyond the automated solutions is where you start getting professional-grade results.
These techniques are a crucial part of any serious audio cleanup job. If you're curious about how this all fits into a larger project, understanding the complete audio post production workflow will give you some great context.
One of the most maddening audio gremlins is a constant, tonal noise. I’m talking about that 60 Hz electrical hum from bad wiring, the high-pitched whine of a server rack, or the low drone from an HVAC system. A standard noise reduction plugin might try to grab it, but it often takes a chunk of the vocal frequencies along for the ride, leaving the dialogue sounding thin and lifeless.
This is a perfect job for a surgical equalizer (EQ). Think of an EQ not as a blunt instrument, but as a set of scalpels. Each one can slice out an incredibly specific frequency.
To kill a hum, you’ll use what’s called a "notch filter"—a very deep and narrow EQ cut. If you've identified an electrical hum at exactly 60 Hz, you can dive in, find that precise frequency, and yank it down without impacting the main body of the human voice. This is how you remove background noise without causing collateral damage.
Here's a pro tip: Always use the narrowest possible Q setting (the filter's width) when notching out a hum. If your cut is too wide, you'll start to carve out adjacent frequencies and make the speaker sound hollow. Precision is everything.
What about that low-level shhhhhhh you hear between words? That constant hiss from a microphone preamp or room tone can make a recording feel cheap and amateurish, even if it's not overpowering. For this, your best friends are a noise gate or an expander.
A noise gate is basically an automatic "mute" switch. You set a volume level (the threshold), and any sound quieter than that—like the hiss in the pauses—gets completely silenced. As soon as the person starts talking, their voice crosses the threshold and the gate swings open instantly.
An expander is just a gentler, more subtle version of a gate. Instead of slamming the door shut on quiet sounds, it just pushes them further into the background. It reduces the volume of the hiss instead of muting it, which can sound much more natural.
Okay, but what about the random, one-off sounds? A coworker's phone notification, a creaky chair, or the classic dog bark. No constant filter can fix those. This is where spectral editing feels like actual magic.
A spectral editor turns your audio into a picture, with frequency on the vertical axis and time on the horizontal. Loud sounds show up as bright blobs. This means you can literally see the problem. That annoying beep becomes a sharp, bright line. A cough might look like a fuzzy yellow splotch.
Using tools inside the spectral editor, you can select just that visual artifact and "paint" it out, using the clean audio around it to fill in the gap. It’s like the clone stamp tool in Photoshop, but for sound. It lets you perform unbelievable sonic repairs, removing isolated noises without anyone ever knowing they were there.
Even with the best tools in your arsenal, you're bound to hit a snag or wonder if you're doing things the right way. Let's tackle some of the most common questions I hear from people trying to clean up their audio. Think of this as a quick-reference guide for those nagging little problems.
Answering these questions is a huge part of mastering how to remove background noise like a pro.
That's the million-dollar question, isn't it? While it's the dream, completely eliminating noise without any side effects is almost impossible, especially if you're dealing with a really messy recording. The real goal is reduction, not total elimination.
Modern AI tools are shockingly good, but if you push them too hard, they can leave behind tell-tale digital artifacts. You've probably heard it before—that thin, "watery," or slightly robotic sound. That's the software accidentally cutting out frequencies from the voice that it mistook for noise. Honestly, it's often better to leave a faint, unnoticeable trace of the original room tone than to crank the filter so high that the dialogue sounds unnatural.
My rule of thumb? Reduce the noise just enough so it's no longer a distraction. Don't chase absolute silence. You'll drive yourself crazy and end up with audio that sounds worse. The integrity of the voice is always priority number one.
It really depends on what kind of noise you're fighting.
For dynamic, unpredictable sounds—think street traffic, coffee shop chatter, or gusty wind—AI tools are almost always the winner. They are incredibly smart at telling the difference between a human voice and chaotic background noise in a way manual tools just can't match.
But for a consistent, steady problem like a 60 Hz electrical hum or a persistent hiss from a cheap preamp, manual methods in a DAW like Audacity can give you pinpoint, surgical control. In fact, most audio engineers I know use a hybrid approach:
An ounce of prevention is worth a pound of cure. This couldn't be more true for audio. A clean recording from the start will save you countless hours of editing frustration and will always sound better than even the most expertly-repaired audio. The best recording needs the least amount of help.
Here are the most effective things you can do before you hit record:
Ready to create sound that truly stands out? SFX Engine has a free AI-powered sound effect generator that lets you design custom, royalty-free audio with simple text prompts. Elevate your projects with unique sounds by visiting https://sfxengine.com today.