January 23, 2026 · Kuba Rogut
Good sound design is more than just adding a background track to your video. It’s about building a whole world with audio, layering different elements—dialogue, music, sound effects—to create something that feels real and immersive. The secret isn't just piling on sounds; it's about giving each element its own space so the final mix is clear, impactful, and doesn't turn into a muddy mess. This is done by carefully managing volume, frequency, and placement for every single layer.
Before you even think about dragging an audio clip onto your timeline, stop and plan. I've seen countless projects get bogged down because there was no strategy. Without a plan, you’re just making noise. Effective audio layering is about telling a story and building a sonic world that lifts your visuals to another level.
The first thing to get straight is the hierarchy of sound. Think of it like a pyramid. Certain sounds are simply more important than others, and your mix needs to reflect that. This structure ensures the most vital audio punches through, while the supporting sounds add depth without ever becoming a distraction.
At the absolute peak of this pyramid is dialogue. It's king. If your audience can't clearly hear and understand what people are saying, nothing else matters. Every other sound you add has to work around the dialogue, never overpowering it.
Right below that, you have your key sound effects (SFX) and Foley. These are the sounds directly connected to what's happening on screen—a car door slamming shut, footsteps crunching on leaves, a coffee cup hitting a saucer. They’re what make the scene feel tangible and grounded in reality.
The foundation of your pyramid is built from ambience and music. Ambient tracks set the scene—the low hum of a city at night, the buzz of fluorescent lights in an office, the sound of wind rustling through trees. Music, on the other hand, drives the emotion. These base layers provide the overall context and feeling for everything that happens on top of them.
This inverted pyramid model really drives the point home: dialogue is paramount, with sound effects and music building out the world around it.
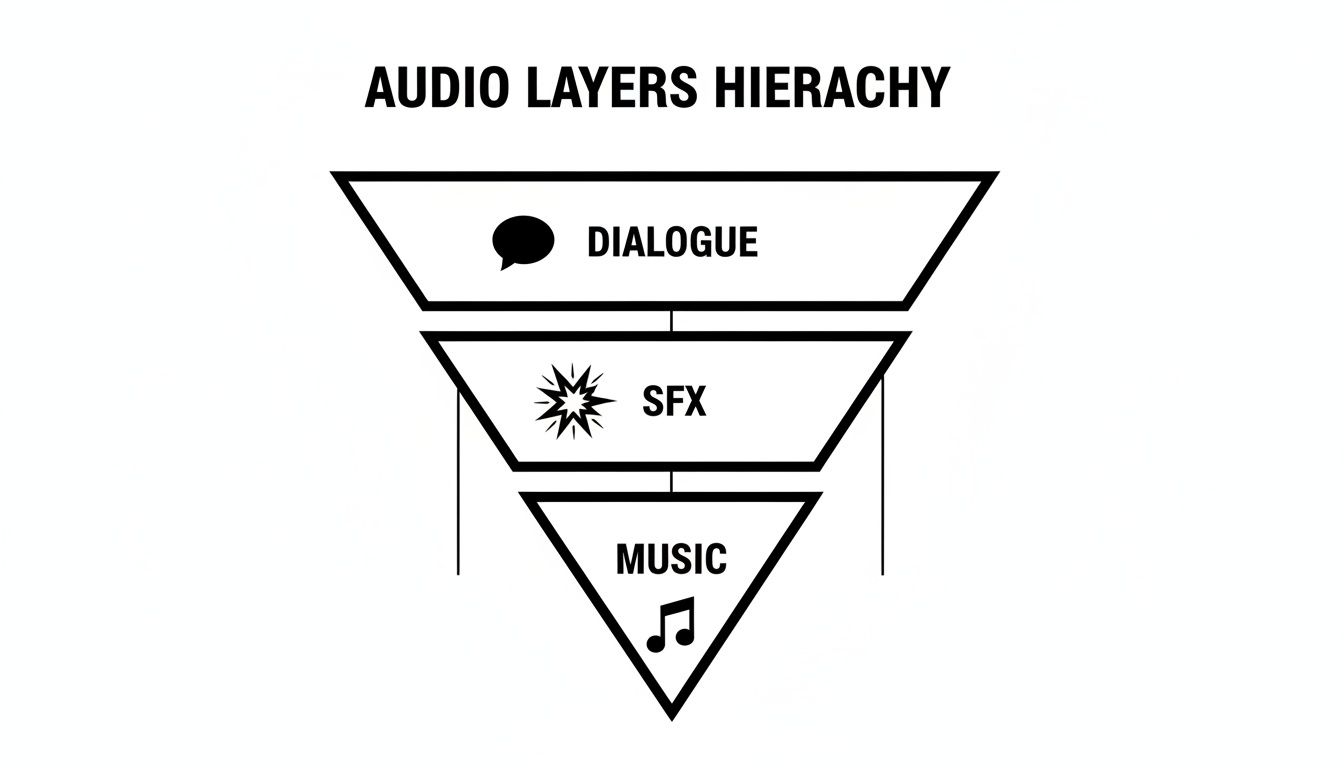
This visual helps reinforce that true clarity starts with prioritizing the human voice. Only then can you begin to weave in the other effects and emotional cues from the score.
To simplify this, here's a quick-reference table breaking down the main audio layers and what they do.
| Audio Layer | Primary Function | Examples |
|---|---|---|
| Dialogue/Narration | Delivers the core narrative and information. | Spoken words, voiceovers, character interactions. |
| Key SFX & Foley | Synchronizes sound with on-screen actions to create realism. | Footsteps, door creaks, punches, object handling. |
| Ambiences | Establishes the environment and setting of the scene. | City traffic, forest sounds, room tone, distant sirens. |
| Music | Drives the emotional tone and pacing of the video. | Underscore, theme music, diegetic (in-scene) music. |
Each of these layers has a distinct job, and when they work together harmoniously, the result is a powerful and believable soundscape.
Think about the emotional beats of your story. Does a scene build from quiet tension to outright chaos? Your sound should follow that same arc. Before you even get to the edit, map out these moments. For example, a suspenseful scene might begin with a subtle, low-frequency drone. As the tension mounts, you could gradually layer in jarring, high-pitched SFX and a swelling musical score.
Taking the time to plan this out will save you an incredible amount of rework later. You’ll be editing with intention instead of just throwing sounds at the wall to see what sticks. This is really a core principle of professional sound design.
Great sound design is invisible. The audience shouldn't notice the individual layers; they should simply feel the result—a believable world that draws them deeper into the story. The goal is immersion, not distraction.
For any project with more than a few audio clips, an organized workflow is absolutely essential. The easiest way to start is by arranging your tracks in your editing software to match the audio hierarchy.
This simple step keeps your timeline from becoming a nightmare to navigate. From there, you can use professional mixing guidelines as a starting point for your levels. As a rule of thumb, dialogue should hover somewhere between -6 dB and -12 dB. Ambient sounds work well much lower, around -12 dB to -24 dB, and music should be ducked even lower whenever someone is speaking. This framework ensures that no single element hogs the spotlight and every sound has its own defined space in the mix.

Once you have a solid audio blueprint, it’s time to start gathering your raw materials. A truly immersive soundscape is built from high-quality ingredients, and thankfully, you have a few different ways to get them. Your sonic palette—the collection of sounds you'll work with—can come from pre-recorded libraries, your own custom recordings, or even AI generation.
Each path has its own pros and cons. Sound libraries are fantastic for speed and variety, but they can sometimes feel a bit generic. Recording your own sounds gives you unmatched realism and specificity, but it takes time, the right gear, and a quiet space. Honestly, the best projects I've worked on use a blend of all three, giving you both efficiency and that custom-tailored authenticity that makes a scene come alive.
Stock sound libraries are a lifesaver, no question. They give you instant access to professionally recorded, hard-to-capture sounds—think explosions, exotic animals, or the engine of a specific muscle car. When you're up against a tight deadline, grabbing a clean, pre-edited sound effect is often the most practical move.
The catch? Leaning too heavily on libraries can leave your project feeling impersonal. It’s those subtle, unique sounds that really ground a scene in reality—the specific scrape of a chair on that particular floor or the distinct rustle of a character's leather jacket. This is where recording your own Foley and ambient sounds becomes your secret weapon.
And you don't need a Hollywood-level studio to do it. A decent microphone and a quiet room are often all you need to get started.
These tiny details add a layer of subconscious believability that stock effects just can't replicate. They directly connect the sound to the on-screen action, making the world feel tangible and lived-in.
There's a new player in the game that's changing how we source audio: AI sound generation. It beautifully bridges the gap between searching for a generic library sound and the time-consuming process of field recording. Instead of scrolling through dozens of files for something that’s "close enough," you can now generate the exact effect you need with a simple text prompt.
This gives you a level of creative control that used to be reserved for dedicated sound designers. You can get incredibly specific, defining not just the sound itself but also its context, texture, and emotional feel. If you're curious about how this works, you can learn more about creating custom sounds from text and see how it can speed up your workflow.
The real magic of AI sound generation is in the details. Instead of searching for "wind," you can create "a cold, howling wind rattling a loose window pane in an old wooden cabin." You get a totally unique asset that perfectly matches the mood of your scene.
Here are a few prompts I might use to generate some unique audio, just to show you how granular you can get:
The best part? These AI-generated sounds are royalty-free, giving you a custom palette without the legal headaches or time sinks of traditional methods. By combining library assets for the big stuff, custom Foley for realism, and AI for those very specific, unique elements, you'll build a powerful and versatile sonic toolkit for any video project you tackle.
This is where the real craft comes into play—and where so many promising projects fall apart. Anyone can stack a bunch of audio tracks. Making them actually sound good together? That’s an art. The goal is always a rich, detailed soundscape, but the all-too-common result is a cluttered, unintelligible mess we call a "muddy mix."
The core problem here is frequency masking. It's a phenomenon where sounds with similar frequencies compete for the same sonic real estate. When they overlap, our ears can't easily distinguish them, and everything just blurs into a single, undefined wall of noise. It's like trying to listen to three people talking over each other at the exact same volume. You can't make out a single word.
To avoid this, every single sound you add needs its own distinct place in the mix. Think of it like a sonic jigsaw puzzle where each piece has a specific shape and a specific spot. We achieve this primarily with two incredibly powerful tools: equalization (EQ) and panning.
Equalization, or EQ, is your scalpel for giving each audio layer its own frequency pocket. It lets you boost or cut specific frequencies in a sound, effectively reshaping it to fit cleanly alongside other elements. But before you even start layering, you have to make sure each track is clean on its own. It's worth learning how to remove background noise from audio so you aren’t introducing mud right from the start.
Once your tracks are clean, you can get surgical. One of the most effective techniques is using a high-pass filter (HPF), which is designed to cut out low-frequency rumble from sounds that simply don't need it.
For instance, a character's voice primarily lives in the mid-range frequencies. If you apply an HPF to their dialogue track and slice off everything below 80-100Hz, you eliminate useless low-end noise without touching the actual clarity of their voice. This simple move instantly creates more room for your music's bassline or a low-frequency ambient drone to sit comfortably without fighting the dialogue.
You can apply this thinking to every single layer:
The golden rule of EQ in audio layering is to cut before you boost. It’s far more effective to remove competing frequencies from one track than it is to boost the desired frequencies in another. This subtractive approach almost always leads to a cleaner, more spacious mix.
As a general rule of thumb, when you find yourself layering more than 3-5 files for a single composite sound, it's time to step back. Critically listen to each layer and see what you can remove. Piling on more sounds often just creates frequency clutter that makes the final effect weaker, not stronger.
After you've created separation with EQ, the next step is to place your sounds in the stereo field using panning. Panning determines if a sound comes from the left, right, or center speaker, which builds a sense of space and direction. A mix where every single sound is panned dead center will feel flat, crowded, and totally lifeless.
Panning is your tool for matching audio to the on-screen action and making the experience more immersive. If a car drives from left to right across the screen, its sound should follow that path. That's an obvious example, but you can apply this logic more subtly to every element in your scene.
Imagine a simple coffee shop scene. Here’s how you might pan it:
| Sound Element | Panning Position | Rationale |
|---|---|---|
| Main Dialogue | Center | Keeps the primary focus clear and anchored for the viewer. |
| Espresso Machine | 40% Right | Places the machine just off-screen to the right, matching a visual cue. |
| Distant Chatter | Panned wide (Left & Right) | Creates the sense of being surrounded by the ambient noise of the room. |
| Door Chime | 80% Left | Signals that a character is entering from the left side of the frame. |
By spreading these sounds across the stereo field, you're giving each one more room to breathe. The mix instantly feels wider, deeper, and far more realistic. This is one of many essential sound design tips for video editors that can seriously elevate your production value.
When you combine deliberate EQ choices with strategic panning, you have the fundamental recipe for stacking audio layers effectively. Your final mix will be powerful and clear, never muddy.
If a mix has static, unchanging volume levels, it feels… well, robotic. The real magic happens when you make your soundscape breathe and react to what’s happening on screen. This is where we move beyond just dropping clips on a timeline and start actively shaping the audio with dynamic processing and automation.
These are the tiny, moment-to-moment adjustments that create a polished, immersive experience. It's the craft that separates a flat, amateur mix from a dynamic, professional one that truly pulls the viewer in.
One of the most fundamental tools in your kit is dynamic range compression. Think of it this way: a compressor makes the quiet parts of an audio clip louder and the loud parts quieter. The result? A much more consistent, even volume level. It’s absolutely essential for taming dialogue, which can swing wildly between a whisper and a shout.
By applying some gentle compression to a voiceover track, you ensure every single word is heard clearly without your audience constantly reaching for the volume knob. It also works like "glue." A touch of compression across your main audio bus can help your dialogue, sound effects, and music all feel like they belong in the same sonic world.
Ever notice in a professional video how the background music seems to magically dip in volume right when someone starts talking? That’s not an editor meticulously drawing in volume changes by hand. That’s a slick technique called sidechain compression, or more commonly, ducking.
This is probably one of the most critical tricks for making sure your dialogue cuts through the mix. You place a compressor on your music track, but here's the clever part: you tell it to listen to the dialogue track instead of the music.
Here’s the basic setup:
So, when the dialogue signal crosses that threshold, it tells the compressor to turn the music down. When the talking ends, the signal drops, and the music swells back up naturally. It’s a clean, automatic way to keep your dialogue right where it needs to be: front and center.
Think of sidechaining as a polite conversation between your audio layers. The music politely "ducks" out of the way to let the dialogue have the floor, then gracefully returns when it's done. This one technique can make a mix sound instantly more polished.
Beyond ducking, your most powerful tool for creating a truly living soundscape is automation. This allows you to "draw" changes to pretty much any parameter over time—volume, panning, effects, you name it. Instead of a sound just sitting there, it can evolve and move throughout a scene.
This is where you get to have some real fun matching the audio to the visuals.
If a car drives across the screen from left to right, its sound should follow it. That’s a no-brainer. You achieve this by drawing a pan automation curve on the car's sound effect. You’d start the pan hard left, smoothly move it through the center as the car passes the middle of the frame, and continue all the way to the right as it drives off-screen.
Automation is also perfect for reflecting a change in environment. Picture a character walking out of a small, cramped hallway and into a massive, echoing cavern. You can automate the reverb on their footsteps. In the hallway, you'd have almost no reverb. Then, as they step into the cavern, you'd draw in a curve to gradually increase the reverb’s size and decay time. The audio now sells that sense of scale perfectly.
It’s these kinds of detailed, automated adjustments that make a soundscape feel truly alive and intentional.
You’ve spent hours layering dialogue, building immersive ambiences, and placing every sound effect perfectly. Now you're at the final hurdle: making sure all that hard work actually translates to the outside world. This last stage is all about preparing your intricate soundscape so it sounds just as powerful on a tiny phone speaker as it does in a home theater.
Think of it this way: a mix destined for YouTube has totally different technical requirements than one headed for broadcast television. Getting this right isn't just a final checkbox; it's what ensures your audience hears your work the way you intended.
Before you even think about exporting, a great habit is to route all of your audio tracks—dialogue, SFX, music, everything—into a single stereo track. We call this a mix bus (or master fader). It’s the main pipeline where all your individual layers come together before they head out the door.
Working on a mix bus lets you apply subtle, final touches to the entire soundscape at once. This is the perfect place to add a gentle EQ to brighten the overall tone or use a light "glue" compressor to help all the separate elements feel like they belong together. It’s a simple move that adds a professional sheen.
One of the most critical tools on your mix bus is a limiter. You can think of it as a hyper-aggressive compressor that acts as a brick wall for your audio levels. Its whole job is to stop any sound from ever going past a specific ceiling—usually set between -0.1dB and -1.0dB. Why? To prevent the nasty digital clipping and distortion that ruins a good mix.
A limiter is your final safety net. It catches those unexpected loud moments, like a sudden gunshot or a sharp cymbal crash, and keeps them from overloading the output. The trick is to be subtle. You want it to just kiss the very loudest peaks without audibly squashing the life out of everything else.
Your limiter is the guardian of your mix's integrity. Set it, and trust it to protect your audio from digital distortion, ensuring a clean and professional sound on any device your audience uses.
In the old days, everyone was in a "loudness war," trying to make their audio louder than the competition. This led to horribly compressed, fatiguing audio that was just plain unpleasant to listen to. Thankfully, things have changed.
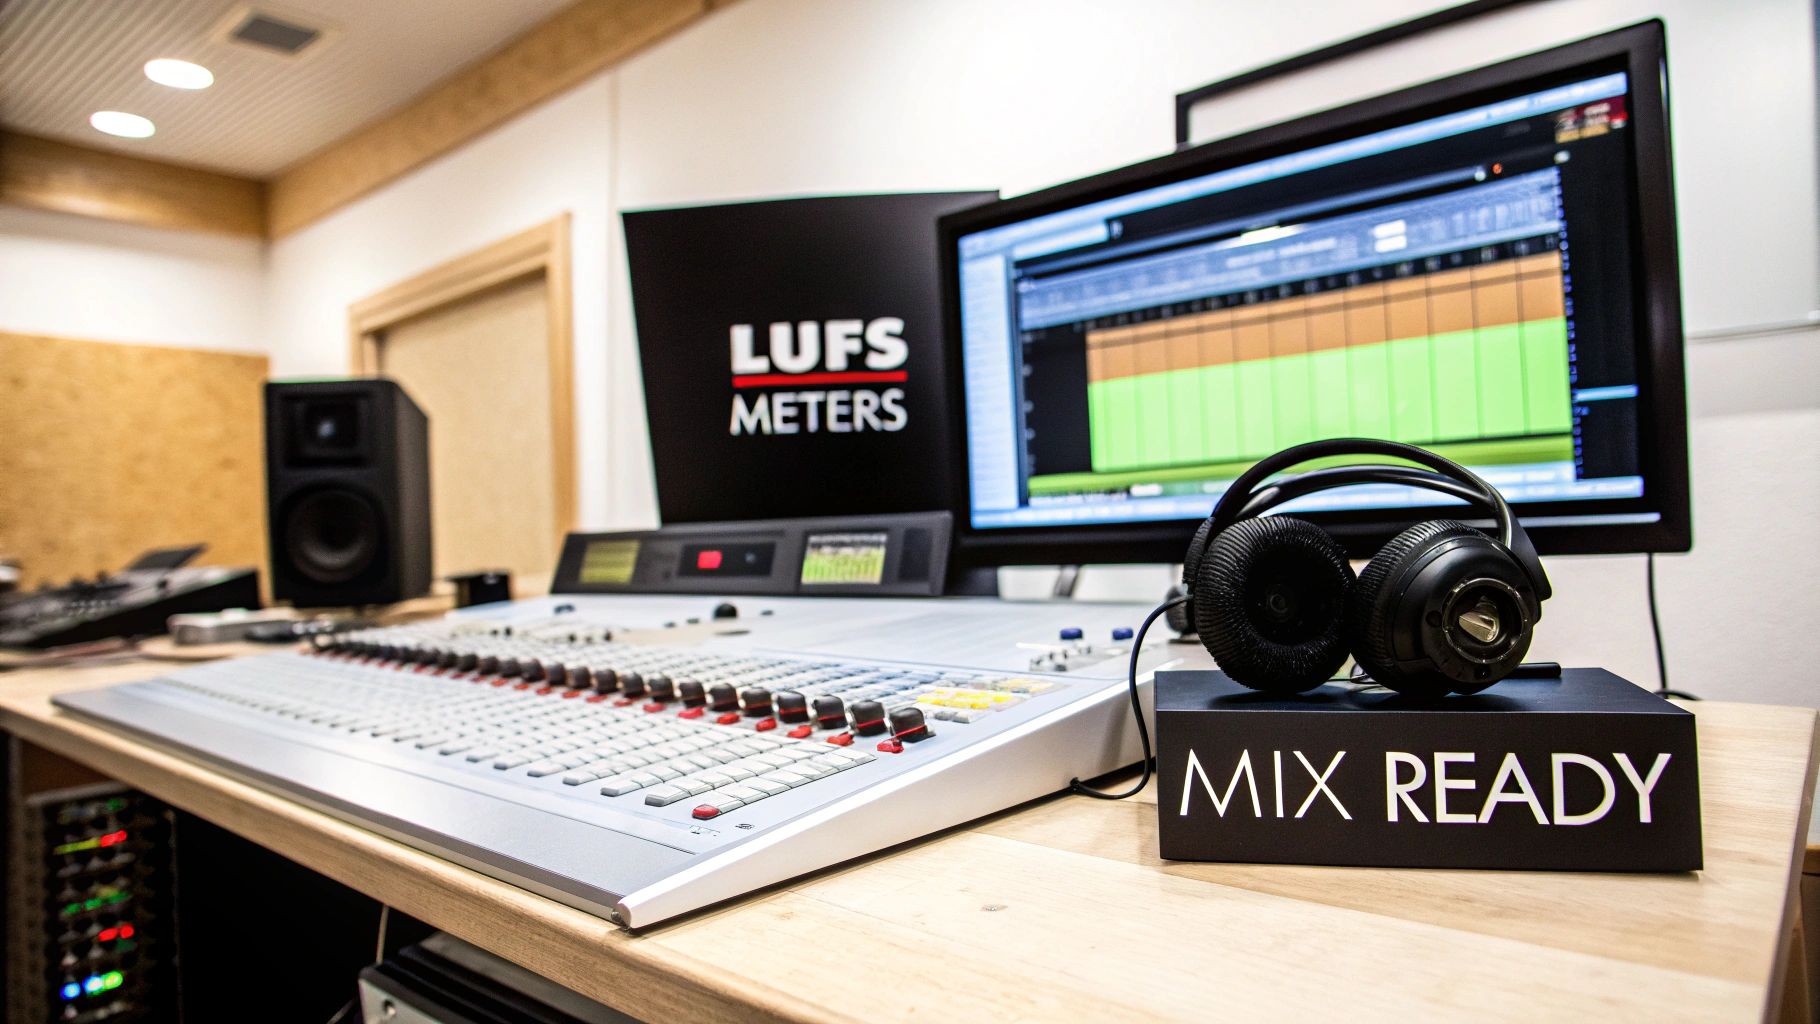
Modern platforms like YouTube and Spotify now use a standardized measurement system called LUFS (Loudness Units Full Scale) to keep the listening experience consistent. LUFS measures perceived loudness, which is far more accurate than just watching peak meters.
Each platform has a target. For example:
If you upload audio that’s way louder than their target, the platform just turns it down automatically. This means there's zero advantage to crushing your mix anymore. The real goal is to create a dynamic, punchy mix that naturally sits around the platform's target LUFS level. You'll need a LUFS meter plugin to keep an eye on this as you make your final adjustments.
The final listening environment completely changes how a mix should be built. In the world of cinema, sound engineers often work with incredible formats like 5.1 surround sound and Dolby Atmos to create truly immersive spatial experiences.
But for most of us creating content for the web, the reality is a bit different, though no less important:
This final stage is where your entire project comes together. To ensure your layered audio has the impact and clarity it deserves, you might consider using professional mixing and mastering services. Whether you handle it yourself or bring in an expert, mastering for your specific destination platform is what makes sure every layer is heard exactly as you envisioned.
As you get your hands dirty with sound design, you’ll inevitably run into a few common questions. These are the practical roadblocks that often come up, but once you know the answers, you can start applying these layering techniques with a lot more confidence.
Let's tackle some of the most frequent ones I hear.
There's no magic number here. The real answer comes down to a simple rule I live by: every single layer must have a purpose. If you can't immediately justify why a sound is in your mix—whether it's to build realism, add emotional weight, or clarify the story—then it's just noise.
When you're building a single, complex sound effect like an explosion or a magical whoosh, pushing past 3 to 5 layers can quickly turn your clean effect into a muddy mess. Instead of just piling on another similar sound, think about what's missing. If you have a deep boom, maybe what you really need is a high-frequency crackle or a metallic ringing to give it character.
For a full scene, your track count will naturally be much higher. But even then, every element should still have its place within that core hierarchy we talked about: dialogue, Foley, ambience, sound effects, and music.
The name of the game is separation. Your dialogue is the star of the show and needs to be treated like it.
Start by getting your levels right. The dialogue should be the loudest thing in the mix, typically peaking somewhere between -6dB and -12dB. Your music, on the other hand, needs to sit well underneath it—think -24dB or even lower whenever someone is speaking.
Next, you need to create a dedicated space for the voice using EQ. A classic trick is to make a small, precise cut in the music track right in the heart of the vocal frequency range (usually somewhere between 1kHz and 4kHz). This carves out a little pocket for the dialogue to sit in, making it instantly clearer.
But the real game-changer is sidechain compression, or "ducking." You set it up so that your dialogue track controls a compressor on your music track. Every time someone speaks, the music’s volume automatically dips down, and when they stop, it gently swells back up. It’s a signature technique of professional sound mixing.
This creates a dynamic, responsive mix where the dialogue is always crystal clear, and you don’t have to spend hours manually riding the faders.
Yes, one hundred percent. In my own work, AI sound generators have become an essential part of the toolkit. Their real power lies in the incredible specificity they offer. You’re no longer just searching a stock library for "wind." Now, you can generate "a lonely, cold wind whistling through a broken window pane at dusk."
You get a completely unique asset that’s tailor-made for the exact mood and context of your scene. Better yet, tools like these almost always provide royalty-free commercial licenses, so you can use the sounds in anything from a YouTube video to a feature film without worrying about legal headaches.
They’re brilliant for creating unique ambient textures, hyper-specific Foley sounds, or abstract soundscapes that would be a nightmare to record or find in a library. It’s a massive creative shortcut that can seriously speed up your entire sound design process.
Ready to create the perfect sound for any scene? With SFX Engine, you can generate custom, high-quality, royalty-free audio with just a text prompt. Stop searching and start creating. Get started for free today.