January 17, 2026 · Kuba Rogut
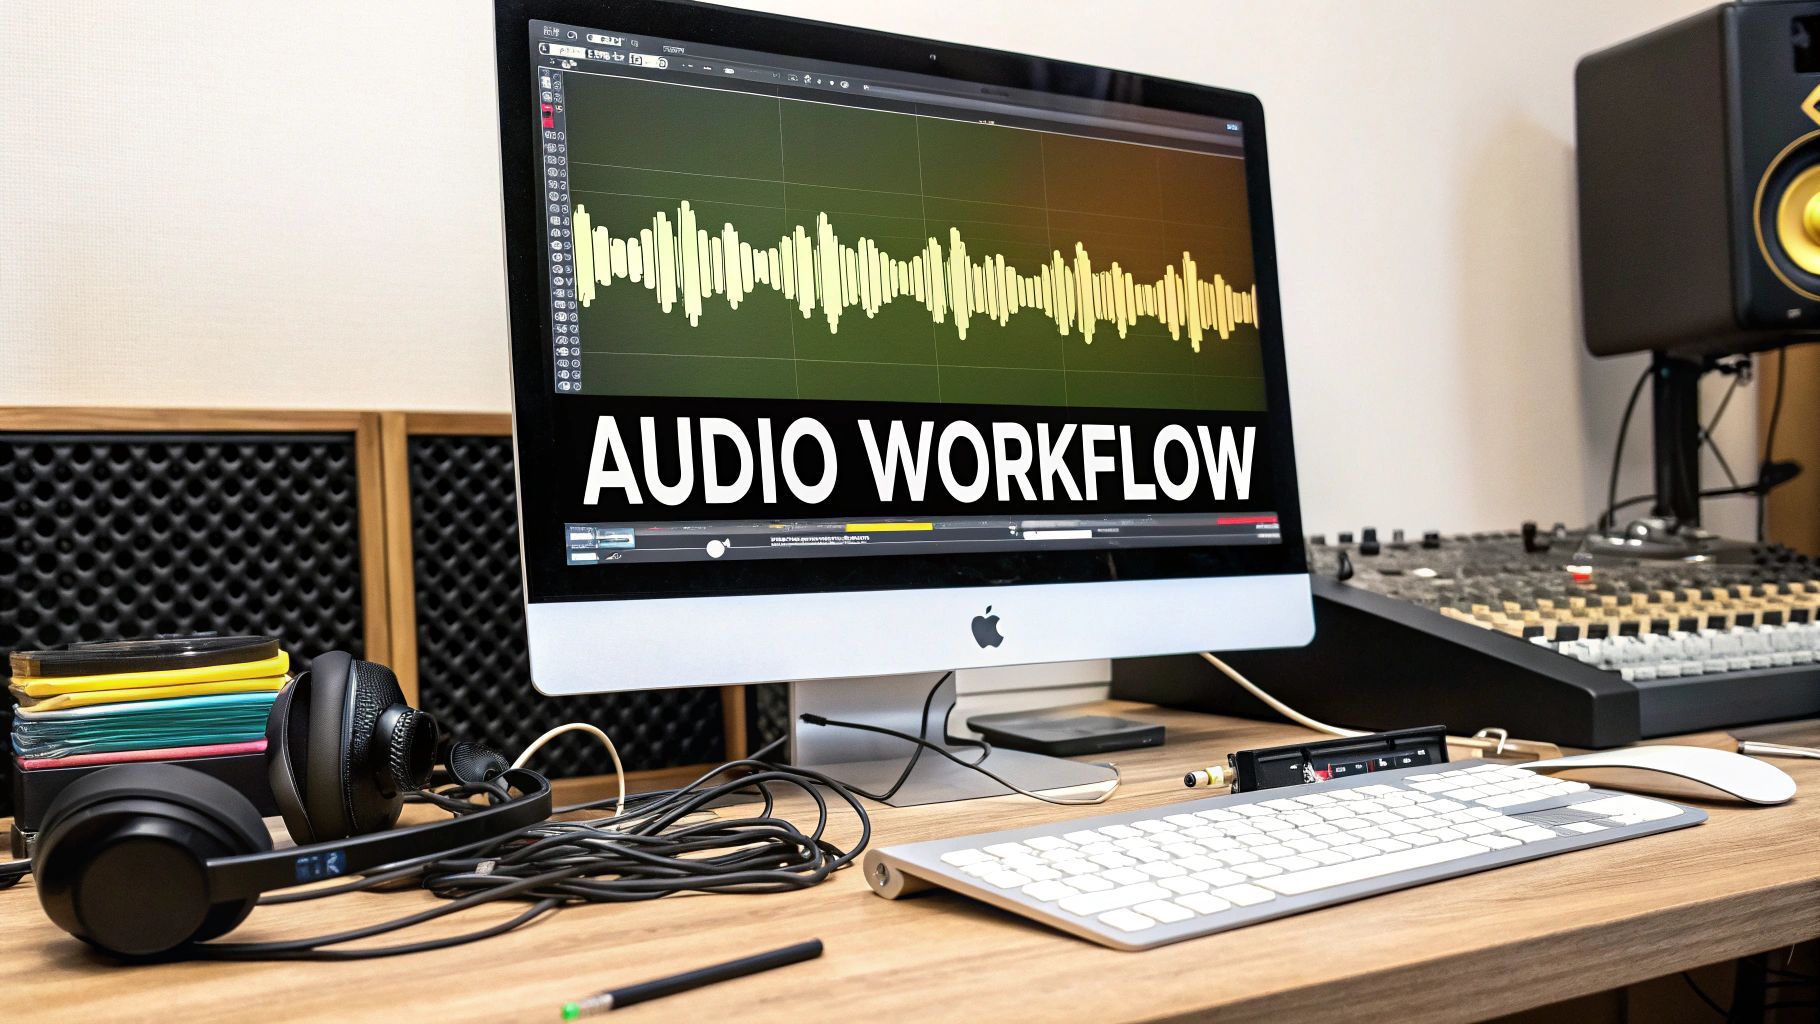
If you want to produce consistently great-sounding YouTube videos, you need a system. I've found that the most reliable approach breaks down into four clear stages: Capture, Cleanup, Creative, and Finalize. This isn't just about applying a few effects; it's a complete mindset that ensures clean recordings, an efficient edit, immersive sound design, and a final product that's perfectly tuned for the platform.
Let's be honest: in the hyper-competitive world of YouTube, visuals get most of the glory. But audio is the unsung hero that actually determines if someone sticks around. A stunning shot might earn you a click, but muffled, crackly, or jarring sound will send viewers packing in seconds.
Think about it—with 500 hours of video being uploaded every single minute, your sound quality isn't just a bonus; it's one of your biggest competitive advantages.
Having a solid workflow isn't about creating more work for yourself. It’s about working smarter. It turns the often-dreaded task of audio editing into a powerful part of your storytelling toolkit. Once you have a repeatable process, you stop guessing, you save a ton of time, and you start putting out professional-level content every single time.
To give you a clearer picture, I've broken down the entire process into a simple table that shows how each stage fits together.
| Workflow Stage | Primary Goal | Essential Tools & Techniques |
|---|---|---|
| Capture | Record the cleanest audio possible at the source. | Quality microphone, proper mic technique, controlled recording environment, setting correct gain levels. |
| Cleanup | Remove imperfections and ensure dialogue clarity. | Noise reduction, de-reverb, de-click, equalization (EQ), compression, removing filler words. |
| Creative | Build an immersive and engaging soundscape. | Layering music and sound effects, creating ambient textures, using plugins like SFX Engine. |
| Finalize | Master and export audio to meet YouTube's standards. | LUFS metering (-14 LUFS target), true peak limiting (-1.5 dBTP), quality control checks, proper export settings. |
This table lays out the roadmap. By focusing on one stage at a time, you can tackle each part of the audio post-production process without feeling overwhelmed.
This whole process really comes down to four fundamental phases. Each one builds on the one before it, leading you from a raw recording to a polished, professional final mix. Viewing your work through this lens helps keep things organized and ensures you never skip a critical step.
This diagram is a great visual for how these stages flow together into a single, cohesive workflow.
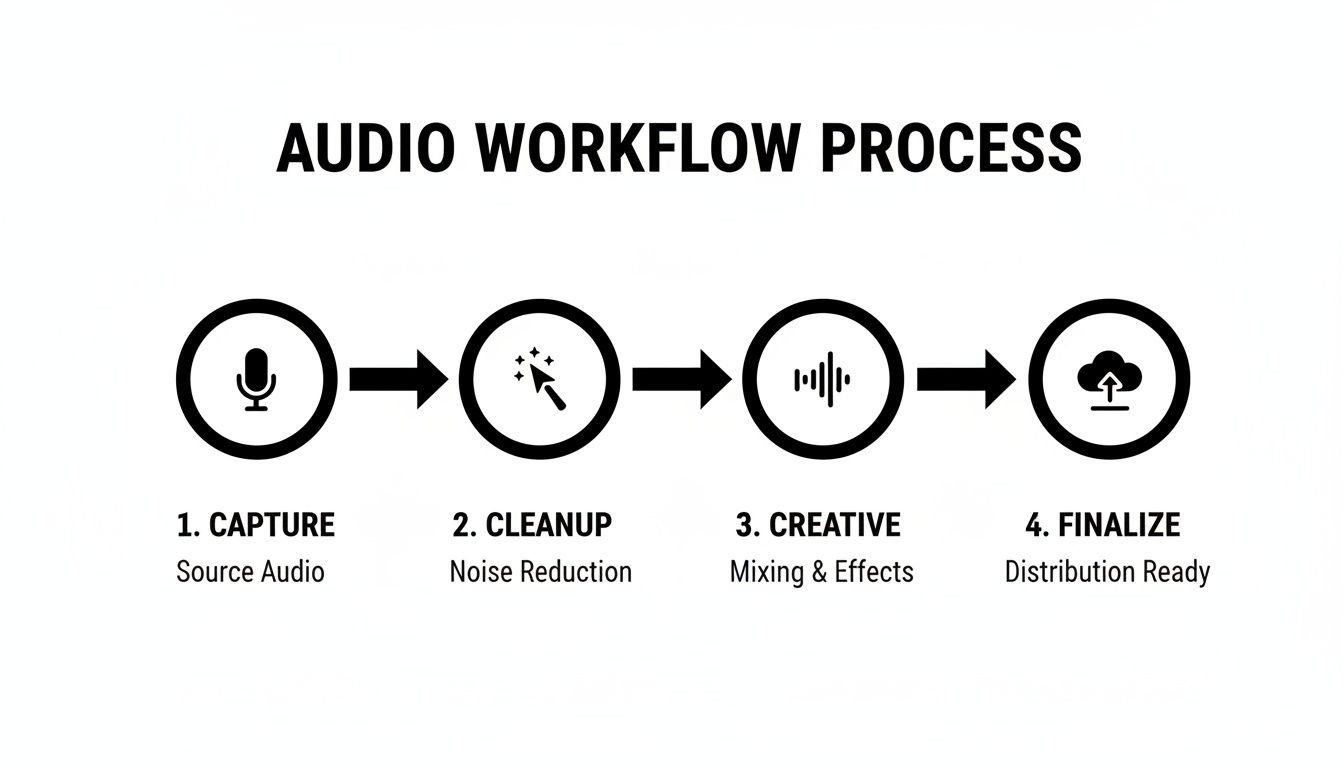
This logical flow from capture to finalization is at the heart of any good audio strategy. Don't underestimate its importance. Recent streaming analyses show that poor sound can drive away 75% of your audience within the first 30 seconds. That's a staggering number. By building a reliable workflow around these four pillars, you're creating a safety net for your content and giving your channel its best shot at growth. If you want to dive deeper, you can discover more insights from this YouTube audio analysis.
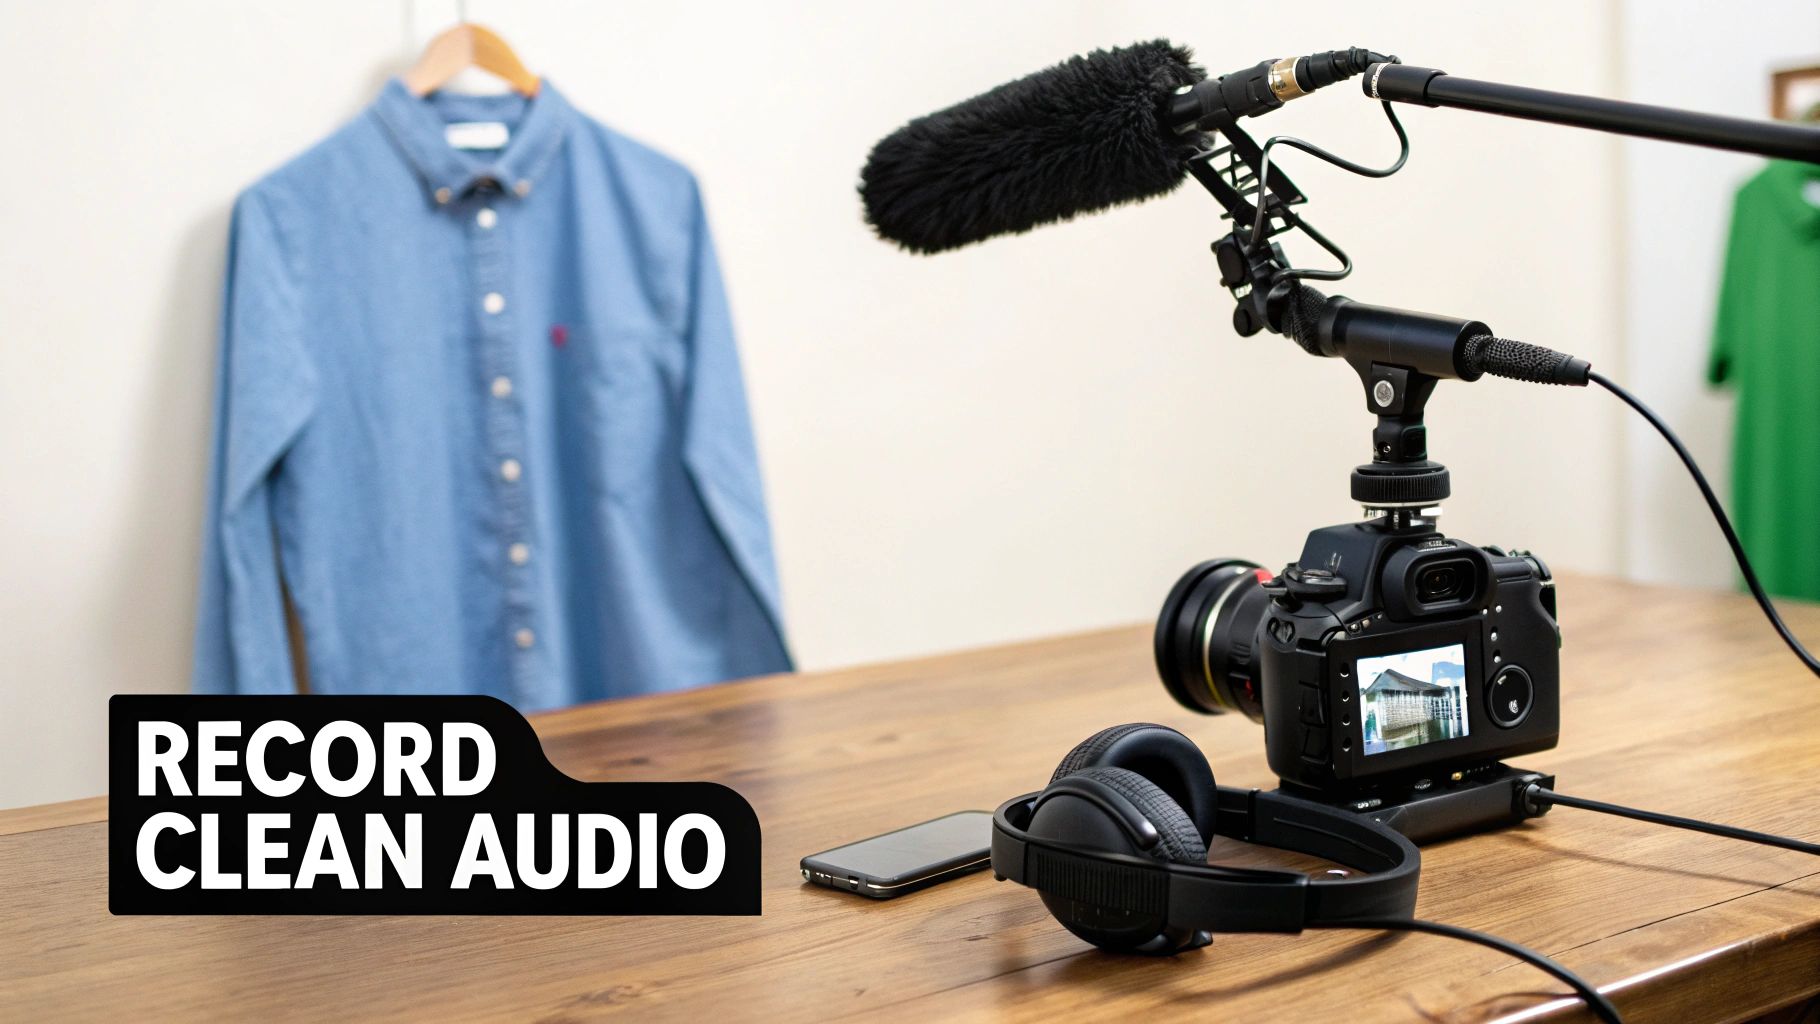
Every seasoned YouTube editor knows this pain all too well: you can't fix terrible audio in post. No amount of EQ wizardry or noise reduction will ever fully rescue a muffled, distorted, or echo-filled recording. The smartest audio workflow doesn't start in your editing software; it starts before you even think about hitting record.
Getting it right at the source is the single best way to save yourself hours of headaches and guarantee a professional sound. It’s a mindset shift—from "I'll fix it later" to being intentional with your mic, your placement, and your recording space from the get-go.
Your microphone is the first, and most important, link in the chain. The kind of videos you make should be the deciding factor here. You wouldn't use a hammer to turn a screw, right? Same logic.
Making the right choice upfront solves so many common problems before they even start. If you're still weighing your options, our guide on choosing the best microphone for video recording breaks down specific models for different needs.
Got the right mic? Awesome. Now, where you put it is everything. One of the most common mistakes I see is placing the mic too far from the talent. This forces you to crank up the gain, which just invites background noise and nasty room echo into your recording.
Pro Tip: For most voices, 6-12 inches (or 15-30 cm) away from the mouth is the sweet spot. It captures a full, present vocal tone without picking up distracting plosives—those harsh 'p' and 'b' sounds.
This ties directly into gain staging, which is just a fancy term for setting your recording levels. The goal is simple: record a strong, clean signal that never, ever hits 0 dB. That red light is not your friend. Once your audio "clips" (distorts), that information is gone forever. You can't get it back.
Aim for your audio levels to bounce between -12 dB and -6 dB. This gives you a healthy signal with plenty of headroom for editing later on, without risking that awful digital distortion.
You don't need a professionally treated studio to get clean audio. The real goal is just to minimize hard, flat surfaces. Sound waves love to bounce off things like bare walls and hardwood floors, creating that echo and reverb we all hate.
You can make a huge difference with just a few simple tricks:
Finally, and this is non-negotiable: always monitor your audio with headphones while you record. Don't just trust the little meter on your camera display. Plug a good pair of headphones directly into your camera or audio recorder.
Listening live is the only way to catch problems as they happen. You'll immediately hear the rumble of a passing truck, the rustle of a lav mic against a shirt, or if your talent is suddenly speaking way too loudly. This simple habit can be the one thing that saves you from having to do a complete reshoot.
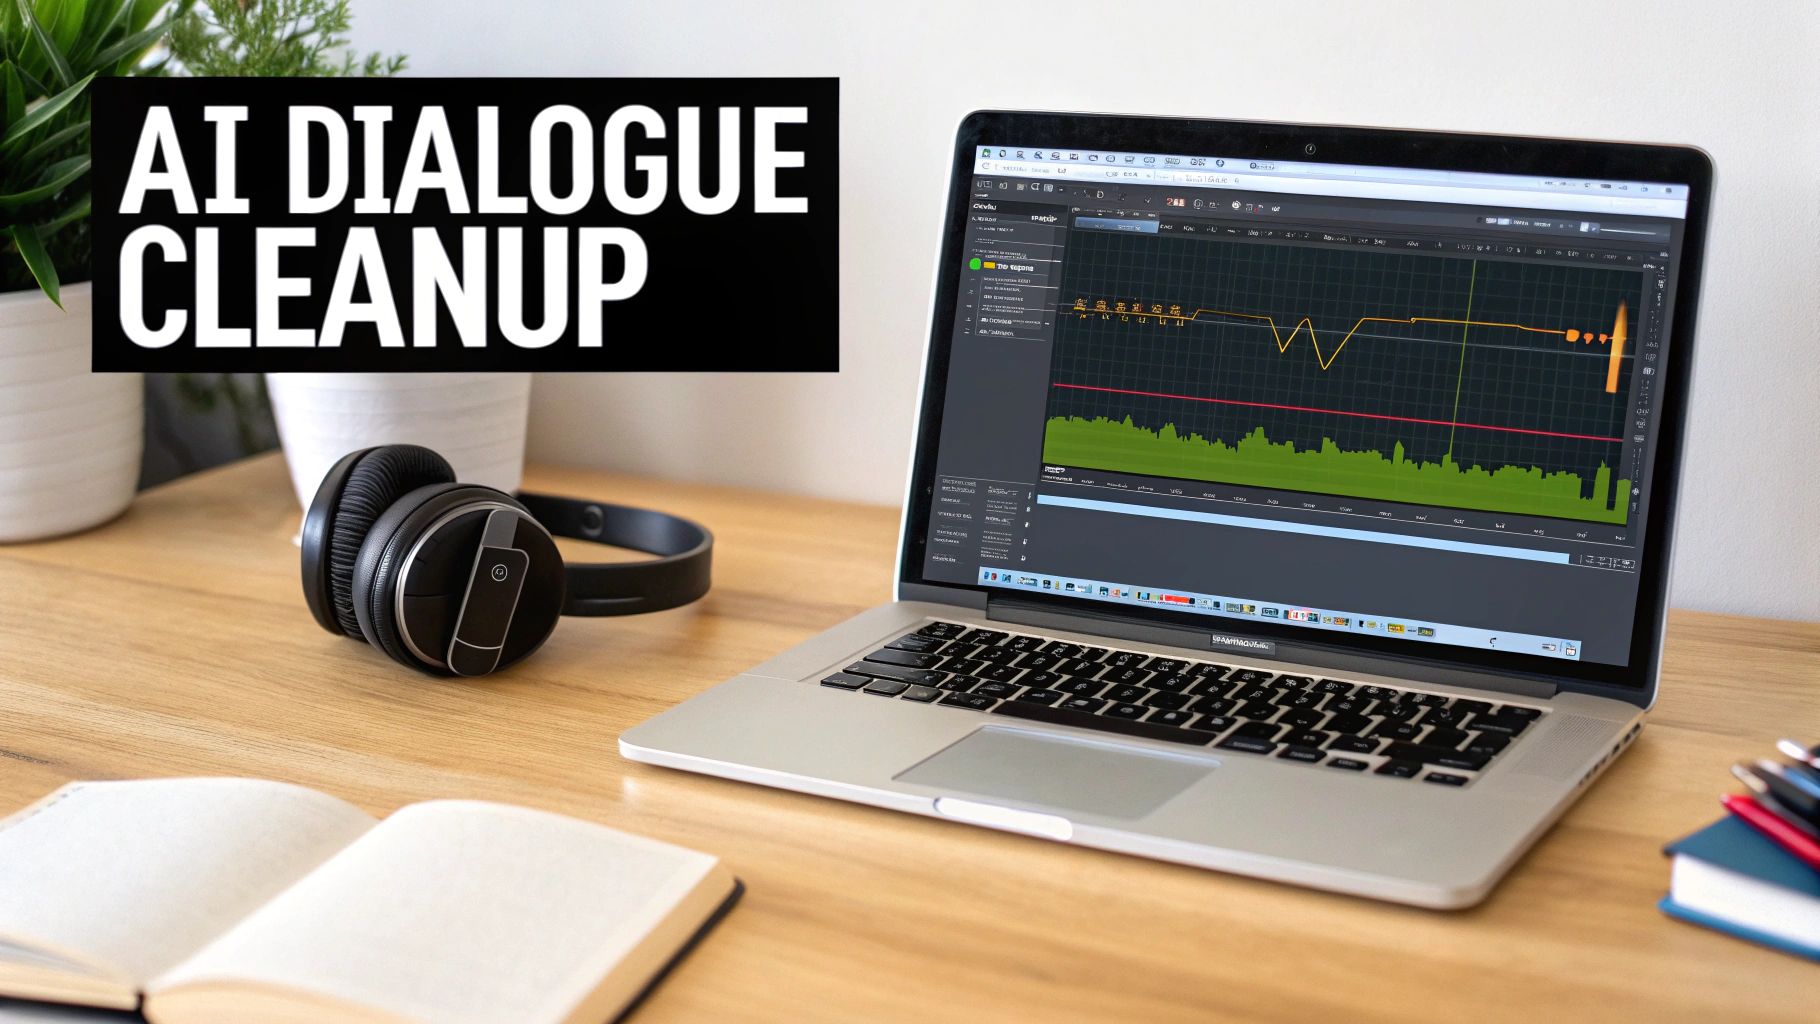
Alright, you’ve got a clean recording. Now comes the part of the process that modern tools have completely transformed. The cleanup stage used to be a soul-crushing grind of hunting down every tiny mistake by hand. Thankfully, AI-powered software can now do the heavy lifting in minutes, not hours.
This is more than just a time-saver; it’s a creativity-saver. Instead of spending your entire session meticulously slicing out every "um" or battling a persistent fan hum, you can actually focus on telling a great story.
The real game-changer here is software that automatically finds and fixes common dialogue problems. Tools like Descript have exploded in popularity for a reason—they let you edit audio as if it were a text document.
Seriously, imagine just deleting the words "uh" and "like" from a transcript and having them instantly vanish from your audio timeline. That’s not science fiction anymore.
These tools are brilliant at handling:
Running your audio through one of these tools first gives you a massive head start. You get a clean, tight dialogue track in seconds, freeing you up for the more creative parts of the edit.
To really get how big of a deal this is, think about the old way. You’d have to listen through the entire recording, find a filler word, zoom way into the waveform, make two perfect cuts, delete the sliver of audio, and try to smooth it over. Now, imagine doing that a hundred more times. It was a recipe for burnout.
The real power of AI in an audio workflow isn't just about saving time—it's about preserving your mental energy. It lets you stay in a creative flow state, focusing on story and pace instead of getting bogged down in repetitive, technical chores.
This efficiency is non-negotiable. YouTube is a beast, with 2 billion monthly users and over 800 million videos competing for attention. Your workflow has to be fast without sacrificing quality. The data is clear: AI integration can slash editing time by 80-90% while boosting engagement with better sound. You can discover the full YouTube engagement statistics on Descript.com to see the impact for yourself.
Once the AI has done its initial cleanup, it’s time for some sweetening. This is where you jump back into your NLE like Premiere Pro or Final Cut Pro to make the dialogue truly pop using two essential tools: Equalization (EQ) and Compression.
Equalization (EQ) for Vocal Clarity Think of EQ as a sonic chisel for sculpting the tone of a voice. Every voice is different, but a few quick tweaks can make a massive impact.
These are just starting points, of course. Tweak them until the dialogue sounds clear and natural, not robotic.
Compression for Consistent Volume A compressor is your secret weapon for making dialogue sound polished and professional. It automatically evens out the volume, turning down the loud parts and bringing up the quiet ones. This means your audience won't be constantly reaching for the volume knob.
A light touch is all you need. Start with a ratio around 2:1 or 3:1 to gently tame the peaks without crushing the life out of the performance. This simple step is a hallmark of the best audio workflow for YouTube editors because it makes your videos instantly more enjoyable to listen to. For a deeper look at cleanup, check out our guide on the best plugins for removing background noise.
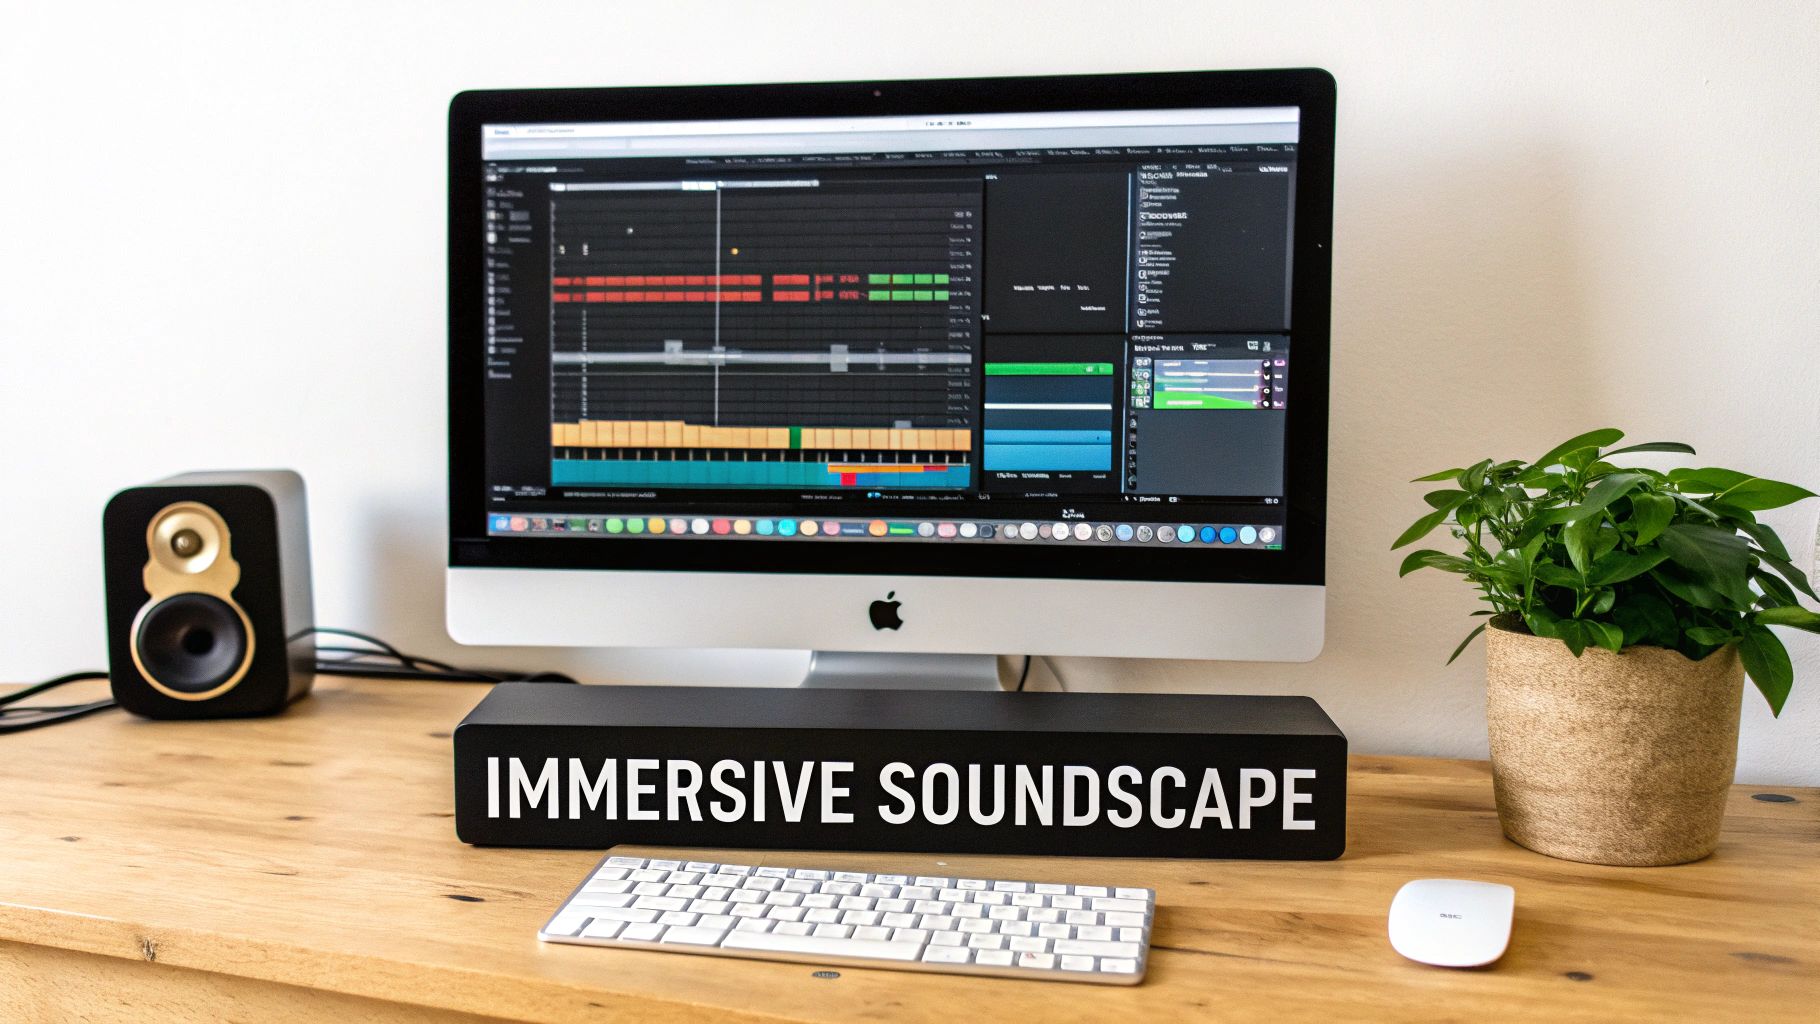
Okay, your dialogue is now clean, consistent, and ready to go. You've built a solid foundation. Now for the fun part—transforming a simple recording into a rich experience that pulls your audience in and keeps them there. This is where the real artistry happens.
This creative stage is all about layering sound to build emotion, add context, and give your video that professional, dynamic feel. Honestly, this is probably the most impactful part of the entire audio workflow. Clean dialogue is non-negotiable, but a well-crafted soundscape is what makes your content truly memorable.
Music is the emotional engine of your video. It sets the mood, drives the pace, and can make or break your key moments. But picking the wrong track? It's a surefire way to distract your audience.
First things first, match the music’s tone to your content. A high-energy electronic track is perfect for a fast-paced tech montage but feels completely jarring in a heartfelt documentary. Just listen for the overall vibe—is it upbeat, somber, mysterious, or inspiring?
Once you have a few options, drop them into your timeline under your dialogue. Listen to how they play together. A great background track should have enough variation to stay interesting without any huge, dramatic shifts that steal focus from the speaker.
Here’s a pro move that will instantly level up your mix: sidechain compression. You might have heard it called "ducking." It’s a technique that automatically lowers the volume of your music whenever someone speaks and brings it back up during the pauses. This creates a buttery-smooth mix without you having to manually ride the faders.
Setting it up is surprisingly simple in most modern NLEs:
This one small step makes a huge difference in clarity and professionalism. Your audience will never struggle to hear what's being said.
While music sets the mood, sound effects (SFX) are what make your world feel real and tangible. They ground your visuals, adding a layer of polish that viewers feel, even if they don't consciously notice it. Simple whooshes on text animations, subtle clicks on UI elements, or a bit of ambient sound can make everything feel more cohesive.
The problem? Digging through massive, generic stock SFX libraries for that perfect sound can kill your creative momentum. You spend hours searching, only to end up with the same overused sounds everyone else is using.
This is exactly where AI sound generation has become a game-changer for me. Instead of searching for a sound, you just create it. With a tool like SFX Engine, you can type a prompt like "gentle cinematic whoosh with a subtle metallic shimmer" and get a totally unique, royalty-free sound effect in seconds.
This approach gives you near-limitless creative freedom. Need some background for a B-roll shot? Generate "subtle cafe ambience with distant chatter and the clinking of ceramic mugs" to add a layer of realism that a generic "cafe" track just can't match. This really is the future of sound design.
For a busy YouTube editor, the difference between a traditional stock library and an AI generator is night and day. It's not just about finding sounds; it's about creating the right sounds without breaking your flow.
Here’s a quick breakdown of how they stack up.
| Feature | Traditional Stock SFX Library | AI Sound Generator (e.g., SFX Engine) |
|---|---|---|
| Creativity | Limited to what's in the library. | Virtually unlimited; you create exactly what you need. |
| Uniqueness | High risk of using overused, generic sounds. | Every sound is unique to your prompt and variations. |
| Workflow Speed | Time-consuming search and audition process. | Near-instant generation based on a simple text prompt. |
| Licensing | Can be complex, with varying royalty agreements. | Simple, commercial, and 100% royalty-free licensing. |
| Cost | Often requires an expensive monthly subscription. | Flexible, credit-based models; pay only for what you need. |
When your time is valuable and originality is key, the choice becomes pretty clear. AI-powered SFX shifts your workflow from tedious searching to pure, focused creation.
Imagine you're editing a tech review. Instead of a generic "mouse click," you can generate a "satisfying mechanical click from a high-end gaming mouse." Or for a travel vlog, instead of a stock "ocean wave" sound, you can create "calm waves lapping against a rocky shoreline at sunset." This level of specificity is what makes your sound design truly immersive and sets your content apart.
You’ve done the hard work—your dialogue is clean, the music is perfectly mixed, and you’ve sprinkled in those custom sound effects that really make the project pop. But we're not quite done. The final, crucial step is mastering.
Think of mastering not as another creative step, but as a technical quality check. It’s what ensures your video sounds just as good on a high-end home theater system as it does on a cheap pair of earbuds or tinny phone speakers.
If you skip this, you’re letting YouTube’s algorithm make the final decision on how your audio sounds. And trust me, it’s not a gentle hand. It will automatically compress or lower the volume of your mix, which can completely squash the dynamic range you worked so hard to create.
The most important metric you need to know for this is LUFS (Loudness Units Full Scale). It's a modern standard that measures perceived loudness—how loud our ears actually think something is—which is way more accurate than just looking at peak meters.
YouTube normalizes every video on its platform to a specific loudness target to give viewers a consistent experience. No more getting your eardrums blasted by one video and then cranking the volume for the next.
YouTube’s target loudness is -14 LUFS. If your mix is louder, they'll turn it down. If it's quieter, they'll turn it up. The goal is to deliver a mix that’s already hovering right around that number.
When you master to -14 LUFS yourself, you stay in the driver’s seat. You control the dynamics, and you ensure your audience hears the audio exactly as you intended, without YouTube's crude, automated adjustments messing it up.
So how do you get your mix to that -14 LUFS target without introducing nasty distortion? The tool for the job is a limiter.
A limiter is like a hyper-aggressive compressor. It sets an unbreakable volume ceiling, allowing you to raise the overall level of your audio without letting the loudest parts "clip" and sound terrible.
Another metric to watch is True Peak. This measures the absolute loudest point your audio will hit in the real world, after it's been converted from digital back to analog for playback. To avoid any chance of distortion, we need to keep this in check.
Here’s the simple process I use in Premiere Pro, DaVinci Resolve, or Final Cut Pro:
That’s it. This quick process guarantees your audio is loud enough, free of distortion, and perfectly controlled for YouTube.
Once mastering is complete, the very last step is exporting with the right audio settings to survive YouTube’s re-encoding process. Remember, YouTube compresses everything you upload, so giving it a high-quality file to start with is non-negotiable.
For the best results, stick with these settings:
Using these settings ensures you’re feeding YouTube a pristine audio file, which minimizes any quality loss when it gets processed on their end. For a deeper dive into the video side of things, check out our full guide on the best export settings for YouTube.
With a professionally mastered mix, your content is in a much better position to succeed. High-quality production is a key part of effective strategies for promoting content and growing your audience on YouTube.
Even with the best workflow, you’re going to hit a few snags. It’s just part of the process. This section is all about tackling those common questions and hurdles that pop up when you're deep in an edit, trying to get the audio just right.
This is a classic question, and honestly, the answer is simpler than you might think. For most YouTube content, the audio tools built right into NLEs like Premiere Pro, Final Cut Pro, or DaVinci Resolve are more than enough to get the job done. They can handle your EQ, compression, and basic noise reduction beautifully.
You really only need to think about jumping over to a dedicated Digital Audio Workstation (DAW) like Adobe Audition or Logic Pro in a few specific cases. If you're wrestling with seriously damaged audio—think heavy background noise or clipping—or building out a complex, layered sound design, then a DAW will give you the surgical precision you need.
A great middle-ground approach is to do all your primary mixing and cleanup inside your NLE. Only when you hit a problem your video editor can't solve should you bother with "round-tripping" that audio to a dedicated DAW. It's the best of both worlds—you get speed when you need it and power when you have to have it.
Okay, this one trips people up all the time. Both normalizing and limiting deal with volume, but they do completely different jobs. Getting this right is a huge step toward mastering your final mix.
Normalizing just scans an entire audio clip, finds the loudest peak, and then applies a fixed amount of gain to make that peak hit a target level (like 0 dB). The key thing to remember is that it raises or lowers everything by the same amount. It doesn't change the dynamic range—the gap between your loudest and quietest sounds stays exactly the same.
A limiter, on the other hand, is like a brick wall for your audio. It creates an unbreakable ceiling, preventing your signal from ever crossing a specific peak (like -1.0 dB). This is what allows you to safely boost the overall perceived loudness (LUFS) of your mix. For YouTube mastering, a limiter is the right tool for the job. It lets you push your mix right up to that -14 LUFS target without any risk of digital distortion.
This isn't just a technical question—it's a business one. Copyright is no joke on YouTube, and a single strike can put your channel in jeopardy. You’ve got to play it safe.
You can always pull from YouTube's own Audio Library, which is a totally safe but sometimes creatively limiting option. A lot of creators subscribe to royalty-free services like Epidemic Sound or Artlist, giving them access to massive music catalogs for a monthly fee.
For sound effects, though, a much better option has emerged. To get complete creative freedom and bulletproof legal safety, using a platform with AI sound generation is the way to go. You can create entirely unique sounds that you own completely.
This approach gives you a few major wins:
It completely removes the legal gray areas and gives you a custom library of high-quality sounds that are truly your own.
At SFX Engine, we empower creators to build immersive soundscapes with our AI-powered sound effect generator. Stop searching and start creating the exact royalty-free audio you need, on demand. Discover the future of sound design and elevate your next project at https://sfxengine.com.