October 31, 2025 · Kuba Rogut

If you're creating any kind of audio content, a remove noise plugin is one of the most powerful tools in your arsenal. It's software designed to scrub your recordings clean, getting rid of all those distracting background sounds like hiss, hum, and even that pesky room echo. A good plugin can take an amateur recording and give it a polished, professional sheen that keeps your audience focused on what you're saying.
Let's be honest—in a world flooded with content, your audio quality is the first thing people notice. Nobody has the patience for distracting background noise.
That low hum from the air conditioner, the faint electrical hiss from a cheap cable, or the frantic clicking of a keyboard can instantly make your work sound amateur. It pulls your listener out of the experience, and they might just tune out before they ever get to your actual message. Clean audio isn't just a nice-to-have; it's a baseline requirement for credibility.
Think about a podcast interview where you can hear a refrigerator buzzing in the background—it completely kills the vibe. Or a voiceover that's full of echo, making the whole video feel cheap. These little imperfections are distractions that chip away at your authority. This is where a dedicated remove noise plugin becomes your secret weapon, bridging the gap between a basic home setup and a studio-quality sound.
The push for crystal-clear audio isn't just anecdotal; the numbers back it up. The global market for audio noise suppressor technology was valued at a whopping $1.304 billion in 2025 and is only expected to climb. This spike is directly tied to the explosion of podcasting, remote work, and professional home studios all demanding high-quality sound. You can see more on these audio market trends at Market Report Analytics.
This waveform visualization gives you a perfect snapshot of what noise reduction actually does to an audio signal.

The top waveform is the raw, noisy audio. The bottom one is the much cleaner signal after the plugin has worked its magic. The difference is night and day.
Key Takeaway: Putting effort into audio cleanup is really an investment in your audience's experience. A clean track ensures your message lands clearly and professionally, which builds trust and keeps people listening.
Of course, software can only do so much. Your best first step is always to get a clean recording from the start. For a deep dive into setting up your space correctly, check out our guide on acoustic treatment for home studios.
With so many noise reduction plugins on the market, it's easy to get overwhelmed. The secret isn't finding the single "best" one, but rather the best one for your specific audio problems and workflow. Don't just follow the crowd; figure out what you actually need to get the job done right.
The first big question to ask yourself is how much control you really need.
If you’re a podcaster trying to get rid of a persistent air conditioner hum in an interview, a simple, one-knob plugin could be your new best friend. These tools often use smart AI to automatically sniff out and eliminate common background noise without you having to touch a dozen different settings. They're built for speed and efficiency.
But what if you're a filmmaker and a dog barks right in the middle of a critical line of dialogue? That's when you need something with more surgical precision. For that kind of problem, an advanced spectral editor is the tool of choice. It lets you visually pinpoint and literally erase the unwanted sound, almost like using Photoshop on an audio file.
Before you even think about buying, you have to consider the practical stuff. The most powerful plugin in the world is useless if it doesn't work with your setup.
Make sure any plugin you're eyeing is compatible with your Digital Audio Workstation (DAW). Whether you're working in Audacity, Logic Pro, or Pro Tools, double-check the system requirements and supported formats (like VST, AU, or AAX). This one step can save you a massive headache later.
Think through these key questions:
To help you sort through the options, it's useful to think about plugins in a few distinct categories. Each has its strengths and is designed for different kinds of audio cleanup tasks.
Here's a breakdown of common noise reduction plugin categories to help you choose the right one for your specific audio challenges.
| Plugin Type | Best For | Typical Use Case | Skill Level |
|---|---|---|---|
| Broadband Noise Reducers | Consistent, steady noise like hiss, hum, or fan noise. | Cleaning up dialogue recorded with a noisy preamp or air conditioner. | Beginner to Intermediate |
| Spectral Editors | Removing specific, isolated sounds like coughs, clicks, or ringtones. | Saving a crucial take that was ruined by a sudden background noise. | Intermediate to Advanced |
| De-Clickers & De-Cracklers | Clicks, pops, and crackle, often from vinyl or digital errors. | Restoring old vinyl recordings or fixing audio with digital glitches. | Beginner |
| AI-Powered "Smart" Plugins | Automatically identifying and separating voice from complex, changing noise. | Cleaning up location audio recorded in a busy, unpredictable environment. | Beginner |
Ultimately, understanding these categories helps you narrow down your search from dozens of options to just a handful of contenders that are actually suited for your work.
Remember, the goal isn't to find a plugin that can do everything. It's to find the one that does exactly what you need, without overcomplicating your process.
Finally, consider the price tag. Many modern plugins have moved to a subscription model, which gives you the latest updates but comes with a recurring cost. Others stick to the traditional one-time purchase. There's no right or wrong answer here—it just comes down to what makes the most sense for your budget and how often you'll be reaching for the tool.
Alright, let's put this into practice. Imagine you just wrapped up a great podcast interview, but when you listen back, there's a low, constant hum from a refrigerator in the background. It's distracting, but not a deal-breaker. A good remove noise plugin can be a lifesaver here, but using it effectively is more of a balancing act than just clicking a button.
The process itself is pretty straightforward. Your first job is to find a clean snippet of the background noise—just the hum, with nobody talking over it. A few seconds is all you need. This sample is called a noise print, and it’s what you'll use to show the plugin exactly what sound you want it to remove. Getting a good, clean noise print is the most important part of the whole operation; it sets you up for success.
Once the plugin has learned the noise, you can apply the reduction. And here's where the finesse comes in. It's tempting to just slam the reduction knob all the way to 100%, but that's a mistake. Start with a much lighter touch, something around 40-50%, and listen closely to the result.
Most noise reduction plugins will give you two main controls to play with: Threshold and Reduction.
Your goal isn't to create a perfectly silent void. That sounds completely unnatural to the human ear. You just want to push the background noise down far enough that it no longer distracts from the main dialogue. The voice should always be front and center, sounding rich and clear.
If you're deep in the podcasting world, it's also worth checking out some of the modern AI tools for podcasters, many of which have incredibly sophisticated noise reduction built right in.
This infographic breaks down how to think about picking the right tool for the job.
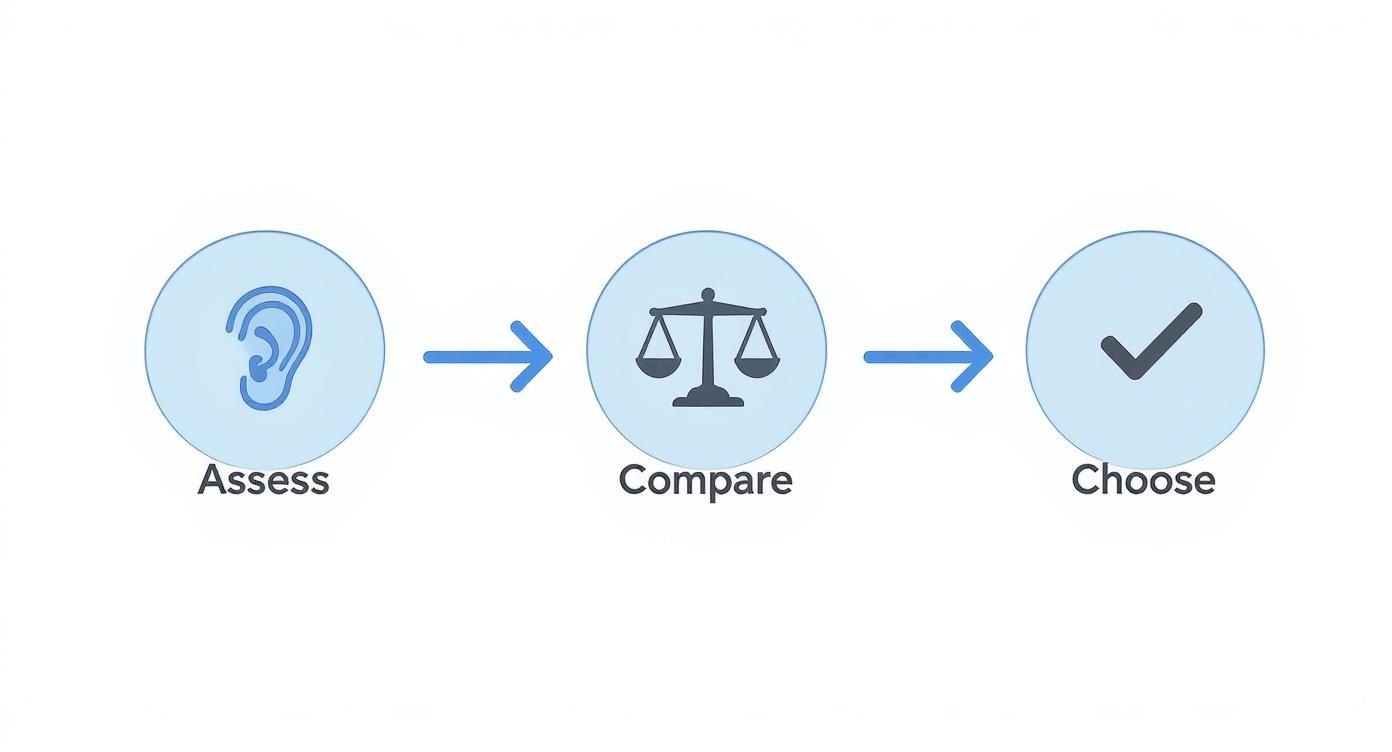
As you can see, it all starts with identifying your specific noise issue. From there, you can compare features and find a plugin that slots neatly into your existing editing process.
Getting the hang of this gives you a reliable technique you can use on any audio project. For a more in-depth look at this within a full editing workflow, our guide on https://sfxengine.com/blog/how-to-edit-podcast-audio has some extra tips. And one final pro tip: always, always work on a copy of your audio file. That way, if you push the reduction too far, you can always go back to the original and start over.
https://www.youtube.com/embed/Pokir_L6Xvg
Once you've got the hang of quieting down basic hums and hisses, it's time to get a bit more surgical with your noise reduction tools. Getting truly professional results means moving beyond the broad-stroke adjustments and zeroing in on those specific, isolated noises that can ruin an otherwise perfect take.
Many top-tier plugins come equipped with a spectral repair feature. The best way to think of this is like Photoshop, but for sound. Instead of just seeing the standard waveform, you get a spectrogram—a visual map of your audio showing frequency and time.
This view is a game-changer. That sudden cough, a phone notification, or a loud keyboard clack will show up as a bright, obvious visual blip. You can literally draw a box around it and delete or reduce it, leaving the dialogue around it completely untouched. It’s an incredible way to save takes you thought were lost for good.
It's tempting to just crank the noise reduction dial and obliterate all the background sound in one go. The problem? This heavy-handed approach almost always leaves the main audio sounding thin, watery, and unnatural—what we often call "robotic."
The real secret to a natural sound is to use multiple, gentle passes. Start by applying a very light layer of noise reduction, just enough to take the edge off the noise. Then, render or bounce that file and apply another light pass. This layered technique gently chips away at the noise without aggressively carving out essential frequencies from the voice. It takes a bit more patience, but the final result sounds far more authentic.
Think of noise reduction like painting with delicate brushstrokes instead of a paint roller. The goal is transparency. Your listeners should never even suspect the audio was processed.
Sometimes, even careful noise reduction can dull the audio a little, stripping away some high-end sparkle or low-end warmth from a voice. This is where a good Equalizer (EQ) becomes your best friend. After cleaning the track, you can use an EQ to carefully reintroduce the frequencies that went missing.
Here are a couple of quick starting points:
This two-step process—remove the bad, then restore the good—is fundamental to achieving pristine sound. Modern AI-powered tools are making this process even more precise. Recent tech has been shown to improve live voice quality by 28% on some platforms, as detailed by Business Research Insights. It’s a testament to how well software can now distinguish a human voice from unwanted noise.
And if you're also struggling with room echo, our guide on removing echo from audio provides some great complementary strategies. Combining these techniques will help you deliver audio that isn't just clean, but also rich and full-bodied.
Knowing what not to do with a noise reduction plugin is just as critical as knowing what to do. I’ve seen it countless times: someone gets a new tool and immediately cranks all the settings to the max. This is hands-down the biggest mistake you can make.
Pushing the reduction settings too aggressively will strip the life right out of your recording. Sure, the noise might be gone, but you're left with a clean yet sterile track, often riddled with weird digital artifacts.
You'll know the sound when you hear it—a strange, watery, or metallic quality that just screams "over-edited." Remember, the goal is to gently reduce distracting noise, not to create an unnaturally silent void where the background should be.
Besides simply going overboard, a few other common missteps can easily sabotage your audio. Steer clear of these, and you'll be on your way to a much more professional sound.
Grabbing a Bad Noise Profile: When you "teach" the plugin what sound to remove, that sample has to be pure background noise. If you accidentally capture a breath, a lip smack, or even a sliver of a word, the plugin will misunderstand and start chipping away at those same frequencies throughout your entire track.
Editing Destructively: This is a cardinal sin of audio work. Never, ever apply noise reduction directly to your original audio file. Always work on a duplicate track. Treating the original as a one-way street is a recipe for disaster; if you mess up, there’s no undo button.
Forgetting to A/B Test: Don't just trust your ears in the heat of the moment. You need to constantly bypass the plugin (toggle it on and off) to compare the processed audio with the raw original. It's the only way to know if you're actually improving things. Also, listen on different speakers! What sounds great on your studio monitors might fall apart on a pair of cheap earbuds or a tinny laptop speaker.
The market for noise suppression technology, the very engine inside these plugins, is massive. It was valued at USD 28.33 billion in 2025 and is on track to reach an incredible USD 86.33 billion by 2034, driven heavily by consumer electronics. You can dig into more data on these trends from Precedence Research.
By sidestepping these common blunders, you can be confident that your cleanup efforts are actually enhancing your recording, not unintentionally damaging it.
If you're just getting started with noise reduction plugins, you probably have a few questions. I see the same ones pop up all the time, so let's walk through them and get you on the right track.
Yes and no. A good plugin can definitely tame the low-frequency rumble you get from a light breeze. That's a relatively easy fix.
The real trouble starts with a strong gust of wind that blasts the microphone's diaphragm. This causes the signal to overload and clip, creating a nasty distortion. Once that clipping is baked into the recording, it's almost impossible to remove without wrecking the voice or dialogue you want to keep. The plugin might reduce it, but you'll likely be left with a garbled mess.
Your best bet is always prevention. A good windshield on your mic during the recording session is worth its weight in gold.
When you use them right, noise reduction plugins are a massive net positive for your audio quality. The risk comes from getting a little too aggressive with the settings.
If you crank the reduction knob to the max, you'll start to hear weird, watery artifacts. It can strip the natural character out of a voice, leaving it sounding thin and robotic. The trick is to find that perfect balance where the background noise vanishes, but the main audio—the voice, the instrument—remains untouched and clear.
My Two Cents: The best noise reduction is the kind no one even knows you did. Your audience just hears clean audio, not the absence of noise. Always aim for subtlety.
For basic, consistent noise like an air conditioner hum or a bit of static hiss, you can often get great results with free tools. But for more complex, dynamic background noise, the advanced algorithms in premium plugins are much better at isolating and removing the junk while carefully preserving the integrity of the voice. They just produce fewer unwanted side effects.
Ready to create custom, professional-grade sound for your projects? With SFX Engine, you can generate unique, royalty-free sound effects in seconds. Start creating for free at sfxengine.com.