October 15, 2025 · Kuba Rogut
So, you’ve got an echo problem. It's one of the most common and frustrating issues in audio recording, but thankfully, it's solvable. You can either tackle it at the source before you even hit record, or you can clean it up afterward with some clever software.
Your best bet really depends on how much control you want, how much time you have, and just how bad the echo is.
That hollow, distant sound you're hearing? It's caused by sound waves from your voice bouncing off hard surfaces—think walls, desks, ceilings, and even windows. Your microphone picks up the direct sound from your mouth, but it also captures those reflections a millisecond later. The result is a muddy, unprofessional echo.
Fortunately, you’ve got a few solid ways to fix this. We'll walk through three main strategies for removing echo from audio so you can get that crisp, clean sound you're after.
Each of these methods has its place. Prevention is always the gold standard, but when you're stuck with an echoey recording, post-production tools are lifesavers.
Echo cancellation has been a puzzle for engineers for a long time. It really became a major headache back in 1962 with the launch of the Telstar satellite. The signal delays on international phone calls created such a noticeable echo that it spurred decades of innovation. You can dive deeper into the history of echo cancellation to see just how far we've come.
To help you decide which path to take, it’s useful to see how these methods stack up against each other.
Here’s a quick breakdown of the main approaches to echo removal, so you can pick the one that best fits your situation, budget, and technical skills.
| Method | Best For | Difficulty | Typical Cost |
|---|---|---|---|
| Acoustic Treatment | Achieving the most natural, professional sound from the start. | Medium | $50 - $1,000+ |
| DAW Plugins | Editors who need precise, granular control over the final sound. | High | $0 - $500 |
| AI Audio Enhancers | Quick, one-click fixes for podcasters, vloggers, and content creators. | Low | $0 - $25/month |
Ultimately, there's no single "best" method—it's all about what works for you. An AI tool might be perfect for a quick video, while a professional voiceover artist will always benefit from a well-treated room.
This chart gives you a visual idea of how much echo reduction you can realistically expect from each method.
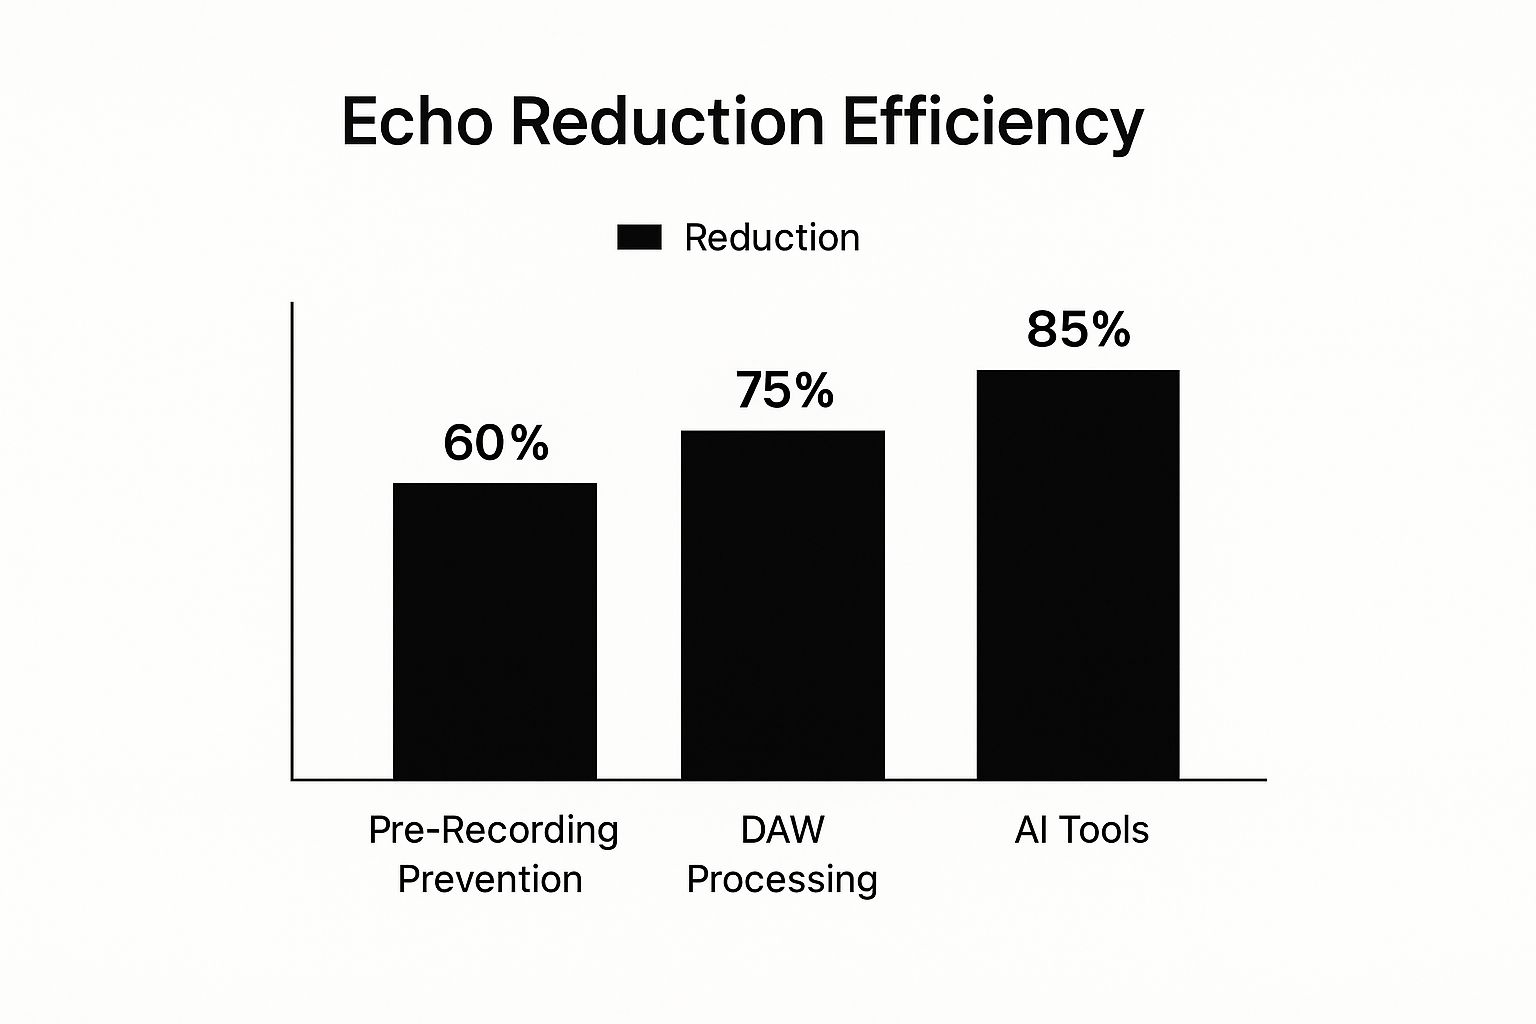
As you can see, treating your room makes a huge difference. But when it comes to post-production, AI tools often deliver the most dramatic improvement with the least effort. For truly flawless audio, the winning combination is often a little bit of prevention mixed with a smart editing workflow.
Let's be honest: the best way to "remove" echo from your audio is to make sure it never gets there in the first place. While post-production tools can feel like magic, nothing beats a clean, raw recording. Getting it right from the start saves a ton of editing headaches and just plain sounds better.
Preventing echo is all about taming your recording environment. Sound waves are like bouncy balls, and they love ricocheting off hard, flat surfaces like drywall, hardwood floors, and glass windows. Your job is to stop those reflections before they hit your microphone.
The room you're in has the single biggest impact on your audio quality. That big, empty living room with high ceilings? It's basically an echo chamber. What you want is a smaller space filled with soft things that can soak up sound.
Think about a walk-in closet packed with clothes—it’s a surprisingly good vocal booth because all that fabric just deadens the sound. You don't have to record next to your shoe rack, but you can use the same logic anywhere.
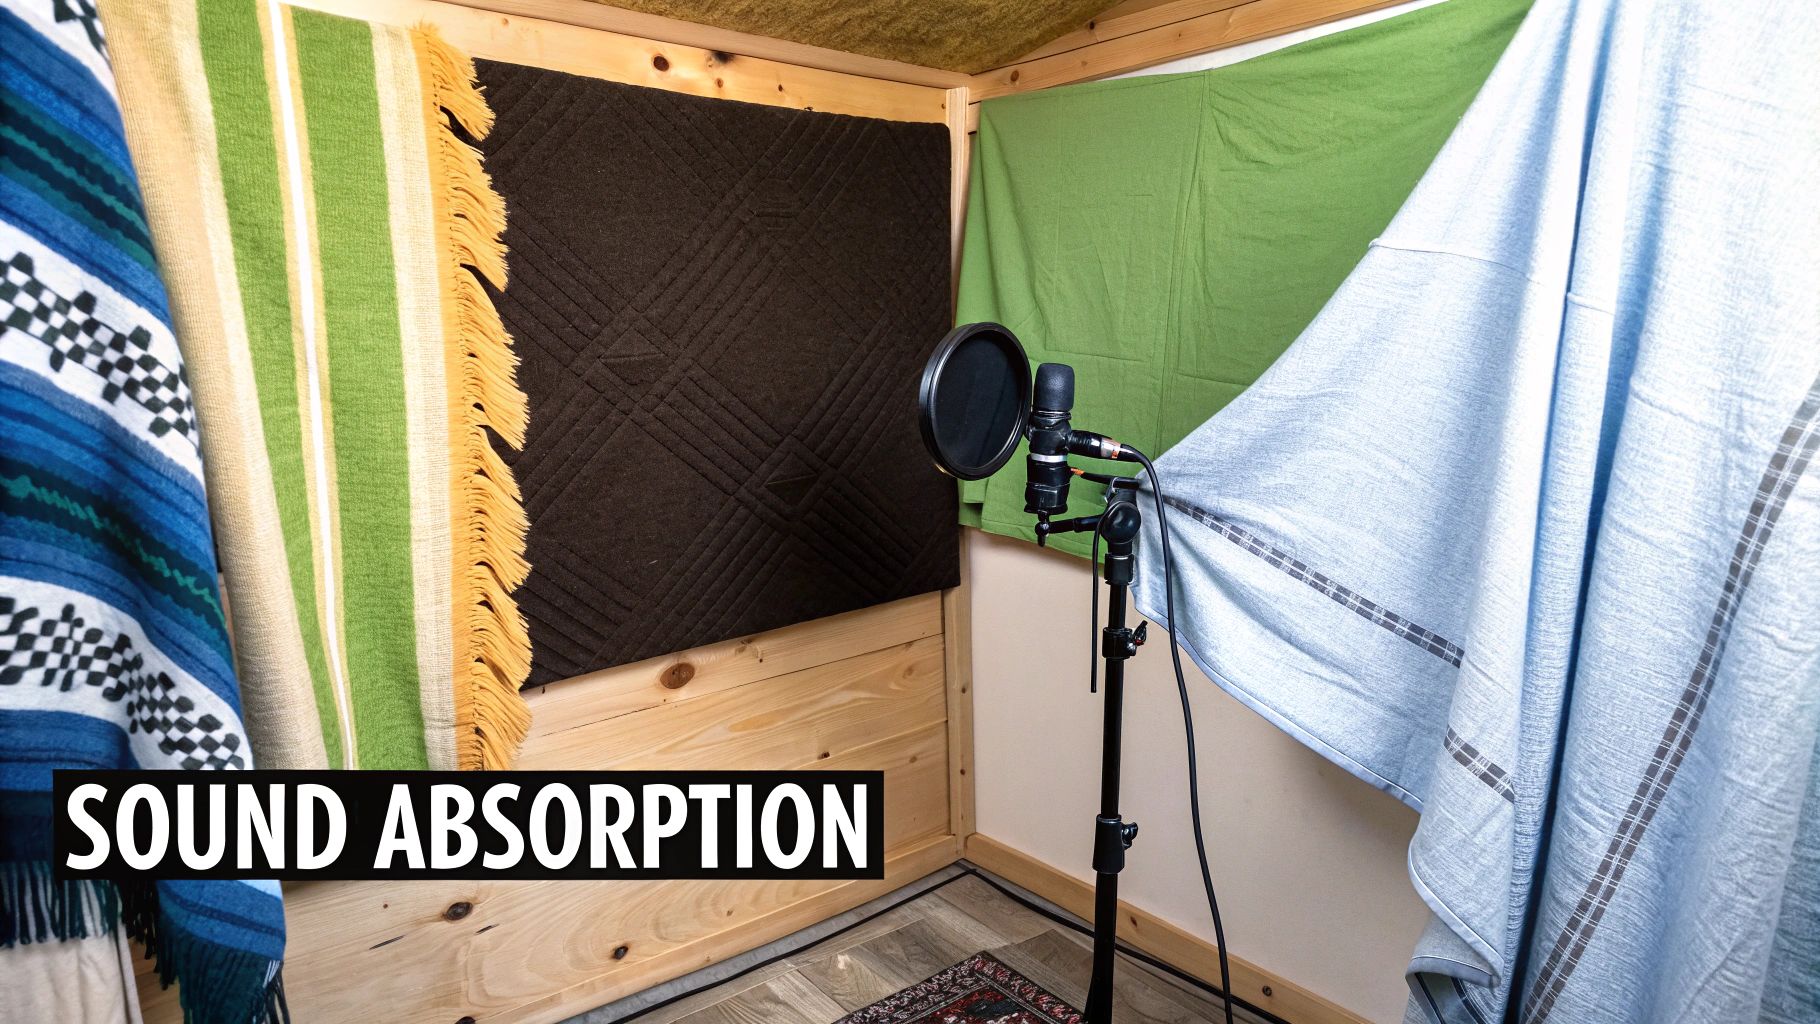
You don't need a high-dollar, professionally treated studio to get fantastic results. You probably have everything you need to tame reflections lying around the house. The mission is to cover up as many of those hard surfaces as you can.
Try adding some of these to your recording space:
The core idea is simple absorption. Hard surfaces reflect sound; soft surfaces absorb it. I've seen people lean a mattress against a wall in a pinch, and it works surprisingly well to kill room echo.
If you're ready for a more permanent setup but don't want to drain your bank account, our guide on acoustic treatment for home studios has some great ideas that won't break the bank.
How you actually use your microphone is just as critical as the room itself. The right mic—and knowing how to use it—can do wonders for isolating your voice from unwanted room noise.
A classic mistake I see all the time is people using a super-sensitive condenser microphone (like the popular Blue Yeti) in a room with no acoustic treatment. Condenser mics are designed to pick up everything, and that includes every last bit of echo. In a space with a lot of reverb, a dynamic microphone is a much smarter choice. They're less sensitive and designed to capture sound from directly in front, rejecting noise from the sides and rear.
Finally, get close to the mic! Aim to speak about 4-6 inches away. This simple trick makes your voice significantly louder than any room reflections. It's all about improving the signal-to-noise ratio, ensuring your voice is the star of the show and pushing that distracting echo way into the background where it belongs.
Sometimes, despite your best efforts, echo makes its way into your recording. When prevention fails, it's time for some post-production surgery, and your Digital Audio Workstation (DAW) is the operating table. This approach is definitely more hands-on than a one-click AI tool, but the level of control you get is second to none.
Whether you're using a free powerhouse like Audacity or a professional suite like Adobe Audition, the principles are the same. We're going to dive in and surgically remove that echo.
Before you touch a single knob, you need to analyze the problem. Your ears will tell you there's an echo, but your eyes will help you pinpoint it.
Load your audio file into your DAW and take a hard look at the waveform. You’ll see the big, chunky waves of your primary audio—your voice, for instance. But look closer. Do you see smaller, repeating waves trailing right after them? Those are your culprits. These little "tails" are the visual fingerprint of echo and reverb.
For an even more detailed view, switch over to the spectrogram. This view shows you the frequency and intensity of your audio over time. Echo often looks like a blurry smear that extends out from your main sound, muddying the clean lines. Identifying where the echo lives visually is the first step to targeting it effectively.
One of your most powerful tools for this job is the Parametric Equalizer (EQ). Echo isn't just a simple copy of a sound; it’s a mess of reflections that tend to pile up in certain frequency ranges, often making your audio sound boomy or muddy.
In most home recording situations, especially in untreated rooms, that messy buildup happens in the low-mid frequencies.
Think about a recording made in a big, boxy room. The echo often creates a muddy, resonant sound somewhere between 200-500 Hz. By making a precise, surgical cut in this range with your EQ, you can reduce the body of the echo without making the original voice sound thin and weak. It’s like sculpting—you’re just chipping away the excess.
Start by applying a narrow cut (this is the "Q" setting on your EQ). Sweep it back and forth across that 200-500 Hz range while listening closely. You'll hear a point where the echo suddenly becomes less noticeable. Don't go crazy here; a gentle cut of 3-6 dB is usually all you need. If you cut too much, the audio will start to sound hollow and unnatural.
Beyond a simple EQ, two other tools are indispensable for fighting echo in a DAW.
Noise Gate: A gate is basically an automatic volume knob. You set a volume threshold, and it mutes any sound that falls below it. This is incredibly effective for cleaning up the silence between words, instantly chopping off the lingering echo tails that give away a roomy recording. The trick is to set the threshold just high enough to cut the echo, but not so high that it cuts off the ends of your words.
De-Reverb Plugins: These are the specialized heavy-hitters. Plugins from companies like iZotope use sophisticated algorithms to intelligently distinguish between the direct sound (your voice) and the reverberant sound (the echo). Instead of just muting quiet parts, they analyze the entire signal and let you dial down the amount of reverb, giving you a much cleaner and more natural result.
The tech that powers these tools has come a long way. Modern Digital Signal Processing (DSP) is built on decades of research, with today's adaptive filters in echo cancelers capable of handling delays up to 64 milliseconds—more than enough for most situations. You can learn more about the fascinating science behind these advances in echo suppression and cancellation.
Of course, all this starts with picking the right DAW for the job. If you're still deciding on your software, our digital audio workstation comparison guide can help you find the perfect fit for your needs and budget.
This manual approach takes a bit of patience, but once you get the hang of it, you'll have complete control over the final sound of your audio.
While manually editing in a DAW gives you total control, sometimes you just need to fix a problem right now. This is where the latest AI-powered audio tools truly come into their own, offering a surprisingly simple way to remove echo from audio.
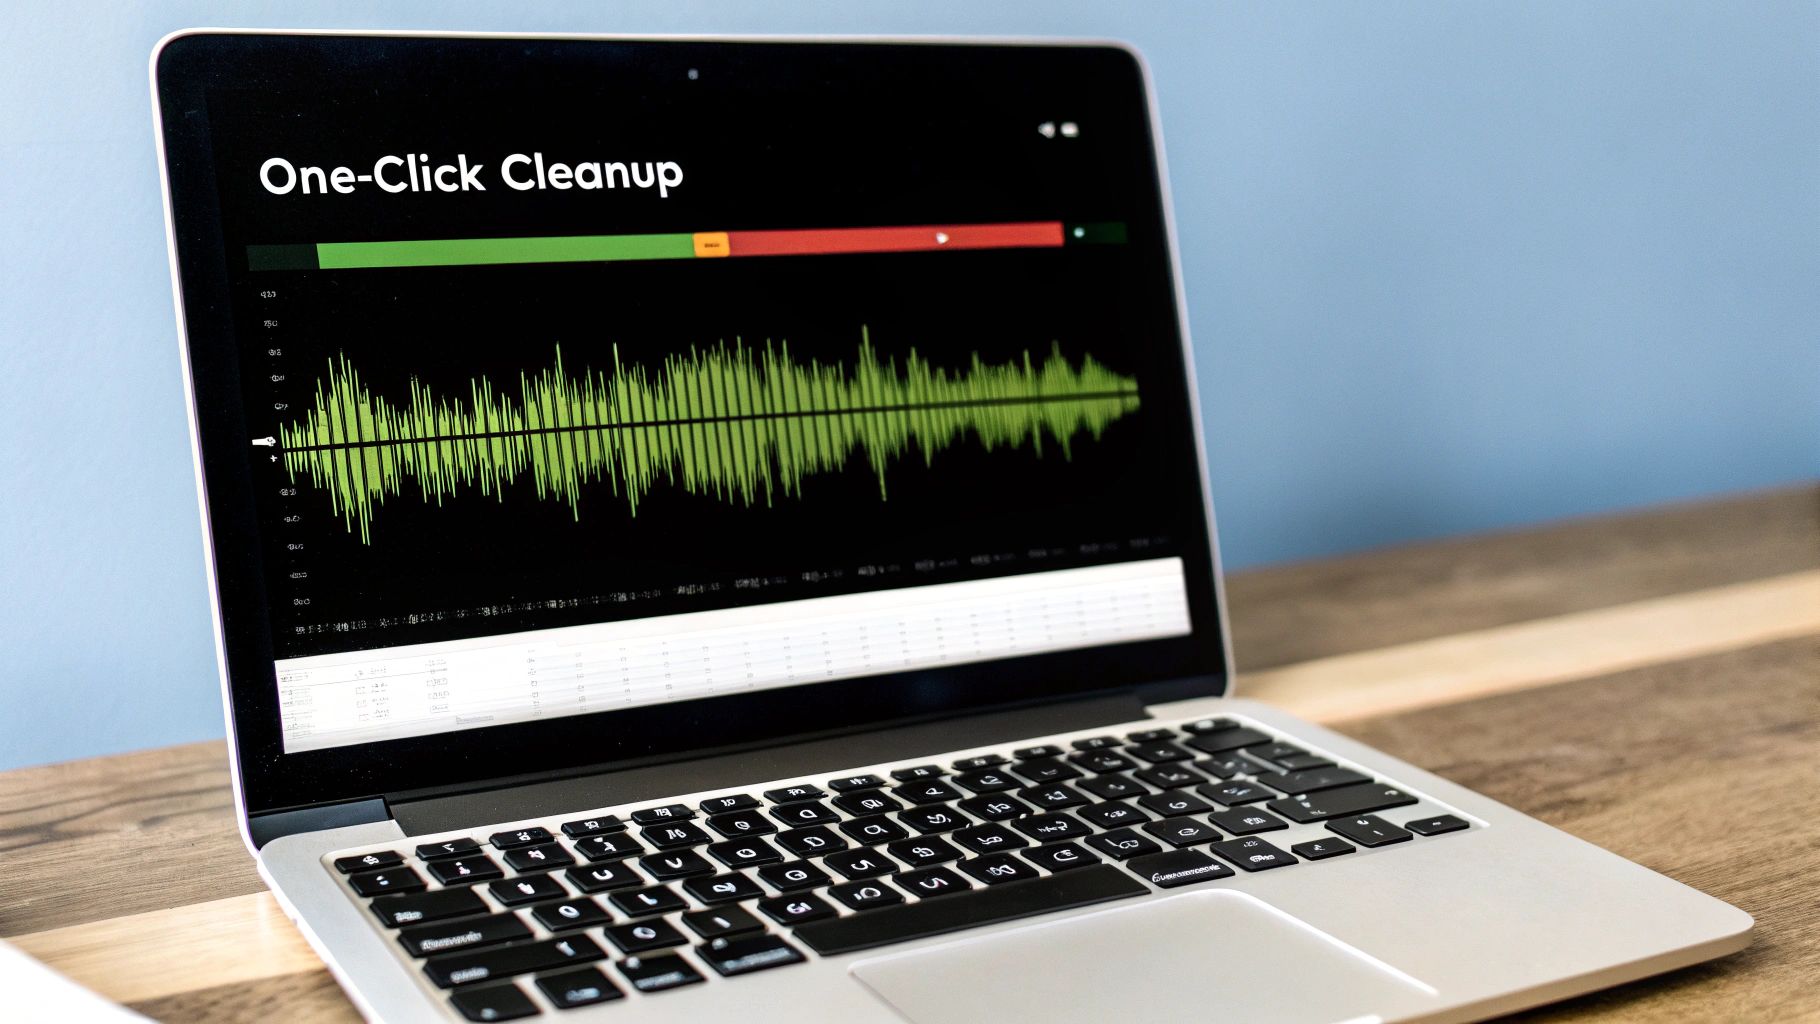
What if you could clean up a terrible recording with a single click? That's the magic promised by services like Adobe Podcast Enhance or Descript's Studio Sound feature. These platforms have been trained on mountains of audio data—both clean and noisy—and have learned to intelligently separate your voice from all that distracting room echo.
The process is almost laughably easy. You just upload your audio file, look for a button that says "Enhance" or "Studio Sound," and flip the switch. The AI gets to work, analyzing your track, isolating the echo, and stripping it out. What you get back is a much cleaner, more professional-sounding file.
For most content creators, this is a total game-changer. Think about a podcaster interviewing a guest who recorded their audio in a big, boomy kitchen. Instead of spending an hour carefully tweaking EQs and noise gates, they can just run the track through an AI tool and get a perfectly usable file back in minutes.
The technology doing the heavy lifting here is incredibly sophisticated. These modern audio echo cancellation (AEC) systems use adaptive filtering and complex algorithms to clean up digital audio. They even overcome tricky technical challenges like "sample rate drift"—tiny timing differences between audio signals that can wreck performance. The AI is smart enough to detect and compensate for these issues automatically. If you're curious, you can get a glimpse into the technical details of modern AEC systems to see just how much complexity these tools handle behind the scenes.
The best part is that these tools make professional-sounding audio accessible to everyone. You no longer need to be an audio engineer to save an important interview or fix the narration on a video.
Of course, this simplicity comes with a trade-off: you give up fine-grained control. When you hit that "Enhance" button, you’re putting your trust in the AI's algorithm. You can't tell it to remove a little less echo or tweak a specific frequency. Most of the time, the results are fantastic, but every now and then, the processing can sound a bit too aggressive or add some strange artifacts.
For 80% of common echo problems—like a remote guest in a reverberant room or a voiceover recorded in a less-than-ideal home office—AI tools deliver results that are more than good enough. The time saved is almost always worth more than the need for painstaking manual control.
To help you figure out which method is right for your project, it’s helpful to see a direct comparison. And if you're looking to explore more options, our complete guide on the https://sfxengine.com/blog/best-ai-tools-for-content-creators is the perfect next step.
Deciding between a traditional Digital Audio Workstation (DAW) and a one-click AI tool often comes down to balancing your need for control against your need for speed. Here’s a breakdown of how they stack up.
| Feature | Manual DAW Editing (e.g., Audition) | AI Audio Tools (e.g., Adobe Podcast) |
|---|---|---|
| Control | Full, granular control over every parameter (EQ, gates, etc.). | Limited to an on/off toggle; no fine-tuning. |
| Speed | Slow and methodical; can take significant time and effort. | Extremely fast; results are often available in minutes. |
| Learning Curve | High; requires understanding of audio principles and software. | Very low; intuitive enough for complete beginners. |
| Quality | Can achieve the most natural, professional results if done well. | Generally very good, but can sometimes sound over-processed. |
In the end, AI tools are an incredibly powerful asset for any creator. They offer a fast, effective, and accessible solution to one of the most persistent audio headaches out there, turning a once-technical nightmare into a simple, one-click fix.
Knowing which tools to use is only half the battle. When you’re trying to clean up an echoey recording, it’s just as important to know what not to do. I’ve seen it time and time again: a few wrong moves can take a salvageable track and turn it into an unnatural, distracting mess.
The single biggest mistake? Overdoing it. In the heat of the moment, it’s easy to get carried away and just crank every setting to the max. Pushing a de-reverb plugin too hard or setting an overly aggressive noise gate might seem like a quick fix for the echo, but it usually butchers the original audio in the process.
This heavy-handed approach almost always introduces digital artifacts—nasty, unwanted sounds created by the processing itself. Suddenly, your audio sounds choppy because the ends of words are getting clipped off, or it takes on a weird, watery, almost robotic quality. Remember, the goal is to make the echo unnoticeable, not the processing.
The real secret, the thing that separates pros from amateurs, is subtlety. Instead of slamming an effect at 100%, try starting with a much gentler setting, maybe around 25-30%. From there, nudge it up slowly, listening carefully at each step. You’re looking for that sweet spot where the echo fades into the background, but the speaker's voice still sounds full and natural.
Here are a few habits that will help you avoid the over-processing trap:
A classic rookie mistake is mixing and editing only on headphones. You’ll be shocked at how thin and weird your audio can sound on regular speakers. Your audience listens on all kinds of gear, and your audio needs to hold up everywhere.
Finally, you have to be realistic. Some audio is just too far gone to be perfectly restored. If the echo in a recording is nearly as loud as the person speaking, no software on earth can cleanly separate them without causing some serious collateral damage.
In those tough situations, the goal has to shift from perfection to simple improvement. Sometimes, just making the dialogue intelligible is the biggest win you can hope for. Understanding these limitations from the get-go will save you countless hours of frustration and help you produce the best possible result, even when the source file is a nightmare.
When you start digging into echo removal, a few questions always seem to pop up. Let's tackle some of the most common ones I hear from people trying to get cleaner audio.
People often use these terms as if they're the same thing, but they're actually two different beasts.
Think of an echo as a distinct, delayed copy of a sound. It's what you get when you shout across a canyon and hear your words come back to you a second later. You can clearly distinguish the original sound from the reflection.
Reverb, on the other hand, is a chaotic jumble of thousands of reflections hitting your ear so quickly they merge together. It's the sound of a large, empty cathedral, creating a sense of space and atmosphere. The good news is, even though they're different, many of the same software tools can help you reduce both.
This is the million-dollar question. While today's software is incredibly powerful, completely erasing severe echo without affecting the original voice is next to impossible. The tools work best when the echo is mild or moderate, and the original sound is still easy to pick out from the reflections.
When a recording is absolutely swimming in echo, your goal has to shift. It's no longer about perfection; it's about making it intelligible. This is where the old saying holds true: an ounce of prevention is worth a pound of cure.
For many situations, yes! Audacity is a fantastic free tool that can make a huge difference. By carefully using its built-in effects like the Noise Gate, Compressor, and Equalizer, you can seriously cut down on unwanted echo. It's a great way to learn the ropes of audio repair without spending a dime.
The trade-off? It takes more manual effort and a bit of a learning curve to get it right. You won't find a "one-click-fix" button here. But if you're on a budget and dealing with mild echo, it’s a perfectly capable starting point.
This is a critical distinction. Most of the popular AI-powered tools, like Adobe Podcast, are trained almost exclusively on the human voice. They're amazing for cleaning up dialogue in podcasts or videos.
However, if you run a full music track through them, the results can be... weird. The AI might misinterpret instruments as noise or create strange, unnatural artifacts in the sound. For music, you're always better off using dedicated de-reverberation plugins inside a proper Digital Audio Workstation (DAW) where you have much finer control.
Looking to create your own unique sound effects without the headache? SFX Engine uses AI to generate the perfect sound from a simple text description. Get all the royalty-free sounds you need for your videos, games, and podcasts at https://sfxengine.com.