January 21, 2026 · Kuba Rogut
This guide breaks down the essential pre-production, recording, and editing work that goes into creating professional-grade Foley for your projects. Following a solid plan—from analyzing your scene to picking the right props—is the fastest way to achieve immersive sound. Honestly, this groundwork is what separates a decent idea from a truly great final product.
Before you even think about hitting record, your success is all in the planning. The pre-production phase is what separates amateur guesswork from professional results. It’s not just about listening for the obvious sounds; it’s about strategically taking a scene apart to build an authentic, compelling atmosphere from the ground up. This methodical approach ensures every sound you capture actually serves the story.
This whole process kicks off with what we call a 'spotting session.' You’ll watch the scene over and over, but not as a viewer—you’re an audio detective now. The goal is to hunt down and identify every single sound that needs to be created, from the big, obvious actions down to the tiniest background noises. If you're just getting started, our guide on what is Foley sound is a great place to build your foundation.
When you’re spotting, you have to think beyond the obvious. A character walking across a room isn't just a set of footsteps. What else is really going on?
The best way I’ve found to keep all this straight is with a detailed cue sheet. This document becomes your roadmap for the entire recording process.
A well-organized cue sheet is the single most important tool in pre-production. It transforms a chaotic list of sounds into an actionable, efficient recording plan, saving you hours of backtracking and guesswork later.
Your cue sheet doesn't need to be fancy. A simple spreadsheet works perfectly. Just create columns for the timecode, the character or object responsible for the sound, a clear description of the sound itself, and a spot for notes on performance or prop ideas.
For instance, a cue sheet for a short scene might look something like this:
| Timecode | Character/Object | Sound Description | Prop Ideas |
|---|---|---|---|
| 00:15:03 | John | Footsteps on gravel path | Shallow tray of kitty litter |
| 00:15:07 | John | Heavy denim jacket rustle | Old pair of stiff jeans |
| 00:16:10 | Door | Old wooden door creaks open | Rusted hinge, slowly rotated |
| 00:17:01 | John | Keys jingle and drop on table | Bunch of old keys, wooden block |
This kind of structured approach forces you to think critically about each sound before you start recording. It leads to a much more focused and productive session when the mics are hot.
With your cue sheet complete, it’s time for the really fun part: gathering your props. This is where creativity takes over. The sound you need is often not made by the actual object you see on screen. A Foley artist's toolkit is a bizarre collection of everyday items that can be manipulated to create a world of sound.
You have to think outside the box. A slow twist of a leather wallet can perfectly mimic the flapping of bird wings. Snapping a head of celery in half creates a shockingly realistic bone break. Don't be afraid to experiment! The goal is to find an object that sounds right, not one that looks right. All this careful planning during pre-production ensures that when you finally hit record, you're capturing every sound with purpose and precision.
You don't need access to a massive Hollywood soundstage to capture pristine, professional-grade Foley. Believe it or not, a great recording environment is less about expensive gear and more about controlling your acoustics. Whether you're in a dedicated room or a quiet corner of your apartment, the main goal is to create a space that is as acoustically "dead" as possible.
This means your first job is to hunt down and eliminate every source of unwanted noise. That low hum from the refrigerator? Turn it off. The air conditioner? Off. Close the windows to block out traffic, birds, and anything else from the outside world. Every little bit of external noise you kill now is one less headache you'll have to fix in post-production.
Your microphone is the most critical piece of hardware in your Foley setup, and the type you choose will fundamentally shape the character of your recordings. Each one is a specialized tool for a specific job.
Finding the right mic is about matching its characteristics to the sound you're trying to capture. A super-sensitive condenser is fantastic for whispers and cloth movement, but it will distort into a mess if you put it in front of a body fall. It's all about picking the right tool for the job at hand.
| Microphone Type | Ideal For Capturing | Key Strengths | Potential Drawbacks |
|---|---|---|---|
| Condenser | Quiet, detailed sounds like cloth rustles, paper crinkles, breathing, and light object handling. | Incredible sensitivity and detail. Captures a wide frequency range with stunning clarity. | Picks up everything, so a dead-quiet room is a must. Can be fragile. |
| Dynamic | Loud, impactful sounds like heavy footsteps, body falls, punches, and door slams. | Very durable and can handle high sound pressure levels (SPL) without distortion. | Less sensitive to fine details and high frequencies compared to condensers. |
| Shotgun | Isolating specific sounds in less-than-ideal rooms. Great for targeted prop work. | Highly directional (unidirectional) pickup pattern rejects sound from the sides and rear. | Sound can feel unnatural or thin if the source moves off-axis. |
Ultimately, the best choice depends on the specific sound's energy and the acoustic limitations of your space. Many experienced artists keep at least one of each type on hand to be ready for any scenario.
Where you place your microphone is just as important as which one you choose. Proximity is power.
The golden rule of Foley is to get the mic as close to the sound source as you can without getting in the way of the performance. This simple trick maximizes the direct sound from your prop while minimizing the reflected sound bouncing off the walls.
For footsteps, I usually place the mic about a foot or two away, pointed down at the surface where the action is happening. If I'm working with smaller, handheld props, I'll position the mic just out of frame, angled right at the source. Don't be afraid to experiment! Moving the mic even a few inches can dramatically change the sound's presence and character.
Here's a key takeaway from years of experience: The goal is always to capture a clean, dry sound. You can add reverb, echo, and room tone later in the mix, but you can never fully remove it from a bad recording. A clean source file gives you total creative freedom.
Creating an acoustically treated space doesn't have to drain your wallet. You can get fantastic results by focusing on one thing: sound absorption. All you're trying to do is stop sound waves from bouncing around your room and creating unwanted echo.
Heavy, dense materials are your best friend here. Drape thick blankets or moving pads over bare walls, doors, and even furniture to soak up reflections. I've seen pros pile pillows and cushions in the corners of a room, which is brilliant because that's where muddy low-frequency sounds love to build up.
Even a closet packed with clothes can serve as a surprisingly effective vocal booth for recording small prop sounds or narration. For a more detailed breakdown, check out our full guide on acoustic treatment for home studios.
This is exactly how a Foley artist thinks when choosing props. It's a creative problem-solving process.
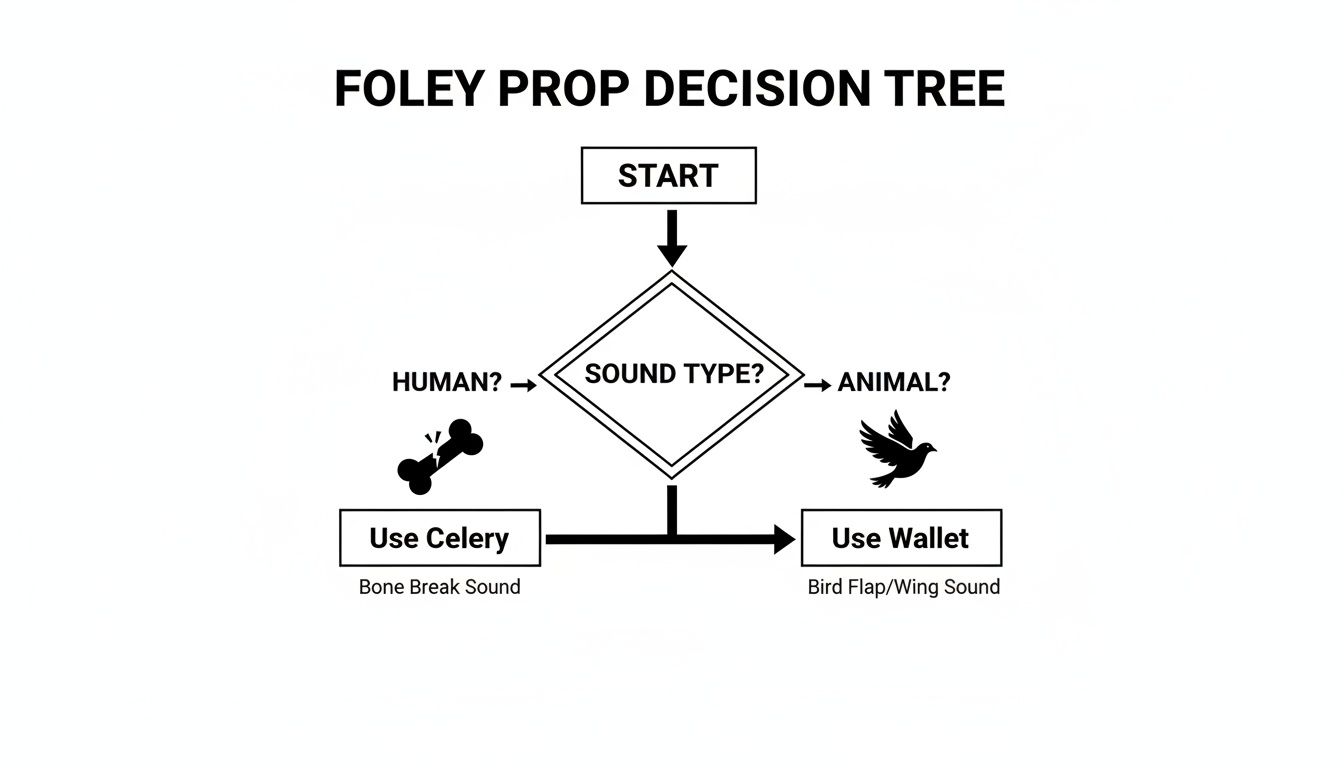
As the diagram shows, the most effective prop is rarely the literal object you see on screen. It highlights the "think-outside-the-box" mentality that is so central to great Foley. By combining these DIY acoustic treatments with smart mic choices, you can build a recording space that delivers clean, professional audio for any project.
Once your space is dialed in and the microphone’s live, you step into the world of performance. Foley isn’t just noise—it’s an interpretive art where every movement carries character and emotion.
This hands-on practice dates back to the 1920s, when radio shows depended on artists crafting sound effects on the fly. By the time The Jazz Singer premiered in 1927, Jack Donovan Foley and his team at Universal were synchronizing footsteps, door creaks and cloth rustles to projected film, capturing each take in perfect sync. That same live-timing spirit drives our work today. You can dive deeper into the history of Foley in sound design on Wikipedia).
Think of yourself as the on-screen character—if they’re stomping in fury, you stomp with conviction. If they’re exhausted, your steps must sag and shuffle.
Your posture, grip on a prop, and the speed of your motion all imprint onto the audio. This subtle physicality is what turns a generic footstep into that character’s specific walk.
Sync is the tricky part. Loop the clip and watch it until the motion lives in your muscle memory.
• Run Through Without Sound: Move in time with the scene, silent, to lock in the timing.
• Highlight Sync Points: Pinpoint critical frames—heel strike, object pick-up, a paper’s rustle.
• Adjust Your Force: A feather-light tap versus a heavy slam demands different pressure. Explore various dynamics until the sound feels true.
I close my eyes and listen, imagining the rhythm as a heartbeat. When I can “hear” the action internally, performing on mic becomes instinctive.
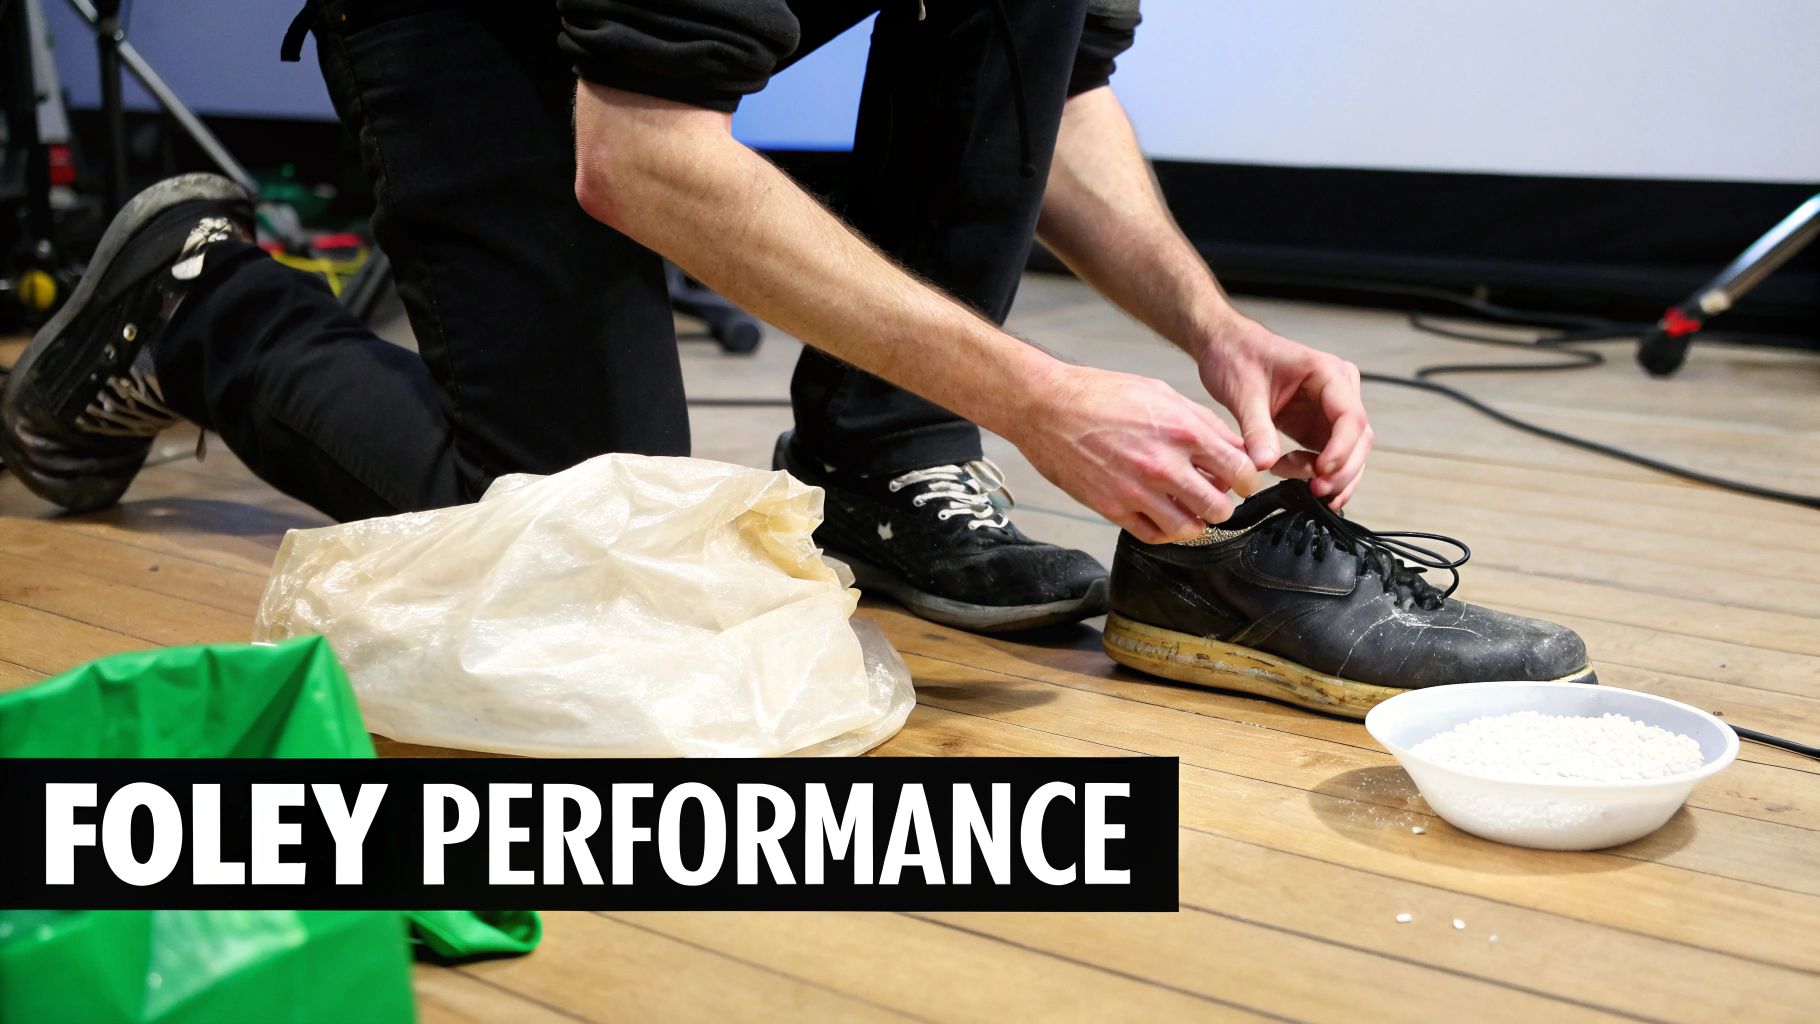
Footsteps often anchor a scene, but authenticity comes from the right underfoot material. Build simple Foley pits—boxes or trays filled with textures that match your shot.
• Gravel: A shallow wooden crate loaded with kitty litter. Shift your weight and drag your feet to add realism.
• Hardwood: A few solid planks on a firm base will give you that crisp, resonant tone.
• Concrete: One paving slab or a concrete block works—test different shoe soles for fresh results.
• Snow: Crumple a chip bag or squeeze cornstarch slowly in your hand, then layer in a touch of salt for a convincing crunch.
Sometimes a single prop can’t deliver the depth you need. By combining elements in one live take, you create texture that’s tough to fake later.
Imagine a character wading through tall grass. Swish a handful of straw while gently tearing off pieces of magnetic tape from an old cassette. The straw forms the body of the sound, and the tape adds a crisp edge—together, they feel alive.
Getting clean recordings is a great start, but it’s only half the battle. The real magic, where raw sounds are molded into a believable part of the story, happens right inside your Digital Audio Workstation (DAW). This is your workshop for organizing, cleaning, and shaping every sound to serve the picture.
The first job is often the most tedious but absolutely essential: comping your takes. You might have ten recordings of a single footstep, and it's your job to sift through them to find the one performance that nails the character's weight, mood, and timing. Think of yourself as a sculptor, chipping away all the excess material until only the perfect take remains.
Once you’ve picked your hero takes, it’s time for a deep clean. Even in a quiet room, a sensitive mic will pick up faint electrical hum, tiny clicks, or the sound of the Foley artist shifting their weight. Your first pass is all about isolating the sound you want and getting rid of everything else.
Start by trimming the fat. Use your DAW’s tools to slice off the silence and noise at the beginning and end of each clip—a process we call "topping and tailing." A crucial pro tip: always apply tiny fades to the start and end of every single clip. We’re talking just a few milliseconds. This simple step is your best defense against the audible pops and clicks that can instantly cheapen your mix.
What about noise within the performance itself? A gentle hand with a noise reduction plugin can work wonders. The key word is gentle. Go too far, and you’ll suck the life right out of the recording, leaving it thin and artificial. The goal is to push the noise down just enough that it vanishes into the final mix, not to obliterate it completely.
Professional sound editing is an invisible art. The goal isn't to make the Foley stand out, but to weave it so seamlessly into the world that the audience never even thinks to question it. A clean, tight edit is the bedrock of this illusion.
With your clips all cleaned up, you can get to the heart of the matter: synchronizing the Foley to the picture. This is a game of precision. The thud of a footstep has to land on the exact frame the heel hits the pavement. The click of a key turning in a lock must be perfectly married to the visual action.
Don't be afraid to work frame-by-frame. Zoom way in on your DAW's timeline and nudge your audio clips back and forth until the sync is dead-on. This process, often called "spotting to picture," is what sells the reality of the scene. A sound that’s even a couple of frames late can shatter the audience's immersion.
In the real world, a single action rarely produces a single sound. When someone walks, you don't just hear a footstep. You hear the scuff of the sole, the rustle of their jeans, maybe even the jingle of keys in their pocket. This is where the true artistry of layering comes into play.
By stacking multiple, distinct audio elements, you can build a composite sound that feels far more textured and authentic than any single recording ever could.
Let's look at a few real-world examples:
The best way to manage this is to dedicate separate tracks for each element—a track for footsteps, another for cloth, and a third for specific props. This keeps you organized and gives you total control to tweak the volume and processing of each layer independently, blending them into one cohesive, convincing sound. This is how you transform a collection of recordings into a living, breathing soundscape.
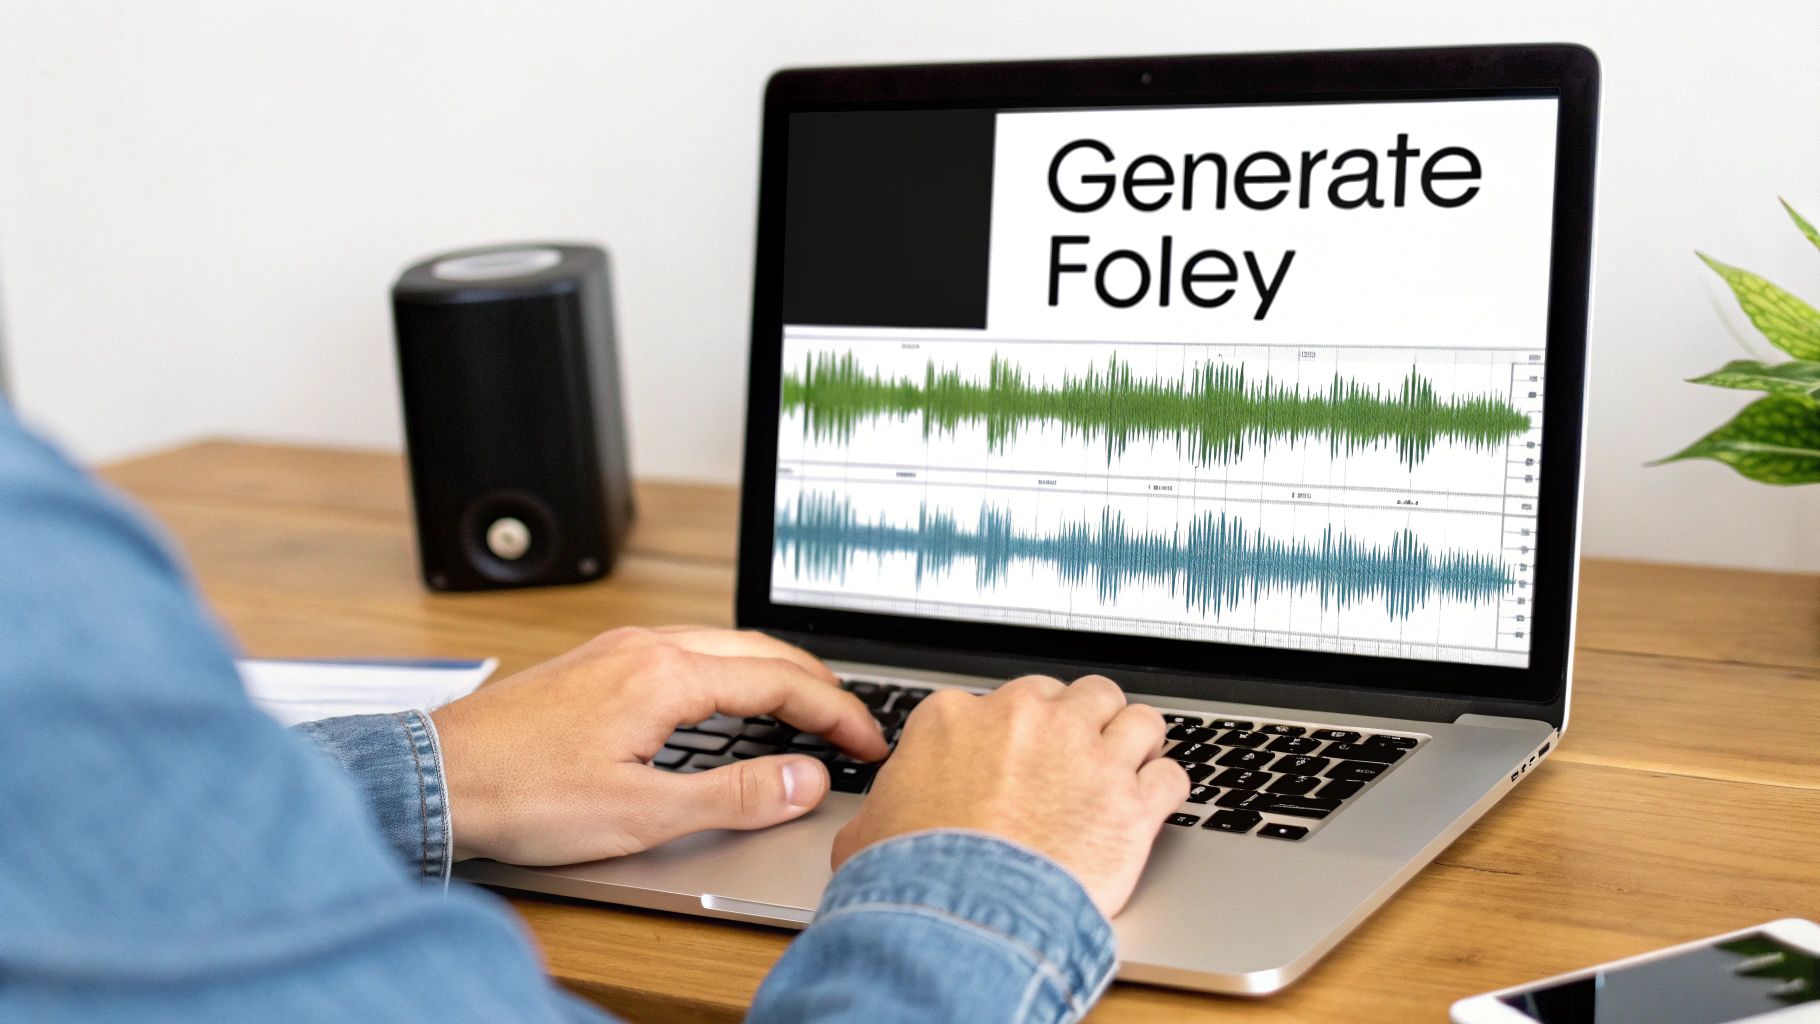
Traditional Foley remains an art form, but these days many sound designers mix in AI-generated effects to save time and expand creative options. Instead of hunting for obscure props or booking extra studio hours, you describe your sound in words and let AI turn it into a polished audio file.
Picture needing the squelch of a biomechanical claw closing around crystal. You don’t own that prop, but with AI you type a few lines and voilà—it’s ready for your timeline.
A clear, detailed prompt is your roadmap to a convincing result. Overly broad descriptions tend to sound flat. Treat your prompt like you would a screenplay: every nuance counts.
Focus on these four areas:
Compare these two prompts:
AI Foley can fill library gaps or serve as a base layer for your live recordings. You might generate:
Once you have that initial track, drop it into your DAW and blend in real mic recordings—like your actor’s footsteps or jacket rustle—for a richer soundscape.
You can read more about how this works in our guide on the AI sound effect generator.
Key Takeaway: Treat AI as a creative partner. Let it craft the impossible or plug library holes, then layer in human performances for depth and authenticity.
After generating a clip with SFX Engine, you’ll want to polish it. The platform lets you:
For game developers and podcasters, this means less time recording and more time iterating. In fact, modern multitrack capture workflows can boost efficiency by 40% compared to the single-track days of early Foley. On a macro level, the sound design market is on track to hit $1.2 billion, with Foley fueling 25% growth in VR/AR audio.
You can find more insights on the history and evolution of Foley at Boom Box Post. To explore advanced capabilities in sound generation, including custom foley, you might find valuable content in a guide to the best AI tools for content creators.
Even after you’ve walked through the techniques, certain hurdles pop up when you’re in the booth. Here, I’m tackling those frequent Foley queries that tend to slow down your flow—so you can keep creating without guesswork.
Grasping the distinctions among audio roles is crucial. Many artists pause, wondering where Foley ends and general sound effects begin. Let’s clear that up.
When you think of Foley, imagine someone performing right alongside the picture—footsteps on gravel, the creak of a door hinge, a jacket brushing against a chair. Those are custom recordings made to sync perfectly with an actor’s movements.
In contrast, sound effects live in libraries. You’ll grab them for big-impact moments:
Because Foley requires that on-the-spot performance quality, it shows up in 95% of major films, TV shows, and games. For instance, in Cyberpunk 2077, Foley made up 40% of the 200,000+ audio files. And yes, AI-driven shortcuts now shave up to 50% off production time—while still keeping those subtle performance details intact.
Discover more about Foley artists in film and gaming production on sadentertainment.com.
Foley usually breaks down into three hands-on areas, each with its own gear and prop lineup.
Can I record good Foley with just my phone?
Absolutely—but temper expectations. In a silent, treated room, your phone mic can capture decent takes. You’ll spend extra time cleaning up noise and reverb in your DAW, but it’s a solid way to get started.
The heart of Foley lies in experimentation. Pair your recording chops with diligent editing, and you’ll layer in that emotional realism that elevates every scene.
Ready to streamline your process and skip the endless prop hunts? SFX Engine lets you generate custom, royalty-free Foley and sound effects from simple text prompts. Elevate your films, games, and podcasts with precisely the sound you need. Try SFX Engine for free and start creating today.