October 12, 2025 · Kuba Rogut
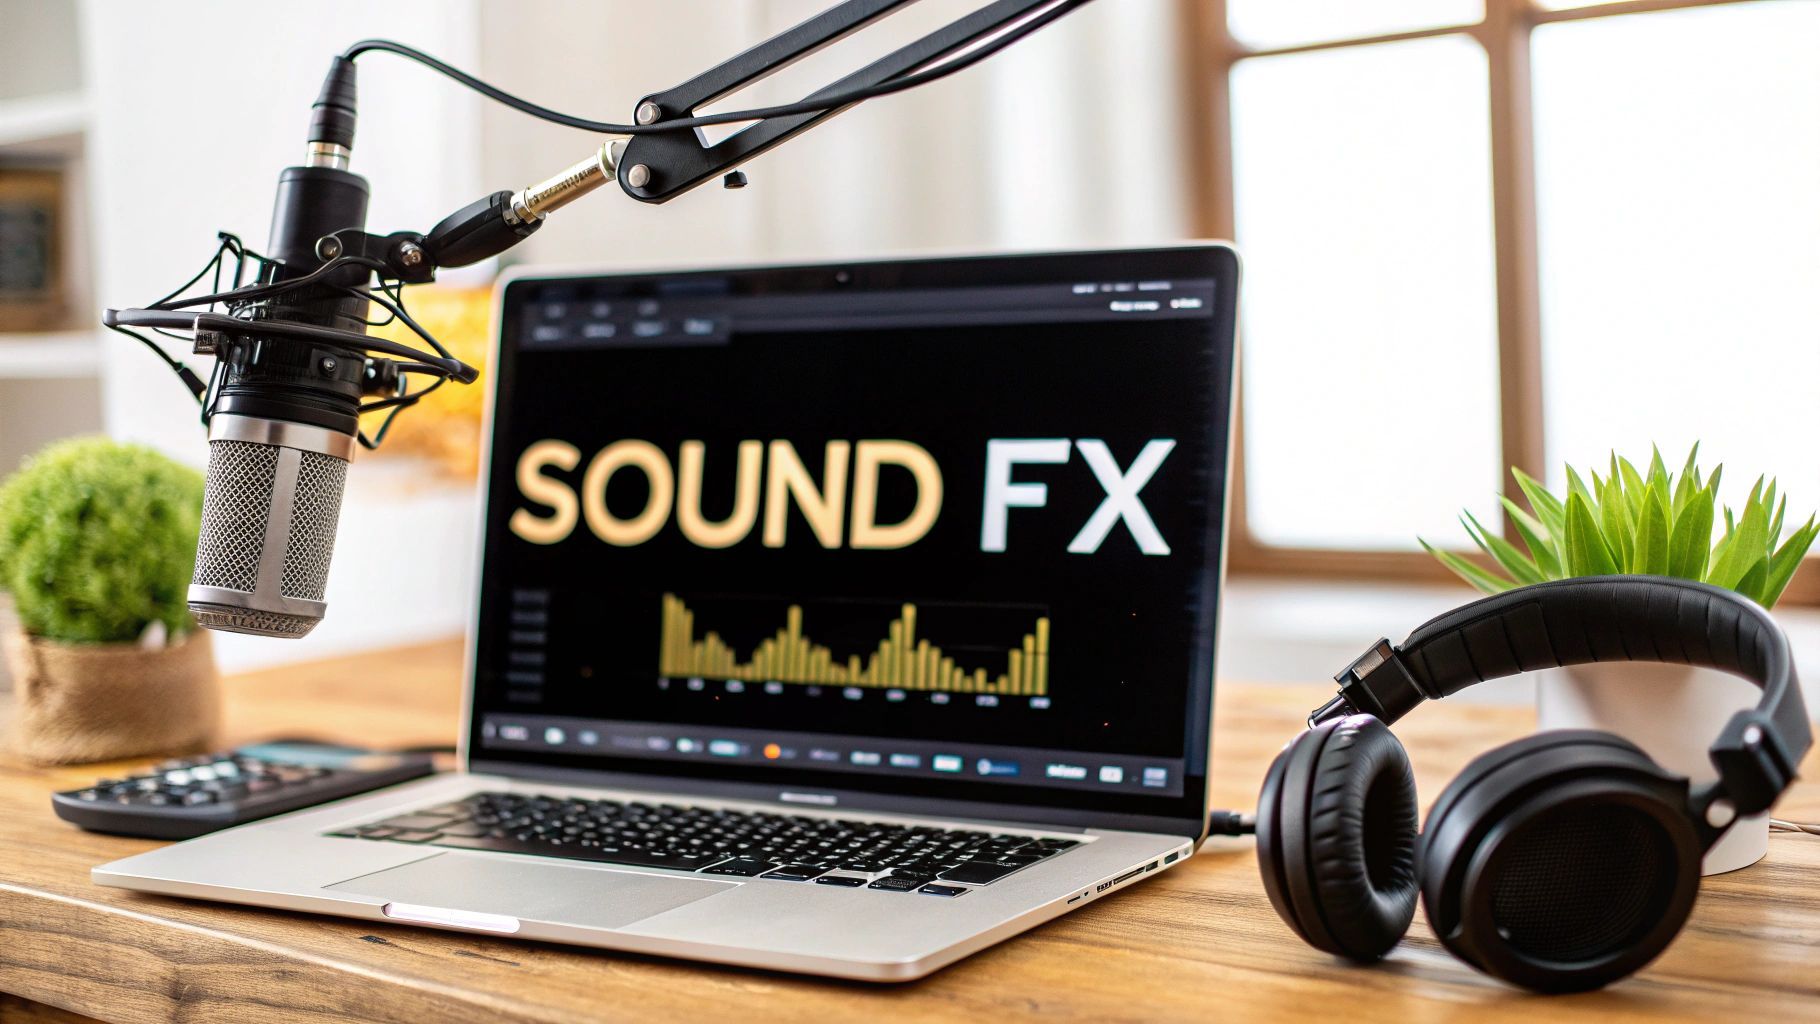
So, you want to make your own sound effects? Great. When you get right down to it, there are really only three ways to go about it. You can record audio from the real world, create sounds from scratch digitally, or get creative by layering existing sounds to build something completely new. Each path offers its own unique flavor for bringing your project's audio to life.
The first big decision you'll make is how you're going to create your sounds. Are you going to record, synthesize, or layer? This choice will shape the entire feel and authenticity of your final product. Each approach has its own strengths, and knowing which one to use is part of the craft, whether you're aiming for gritty realism or fantastical sci-fi.
This infographic breaks down how these three core methods are typically used in modern sound design.
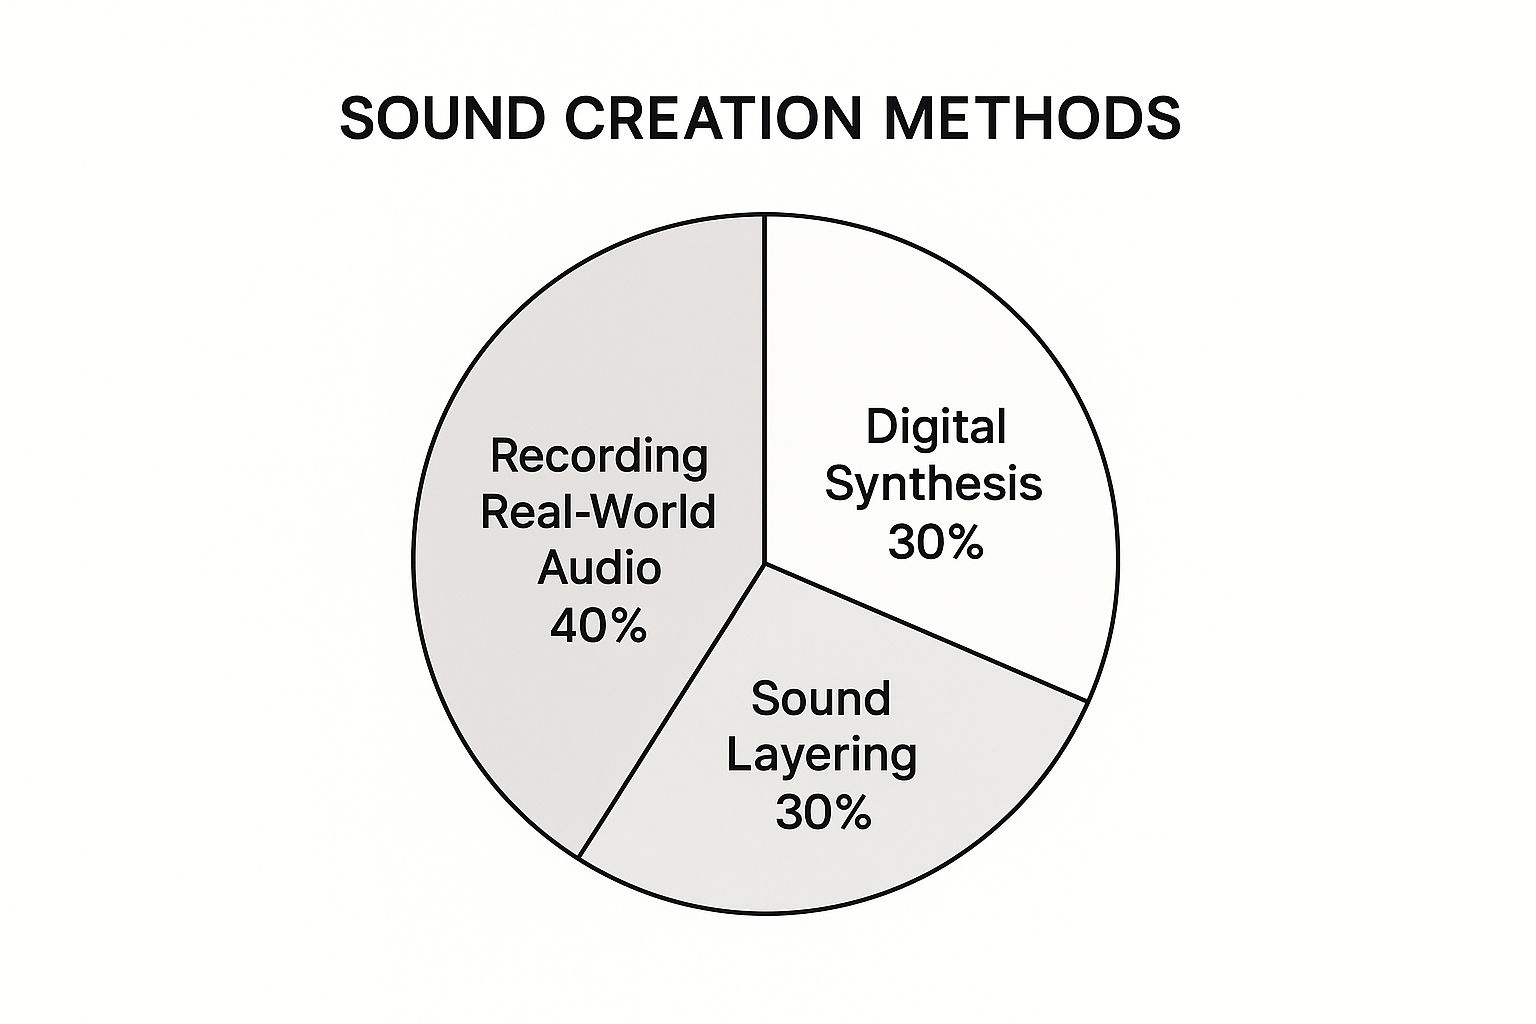
As you can see, while capturing real-world audio is a huge part of the process, digital synthesis and layering are just as vital. A seasoned sound designer has all three in their toolkit and knows when to reach for each one.
To help you decide which route is best for your current project, here’s a quick rundown of the main sound creation methods.
| Method | Best For | Required Tools | Pros | Cons |
|---|---|---|---|---|
| Recording/Foley | Creating organic, realistic, and authentic sounds that ground a project in reality. | Microphone, audio interface, portable recorder, quiet space. | Unmatched realism; highly creative and hands-on; unique results. | Can be time-consuming; requires specific equipment and a quiet environment. |
| Digital Synthesis | Sci-fi, fantasy, UI sounds, or anything that doesn't exist in the real world. | Digital Audio Workstation (DAW), synthesizer plugins (VSTs). | Limitless creative potential; precise control over every parameter. | Can sound artificial if not done well; steep learning curve for complex synths. |
| Layering/Libraries | Building complex, impactful sounds quickly, like creature roars or huge explosions. | DAW, high-quality sound library, editing plugins. | Efficient and fast; can create massive, detailed sounds; highly versatile. | Relies on the quality of your source library; can be less original if not modified. |
Choosing the right method often comes down to the specific needs of your project, but many of the best sound effects are actually a blend of all three.
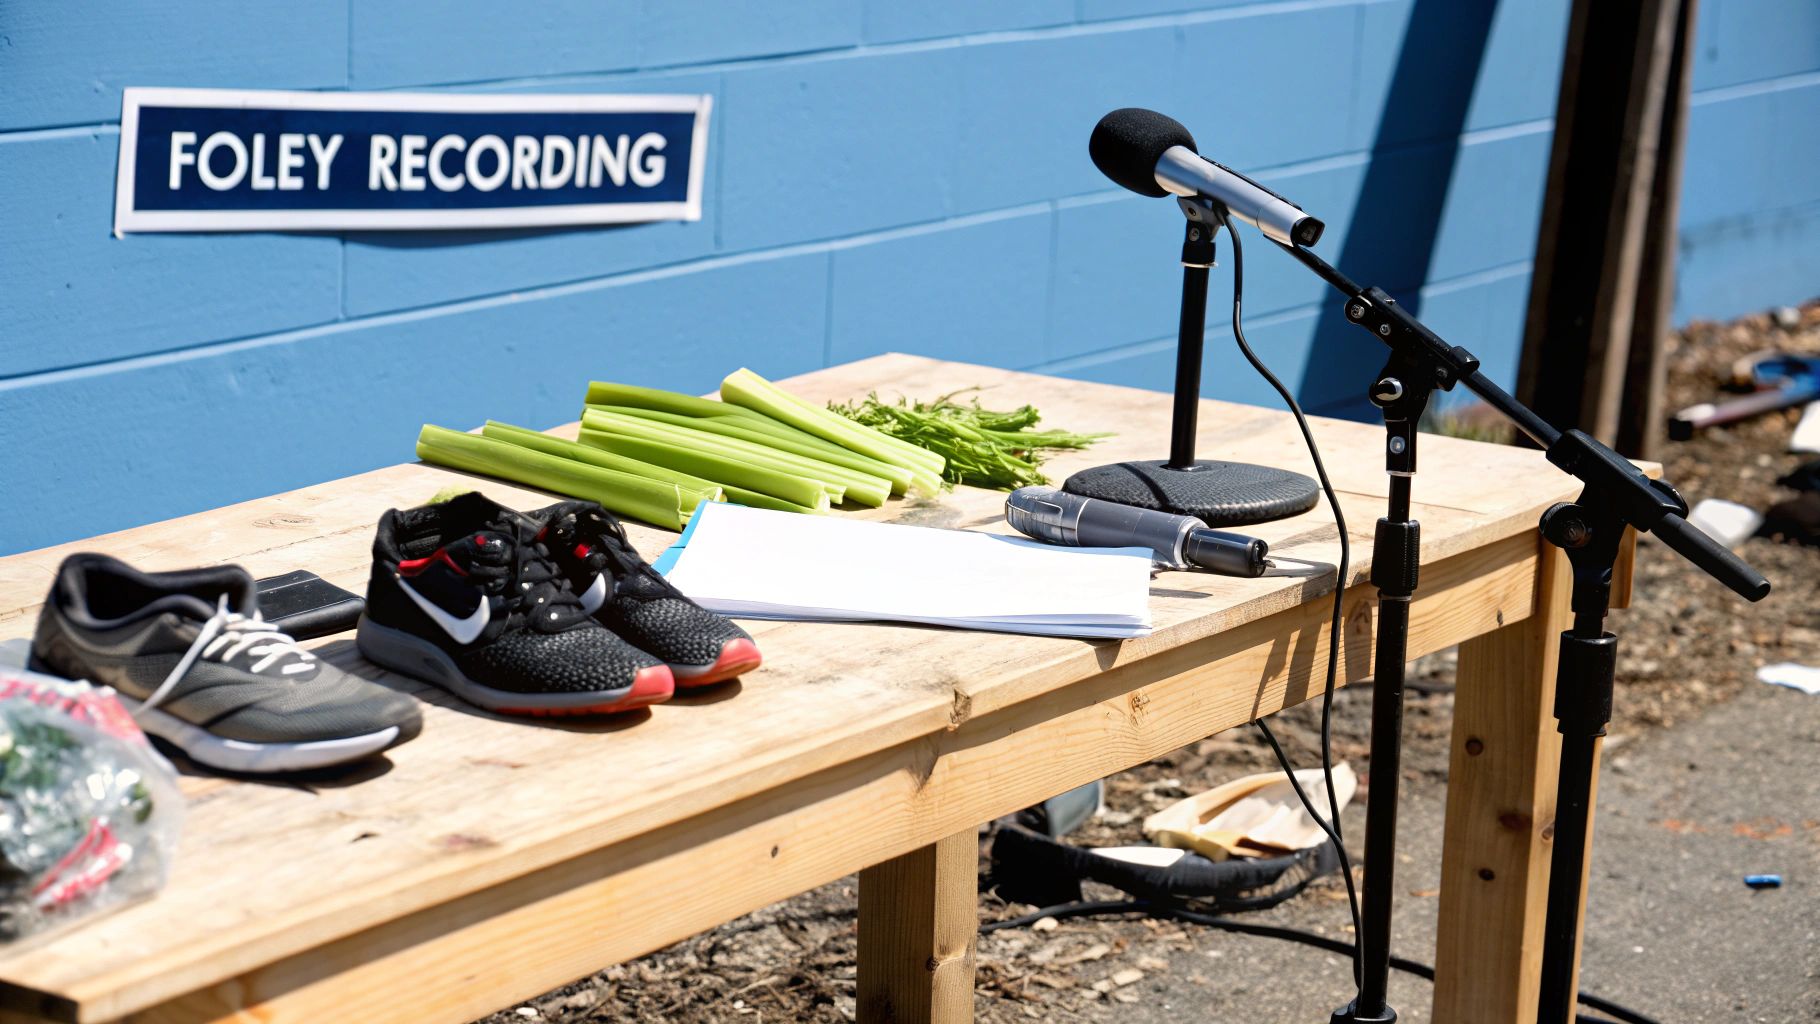
The most direct way to get a sound is to simply go out and capture it. This is the world of Foley and field recording. Foley is the art of performing sounds in sync with a picture, and it’s where a lot of the magic happens. Think snapping a celery stalk to mimic a bone breaking or crinkling cellophane for a crackling fire. It’s a hands-on craft that adds a tangible, grounded reality to a scene.
Field recording is the other side of that coin. It’s all about capturing specific sounds or ambiences out on location, like the roar of a distant waterfall or the unique buzz of a city at night. For pure, authentic environmental audio, nothing beats it.
What about sounds that don't exist in our world? That's where digital synthesis comes in. Here, you're literally building audio from the ground up using software synthesizers. It's the go-to method for crafting the futuristic hum of a spaceship, the ethereal chime of a magic spell, or the slick blip of a user interface.
By twisting knobs and manipulating waveforms, oscillators, and filters, you become an audio architect. You're building completely unique sonic textures that don't have to obey the laws of physics. It’s pure imagination turned into sound.
The third approach is a powerful hybrid technique: combining multiple existing sounds to create something bigger and more complex. You might take the growl of a bear, layer it with the screech of metal, and add a deep, rumbling bass tone to design a terrifying monster roar. It’s an incredibly versatile way to add depth, character, and impact.
This method relies heavily on high-quality sound effect libraries. In fact, the global sound effects services market, valued at USD 1.25 billion, is expected to hit USD 2.5 billion by 2033, largely because of the ever-growing demand for top-notch audio in media. With over 85% of projects using digital libraries, it’s a cornerstone of the modern workflow.
Getting a handle on these three techniques is the foundation of great sound design. To really get into the nuts and bolts, take a look at our detailed guide on how to create sounds using these very methods.
Before you can start making killer sound effects, you need to get your gear in order. Don't worry, building a solid sound design toolkit doesn't mean you need a Hollywood-sized budget. In fact, some of the most iconic sounds are born from surprisingly simple, everyday items. Your journey really starts with just a few key pieces of hardware and software.
The heart of any recording setup is your microphone. If you plan on capturing sounds out in the wild, a portable field recorder like the Zoom H1n is a fantastic place to start. It's small, dead simple to use, and perfect for grabbing ambient textures or specific Foley sounds whenever inspiration strikes.
For more controlled work back at your desk, you might opt for a traditional condenser or dynamic mic. These usually plug into an audio interface and give you a different flavor, often capturing more detail and clarity—great for things like voice-overs or intricate indoor Foley.
Once you have your raw audio, you need a place to chop it up, clean it, and mix it into something new. This is where a Digital Audio Workstation (DAW) comes in, and thankfully, you don't have to break the bank. There are some great guides out there to the best free Digital Audio Workstation software that can get you up and running.
Free options like Audacity are surprisingly powerful for basic editing, cleaning, and layering. They give you all the fundamental tools you need to trim clips, get rid of background noise, and add simple effects. It's a perfect entry point for anyone just starting out.
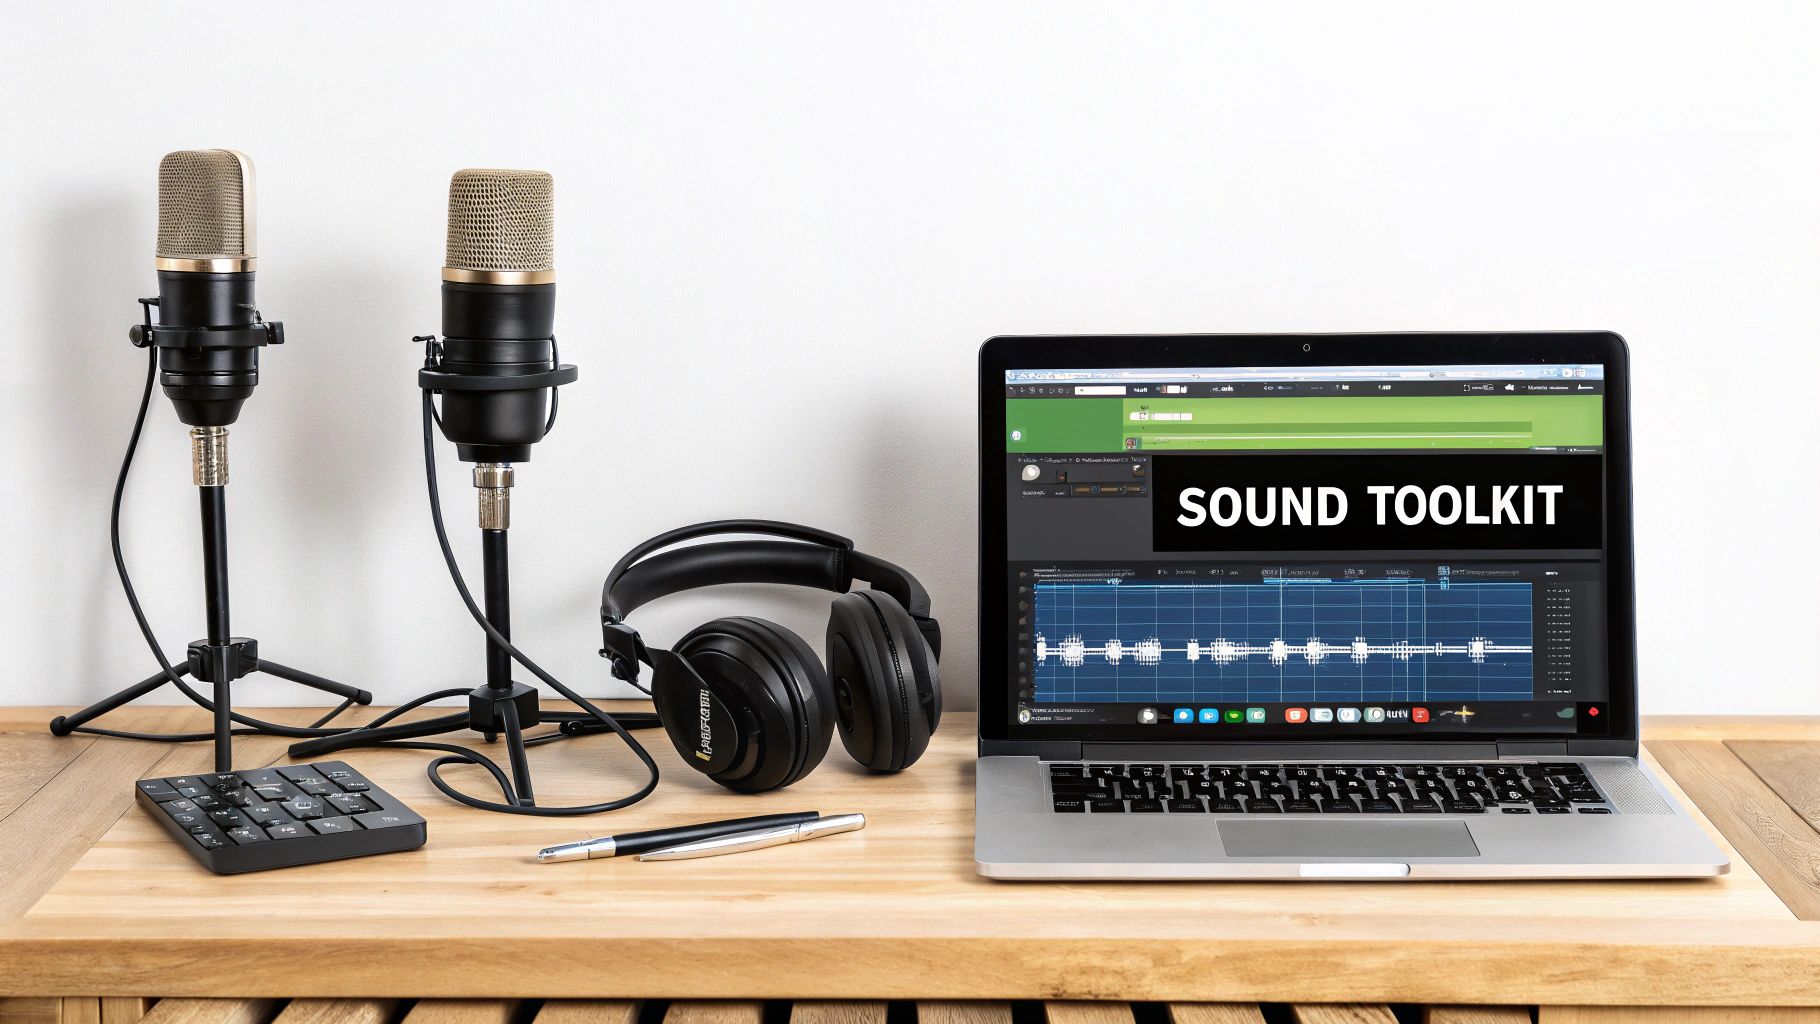
This is what a typical DAW looks like—a multitrack timeline where you can arrange and edit all your different audio clips. As your projects get more ambitious, you might find yourself graduating to industry-standard DAWs like Pro Tools, Ableton Live, or Reaper. These paid platforms offer more advanced features, better plugin support, and workflows designed for pro-level audio production.
Here’s a non-negotiable rule of sound design: you can't edit what you can't hear properly. That's why a decent pair of monitoring headphones is an absolute must-have. Unlike consumer headphones that color the sound (usually by cranking the bass), studio monitors give you a flat, neutral frequency response. You hear the sound exactly as it is.
This honesty is crucial for making precise EQ adjustments and ensuring your final effects sound good on everything from a movie theater system to a phone speaker.
Beyond the tech, some of your best tools are probably already lying around your house. Your home is a goldmine for Foley sound sources.
Don't underestimate the power of everyday objects. I've used crinkling cellophane to create a crackling fire, snapped celery stalks for bone breaks, and even manipulated an old leather jacket to make monstrous growls. Your creativity is the only real limit.
Putting together a basic Foley kit costs almost nothing. Just start collecting things with interesting sonic potential.
Your first toolkit doesn't need to be fancy. Start with a reliable way to capture audio, a DAW to edit it in, and a good pair of headphones. From there, just let your imagination run wild and explore the sonic possibilities hidden all around you.
Sometimes, the perfect sound just can't be found in a library or built from scratch with a synthesizer. When you need something that feels truly organic and grounded in the real world, there's no substitute for grabbing a microphone and capturing it yourself.
This is where sound design gets wonderfully hands-on. It’s a mix of sonic detective work and pure creative play, and it revolves around two core practices: Foley and field recording. While the two often go hand-in-hand, they represent different approaches to bringing a project to life with authentic audio.
At its heart, Foley is the art of performing and recording sounds in sync with a picture, usually in a controlled studio environment. It’s how sound designers create the swish of a character’s jacket, the clink of a coffee mug, or the subtle creak of a floorboard underfoot.
But here’s the fun part: the sound you hear is almost never made by the object you see on screen. That's the real magic of Foley.
A brutal punch in a fight scene? That could just be a sound artist smacking a frozen chicken with a leather glove. A dragon's leathery wings? Try flapping a big vinyl raincoat. This is where your imagination gets to run wild.
You don't need a million-dollar studio to get started. A quiet room and a bit of creativity are all you need.
The beauty of Foley is that it trains your ear to hear the sonic potential in everyday objects. Suddenly, a walk through the hardware store becomes a treasure hunt for new sounds.
If you want to go deeper into this fascinating craft, our guide on what is Foley sound is a great place to start.
Where Foley is about creating sounds, field recording is about capturing them. This is how you get the rich, immersive ambiences of a city street, the delicate sound of rain on a window pane, or the thundering roar of a distant jet engine.
Getting a great field recording really comes down to two things: your location and your microphone placement.
First, you have to scout the right spot. If you need a clean recording of a car door slam, setting up next to a busy construction site is a non-starter. You need to find places free from unwanted noise pollution—traffic, humming air conditioners, or even distant conversations can ruin a take. This often means recording at odd hours, like the crack of dawn or late at night.
Once you’ve found your quiet spot, how you position your microphone will completely shape the character of the sound.
Think of your microphone as a camera lens. Where you point it dramatically changes the final result. There's no single "right" way to do it; it's all about your creative intent.
Let’s imagine we’re recording the sound of someone walking on dry leaves.
The best way to learn is by doing. Record the same sound from multiple distances and angles. Listen back to the differences. You'll quickly build an intuition for how the microphone "hears" and gain a versatile library of sonic textures to use in your projects.
Sometimes, the sound you need simply doesn’t exist in the real world. You can’t exactly record a starship’s engine or the crackle of a magic spell. This is where the real fun begins, and where you get to build audio from scratch. Two of the most powerful tools in your arsenal for this are digital synthesis and creative layering.
Put simply, synthesis is the art of generating sound electronically using software instead of a microphone. It might sound intimidating, but the basic building blocks are actually quite intuitive.
At the core of any synthesizer, you’ll find oscillators. Think of them as the raw source of the sound—they produce a basic, repeating waveform, like a smooth sine wave or a buzzy sawtooth wave. This is your sonic clay.
From there, you start sculpting. You’ll use filters to carve away or boost certain frequencies, which is a lot like using an EQ to shape the tone. Then, you use envelopes to control how the sound’s volume behaves over time—its attack (how fast it kicks in), its decay, sustain, and finally, its release (how it fades out). Just by tweaking these few controls, you can craft anything from a quick, zappy laser blast to a slowly evolving atmospheric drone.
This is a look at the interface for Audacity, a fantastic and free Digital Audio Workstation (DAW). It shows how you can visually arrange different sound files on separate tracks to layer them together.
Each one of those horizontal tracks is a unique sound element, making it easy to see how the different pieces of your final effect are timed and combined.
While synthesis is about making a sound from nothing, layering is all about fusion. It’s the technique of combining several existing sounds to create something entirely new—and often much more complex and impactful than any of the individual parts.
Let’s say you’re trying to design a dragon’s roar. Just using a single recording of an animal growl will probably sound pretty thin and unconvincing. But what happens when you start stacking sounds?
Suddenly, you’ve gone from a simple animal growl to a sound that feels massive, terrifying, and totally unique. It’s a lot like cooking; you’re just combining different sonic ingredients to get the flavor just right.
The tools for this are becoming more accessible every day. The audio industry is expected to see a 40% increase in the use of AI-powered sound tools, from dialogue enhancers to generative sound effect engines. In fact, more than 70% of creators on platforms like YouTube and TikTok are already using affordable digital sound libraries and AI-powered tools to achieve high-quality audio. If you want to dive deeper, you can explore more audio industry trends that are shaping the future of sound.
Let's walk through building a classic sound effect: the futuristic automatic door. We'll construct it piece by piece by layering three distinct sounds, with each one playing a specific role in the final effect.
The real secret to great layering is making sure each sound has its own job and its own space. You don't want layers fighting for attention; you want them working together to tell a story.
Here’s a simple "recipe" breaking down how we could tackle this.
| Layer | Sound Source | Editing Applied | Purpose in the Mix |
|---|---|---|---|
| Layer 1 | Pneumatic hiss (like bus air brakes) | Shorten the clip, add a slight fade-in. | Creates the initial pssshh of pressure being released as the door starts to move. |
| Layer 2 | Small servo motor whirring | Pitch it up a bit to sound more high-tech. | This is the mechanical movement, the whirrr that fills the middle frequencies. |
| Layer 3 | Metallic clank or click | Add some reverb to place it in a hallway. | Provides the satisfying clunk as the door locks firmly into its open position. |
When you play these three simple recordings together, they form a single, cohesive sound that tells a clear story: the door depressurizes, slides open, and locks in place. This is the fundamental workflow for making believable sound effects—even for things that are completely imaginary. By getting comfortable with synthesis and layering, you can build just about any sound you can dream up.
Getting a raw sound captured or generated is a great start, but the real artistry—the stuff that makes an effect feel truly professional—happens in post-production. This is where you roll up your sleeves to clean, shape, and refine the audio. It's how you turn a simple recording into a polished, project-ready asset.
Think of it like this: your raw recording is a rough sketch. Editing and mastering are the inking and coloring that bring it to life. This entire workflow is what elevates your audio from amateur to pro, whether you're working with Foley recordings, synthesized tones, or complex layered creations.
The first order of business is always to clean up the source recording. No matter how pristine you think your recording environment is, there will almost always be unwanted noise hiding in the details. It could be a subtle hiss from your gear, a low-frequency rumble from a nearby air conditioner, or tiny clicks and pops you didn't notice at the time.
Your Digital Audio Workstation (DAW) is your best friend here. A noise reduction plugin is perfect for this. Just find a moment of pure background noise (what we call "room tone"), let the plugin analyze it, and it will intelligently subtract that hiss from the entire clip. For those sharper, more abrupt clicks, you can often zoom right in on the waveform and manually "draw" them out with a pencil tool or use a dedicated de-clicker.
The goal isn't to create sterile, absolute silence. That can actually sound unnatural. The real aim is to remove distractions so the listener's ear is drawn only to the sound you want them to hear. A touch of room tone can make an effect feel more grounded and real.
Once the audio is clean, the real fun begins: shaping the sound.
This is where you truly start to sculpt the character of your sound effect. The two workhorses for this job are Equalization (EQ) and compression. They're a dynamic duo for controlling the tonal balance and punch of your audio.
Equalization (EQ) is all about tweaking the balance of different frequencies—essentially a super-powered tone control.
Compression, on the other hand, wrangles the volume. It evens out the dynamic range, which is the difference between the loudest and quietest parts of a sound. This can make an effect feel more powerful and glued together. Applying compression to a gunshot, for instance, can tame the initial "crack" while lifting the fading "tail," making the whole sound feel more cohesive and impactful.
Is your sound happening in a tiny closet or a vast, echoing cathedral? Reverb is how you tell that story. Short for reverberation, this effect simulates the natural echoes a sound makes as it bounces off surfaces in a physical space.
By artfully applying reverb, you can convincingly place your sound in any environment imaginable.
The trick is to match the reverb to the visual context of your project. This one effect is incredibly powerful for creating believable, immersive audio worlds that sell the scene.
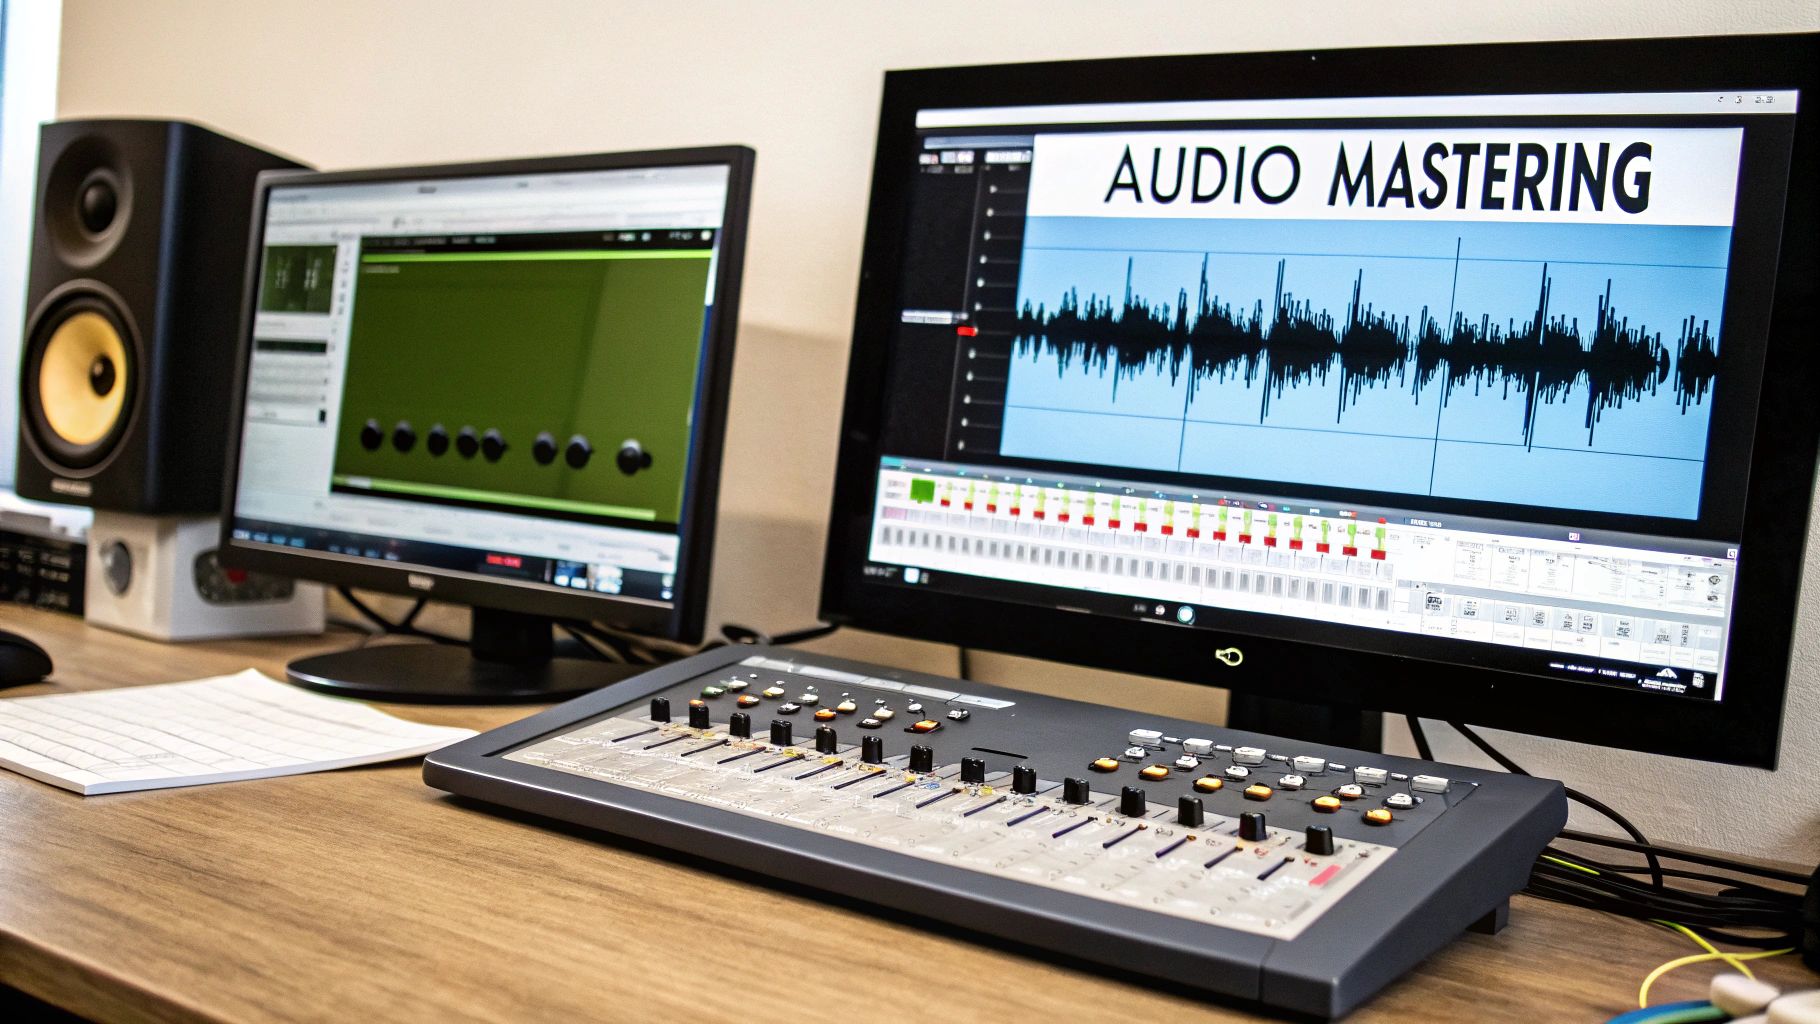
With your sound perfectly polished, the last step is to get it out of your DAW and into a usable file. This is where mastering and exporting come in. Mastering for individual sound effects is usually simpler than for music—the main goal is just to make sure the volume is consistent and at a good level for its final use. Our guide on how to master audio dives much deeper into the core principles.
Finally, you’ll export your file into a standard format. .WAV is the go-to for high-quality, uncompressed audio, while .MP3 is great for smaller, compressed files when space is a concern. The right choice really depends on the project's needs.
This is especially true in video games, which have become a massive driver for custom sound effects. A single open-world game can feature over 200,000 unique sound assets. And with over 90% of game audio pros relying on digital tools, getting your formatting right is non-negotiable. For a closer look, you can check out some insights on the global sound effects services market.
As you dive deeper into creating your own sound effects, you're bound to hit a few snags or have questions pop up. That’s a good thing—it means you’re actually doing the work and pushing your skills.
To help you get past those common hurdles, I’ve put together answers to some of the questions I hear all the time from people just starting out. Think of it as a quick field guide for staying focused, organized, and out of trouble.
Let's get the scary legal stuff out of the way first. Navigating copyright can feel intimidating, but the core principle is actually pretty simple: if you didn't make it yourself or get a clear license to use it, don't use it. That means ripping audio from a movie, a video game, or some random YouTube clip is off-limits. It's a surefire way to get a takedown notice or worse.
The absolute safest route? Create everything from scratch. When you record or synthesize your own sounds, you own 100% of the rights. No questions asked.
Of course, sometimes you need something specific and don't have the time or resources to create it. That's where royalty-free sound libraries come in. When you get a sound from a reputable source, you're also getting a license that spells out exactly how you're allowed to use it.
My best advice? Always, always read the license agreement for any asset you download. It might seem like a boring bit of text, but it’s the only thing that guarantees your project is legally sound and you can actually make money from your work.
I can't stress this enough: a messy sound library will absolutely destroy your creative flow. When inspiration strikes, you need to be able to find that perfect crunch or swoosh in seconds. Spending ten minutes clicking through folders named "New Sounds Final_v2" is a momentum killer.
A logical folder system is non-negotiable. Start with broad, high-level categories that fit how you think and work. A structure I've found really effective is:
From there, get more granular with subfolders. For example: Foley > Footsteps > Gravel. The real key is just being consistent. Once you have a system, your library transforms from a digital junk drawer into one of your most powerful creative tools.
Ever create a sound that feels conceptually right but just lacks... oomph? We’ve all been there. Making sounds hit harder is all about adding perceived weight and energy. Luckily, a few trusty techniques can get you there.
First off, layering is everything. A single recording of a gunshot can sound pretty thin and weak on its own. But start layering it with a deep, low-frequency thump for body and a sharp, crackly snare for the attack, and suddenly it sounds huge. Don't be shy about stacking different elements to build one cohesive, powerful sound.
Next, get friendly with compression. A good compressor helps tame the dynamics of your sound, gluing the layers together and giving it a solid, punchy feel that cuts through the mix.
Finally, pay attention to your low-end frequencies. A little EQ boost somewhere in the 80-150 Hz range can add serious weight to impacts and explosions. Just be careful not to overdo it, or you'll end up with mud instead of punch.
Creative block is real, and it happens to every single one of us. When you feel like you’re just staring at a blank timeline, the best thing you can do is step away from the computer and go find some new sonic ideas.
Inspiration is literally everywhere.
The idea is to refill your creative tank. The more you consciously listen to the world around you and the work of others, the bigger your mental library of sonic ideas will become.
Ready to skip the recording and editing and start creating instantly? SFX Engine uses AI to generate custom, royalty-free sound effects from a simple text prompt. Get exactly the sound you need, ready for commercial use, in seconds. Generate your first sound effect for free at SFX Engine.