December 27, 2025 · Kuba Rogut
At its core, adding a sound effect in Premiere Pro is simple. You import an audio file, drag it to your timeline, and move it around until it lines up with your video. But that's just the starting point. The real magic—the stuff that makes your videos feel professional—happens in the mixing, layering, and polishing.

Have you ever watched a video and felt something was just... off? Chances are, the sound was the culprit. Great sound design is the invisible layer that guides emotion, builds tension, and anchors visuals in reality. Take it away, and even the most beautiful cinematography can feel flat and hollow.
This guide isn't just about the drag-and-drop basics. We're going to get into the details of how to add sound effects in Premiere Pro to build a truly immersive soundscape. It's about thinking like a sound designer for a thriller—every creaking floorboard, distant siren, or unsettling hum is a deliberate choice made to pull the audience deeper into the story.
Creating a rich audio experience isn’t about finding the loudest explosion or the slickest whoosh. It’s about building a believable world from the ground up, layering different audio elements together to support the narrative. A full, professional mix almost always contains these key ingredients:
Good sound design is 50% of the moviegoing experience. Your audience may not consciously register every little sound cue, but they will absolutely feel its absence. It’s what makes a project feel polished and complete.
Throughout this guide, we'll cover everything from finding unique audio—using both traditional libraries and AI tools like SFX Engine—to mastering the hands-on techniques you need in Adobe Premiere Pro. Once you understand how these layers interact, you can start turning basic video timelines into genuinely memorable experiences. To get a wider perspective on the topic, check out our complete guide on using sound effects for video editing for more foundational concepts.
Before you can even think about mixing in Premiere Pro, you need the right audio files. This is a foundational step, and the quality of the sounds you choose will make or break your final edit. For years, the go-to solution was digging through stock audio libraries. The problem? You're often stuck with recurring subscription fees and a limited pool of sounds that have already been used in a thousand other videos.
There’s a much better way to work these days: AI sound generation. This approach gives you complete creative control, letting you dream up the exact sound you need and get it on demand. Best of all, it's unique to your project and totally royalty-free.
Let's say you're cutting a tense scene in an abandoned warehouse. You don't just need "footsteps." You need something very specific, like 'damp footsteps on a concrete floor in a cavernous warehouse with a slight metallic echo.' Good luck finding that in a stock library. You’d probably waste an hour trying to layer generic sounds, and it still wouldn't feel quite right.
This is exactly where an AI sound effect generator becomes your secret weapon. Using a tool like SFX Engine, you can just type that description as a prompt. In seconds, the AI generates a custom audio file that perfectly matches your vision.
AI isn't here to replace your creativity. It’s here to eliminate the most tedious part of the job—the endless search. This frees you up to focus on the actual art of sound design instead of scrolling through audio libraries.
It completely flips the script. Instead of forcing your scene to fit an existing sound, you create a sound that’s tailor-made for your scene.
As you're sourcing your sound effects, keep a close eye on the file format. MP3s are everywhere because they're small, but for professional work, you absolutely want an uncompressed format.
Here’s the breakdown:
Bottom line: always choose WAV files when you have the option. The larger file size is a tiny price to pay for the quality and flexibility you get inside Premiere Pro.
The move toward generative audio is picking up serious steam. At Adobe MAX 2025, Adobe Research even showed off a "Generate Sound Effects" feature for Premiere Pro Mobile, letting users create custom SFX from text prompts right in their mobile timeline. It was adopted by 2.5 million mobile editors. Considering that good sound design can increase viewer retention by 52% and that editors can spend over 30 hours a week just searching for SFX, this technology is changing the game. You can read the full announcement from Adobe Research to see where things are headed.
Alright, let's get your sound effects into Premiere Pro and set up a system that keeps your edit clean and fast. This is the first real step, and getting it right from the jump makes a huge difference, especially when you're up against a deadline.
A messy project panel is a slow project panel. We can fix that.
While it’s tempting to just drag files from a folder straight into your project, there's a much smarter way to work. Pop open the Media Browser panel instead. Think of it as a direct window into your computer's drives from within Premiere Pro. You can browse, preview, and scrub through audio files before you ever import them, which keeps your actual project bin from getting cluttered with stuff you don't need.
Once you've found the sounds you want, it's all about organization. The biggest mistake I see editors make is dumping all their assets into one giant, chaotic pile. Don't do that. Instead, take a minute to create dedicated bins—that's just what Premiere calls folders.
A logical bin structure is your best friend. For a typical video project, I usually start with something like this:
I was once cutting a corporate video on a ridiculously tight turnaround, and I needed a specific "whoosh" for a logo reveal. Because I had my bins set up just like this, I found the perfect sound in under ten seconds. That’s the kind of speed you gain from being organized.
As you bring your files in, keep an eye on what kind of audio you're working with. Premiere will tell you if a clip is Mono (one channel), Stereo (two channels), or 5.1 Surround. This is crucial because it dictates where you should place the sound on your timeline. A mono footstep, for example, belongs on a mono track, while a stereo atmospheric sound needs a stereo track to maintain its sense of space and direction.
An organized project panel isn't just about looking neat; it's a direct reflection of how efficiently you can work. Taking five minutes to set up bins at the start will genuinely save you hours of frustrated searching later.
The world of audio is also evolving right inside our editing software. For instance, in December 2025, Epidemic Sound launched its AI-powered Studio directly within its Premiere Pro plugin. This tool lets editors generate entire soundtracks, complete with foley and music, that sync perfectly to their video in seconds—a task that used to be a massive time-sink. You can learn more about how this integration is shaking up professional workflows by exploring the AI Studio announcement.
Okay, your sound effects are imported and organized. Now for the fun part: placing them on the timeline and actually bringing your project to life. This is where the real artistry comes in. It’s less about just dropping files and more about listening closely and timing everything perfectly to create a believable, immersive soundscape.
The goal is to make every single sound feel like it belongs. A footstep shouldn't just be near the character's foot hitting the pavement; it needs to land on the exact frame of impact. A door shouldn't just close; the latch should click right as the visual lock engages. Nailing this level of detail is what really separates the pros from the amateurs.
To get this right, you’ll want to get comfortable with zooming in and out of your timeline. The plus (+) and minus (-) keys are your best friends here. When you zoom way in, you can see the audio waveform in incredible detail. This makes it a breeze to spot the peak of a sound—like the loudest part of a glass shatter—and line it up perfectly with the visual action.
Scrubbing back and forth endlessly to find the right spot is a huge time-waster. A much better way to work is with markers. As you play your sequence, just hit the M key on your keyboard at the exact moment a sound needs to happen. This drops a little marker on the timeline, giving you a clear, magnetic target to snap your audio clip to.
Imagine you're cutting a fight scene. You can play it down in real-time and just tap 'M' for every single punch, kick, and body blow. Once that's done, you can grab your library of punch and whoosh sounds and just snap them directly to your markers. It's so much faster than hunting for each moment by hand.
Think of your timeline as a musical score. The video is the melody, and every sound effect is a note that has to be played at the perfect moment to create a harmonious composition. If even one note is off, the whole thing can feel jarring.
This simple workflow—import, organize, select—is your best defense against a chaotic and frustrating editing session.
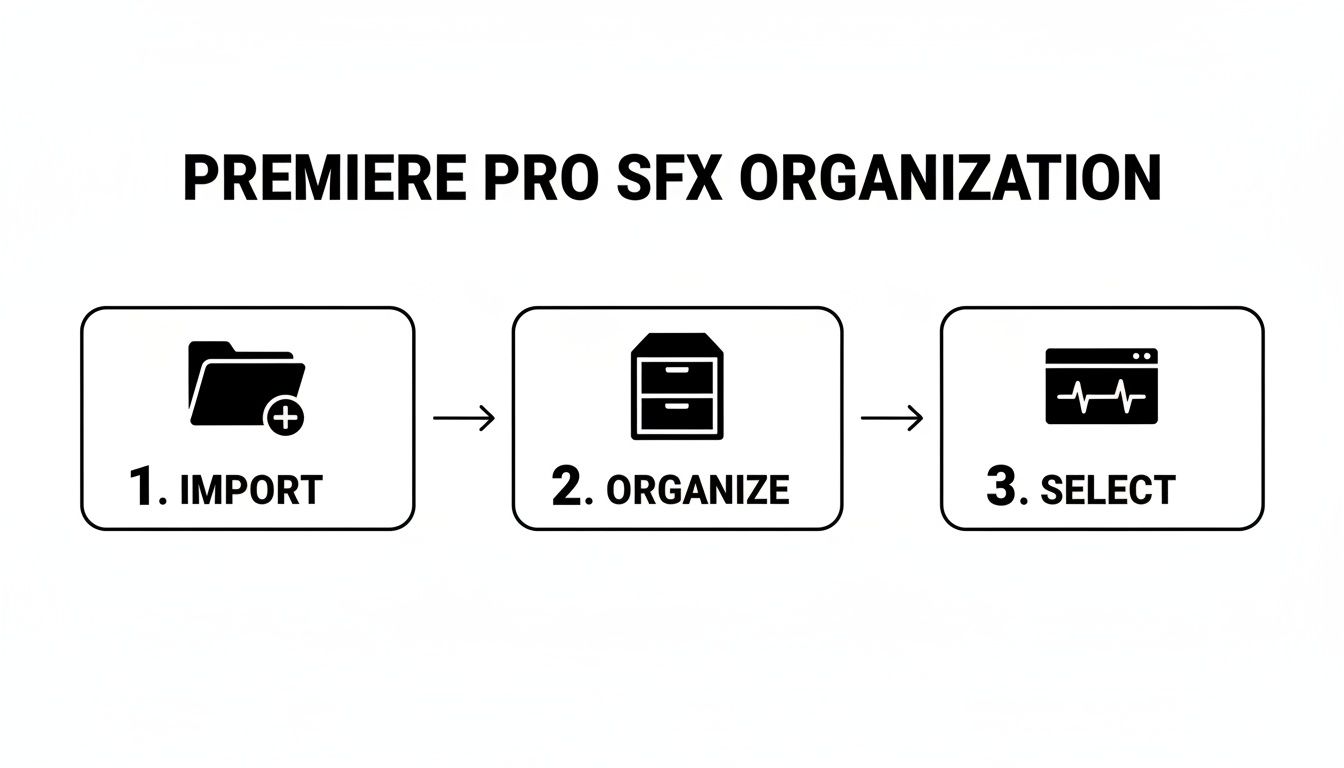
Following a methodical process like the one above will save you countless headaches down the road.
To help you get that frame-perfect placement, Adobe Premiere Pro has a few essential tools built right in. Getting familiar with these will make fine-tuning your audio a much smoother process. Here’s a quick-reference table for the tools I use most often for this task.
| Tool/Shortcut | Primary Function | Pro Tip for SFX Editing |
|---|---|---|
| Selection Tool (V) | The default tool for moving, trimming, and selecting clips. | Hold Alt/Option while dragging a clip to duplicate it instantly—great for repeating sounds like footsteps. |
| Markers (M) | Adds a marker to the timeline or a selected clip. | Tap 'M' twice to open the marker dialog and add color-coded notes for different types of SFX (e.g., green for foley, red for impacts). |
| Zoom (+ / -) | Zooms in or out of the timeline. | Use the backslash (\) key to quickly zoom to fit the entire sequence in the timeline view, then zoom back into your work area. |
| Slip Tool (Y) | Changes the in/out points of a clip without changing its position or duration on the timeline. | Perfect for when a sound is in the right spot but you want a slightly different part of the sound file to play (e.g., a different wood creak). |
| Ripple Edit Tool (B) | Trims a clip and automatically shifts all subsequent clips to close the gap. | A massive time-saver for adjusting timing in a packed audio track without having to manually move every following clip. |
Mastering these shortcuts and tools is a game-changer for speeding up your audio editing workflow and achieving professional-level precision.
Recent updates to Premiere Pro have made this even easier. The 25.5 release, for example, fixed a long-standing bug where audio waveforms would vanish during edits—a major source of frustration for 68% of surveyed users. Now, waveforms stay visible while you drag and ripple edit, which is a huge quality-of-life improvement for placing sounds accurately. For more info, you can read the full report on the Premiere Pro 25.5 release.
A single sound effect rarely has the punch you're looking for. The real secret to powerful, professional sound design is layering. Let's say you're creating the sound for a logo reveal. Instead of just one generic whoosh, you can build a completely custom sound that feels unique and high-impact.
For a cinematic feel, you could try combining a few different elements:
By stacking these sounds on different audio tracks and aligning their peaks, you create a new, much richer effect that's totally your own. This technique is fundamental to making your sound design stand out from the crowd. For a deeper dive into these techniques, check out our guide on how to sync audio with video for more advanced strategies.
Placing your sound effects on the timeline is a great start, but it's just that—a start. The real magic happens when you start blending, shaping, and polishing those clips until they feel like a natural, living part of your video's world. This is where we move from simply adding sounds to truly designing a soundscape.
Your main hub for this kind of work is the Essential Sound panel in Adobe Premiere Pro. Honestly, this tool is a game-changer. It takes what used to be a super-technical process and makes it intuitive. Before you touch a single slider, just select your sound effect clips in the timeline, open up the Essential Sound panel, and tag them as SFX.
Doing this one thing immediately gives you a curated set of controls specifically for sound effects. No more digging through confusing menus meant for audio engineers; you get exactly what you need, right up front.
Have you ever dropped a sound effect into your timeline and it just felt... off? Like it was floating on top of the video instead of being in it? This usually happens when the sound's acoustics don't match the on-screen environment. Think about it: a crisp, dry footstep just sounds plain wrong inside a massive, echoing cathedral.
This is where effects like reverb are your best friend.
A little bit of Studio Reverb (you can find it in the Effects panel) can completely change the feel of a sound. Let's say you have a sound of a door closing. By itself, it might sound like it's in a small room. But apply the "Great Hall" reverb preset, and suddenly that same door is slamming shut in a huge, cavernous space. It's all about tricking the ear to match the eye.
The Parametric Equalizer is another must-have tool in your kit. Its main job is to stop your different audio layers from stepping on each other's toes.
Think of your audio mix like a group conversation. If everyone is shouting at the same time in the same tone of voice, you can't understand anyone. EQ is how you get some people to speak a little softer or in a different pitch so the most important voice—usually your dialogue—comes through clearly.
A common example is when a deep, rumbling sound effect makes your dialogue sound muddy and hard to understand. You can jump into the Parametric Equalizer and just gently carve out some of those low frequencies from the rumble. That tiny adjustment can make a world of difference for the overall clarity of your mix.
Sounds in the real world rarely stay at one constant volume. A car driving by gets louder as it approaches and then fades away. You can recreate this natural dynamic using audio keyframing right on your timeline.
Keyframes let you automate volume changes over time, and it's easier than it sounds. Just expand your audio track so you can see the thin volume line running through the clip. You can use the Pen tool (or just hold Ctrl/Cmd and click) to add points, or "keyframes," to that line.
Here’s how you'd handle that car driving by:
This creates a smooth, believable volume ramp that perfectly syncs with the action on screen. Learning how to add sound effects in Premiere Pro with this kind of dynamic control is what separates amateur work from a polished, professional edit.
As you start working more with sound effects in Premiere Pro, you'll naturally run into a few common hurdles. Let's walk through some of the questions I hear most often and get you quick answers so you can keep your edit flowing.
Absolutely. This is something you'll need to do all the time. You might have a stereo recording of footsteps, for example, but you want to place it on a mono track to have more control over its panning in the final mix.
It's a simple fix. Just find the clip in your Project panel (this part is important—don't do it on the timeline). Right-click it, then head to Modify > Audio Channels. A little window will pop up where you can switch the preset from Stereo to Mono. Now you have a single-channel clip ready to go.
Fading is your best friend for making sound effects feel like they belong in the scene. While keyframing volume is great for detailed adjustments, there's a much faster way for simple fades.
Just click on the very beginning or end of your audio clip in the timeline. Now, hit the shortcut Ctrl+Shift+D (or Cmd+Shift+D on a Mac). This instantly applies your default audio transition, which is typically a Constant Power crossfade. You can then just grab the edge of that transition right on the clip to make the fade longer or shorter.
A quick tip from experience: less is more. You often only need a super short fade—just a few frames—to soften the hard start or end of a sound effect. It makes it blend in without calling attention to itself.
When you're pulling SFX from different libraries, their volume levels are often all over the map. Normalizing gives you a consistent starting point so you're not constantly fighting with your faders.
Select one or more clips in your timeline, give them a right-click, and pick Audio Gain. In the dialog box that appears, you'll see an option for Normalize Max Peak to. I usually set this to around -6 dB. Premiere will then automatically adjust the clip's gain so its loudest point hits that -6 dB ceiling, which prevents clipping and makes the initial mix so much easier to manage.
Stop spending hours searching for the right sound and just create it instead. With SFX Engine, you can generate unique, royalty-free sound effects from a simple text description. Get the exact sound your project needs, right when you need it. Check it out at SFX Engine.