January 29, 2026 · Kuba Rogut
Creating retro game sounds is all about embracing limitations. The whole aesthetic boils down to using simple waveforms—like squares, triangles, and noise—to mimic the constraints of old-school sound chips. Once you get that, you'll see it’s a game of creativity within a very specific set of rules.
Before you fire up your Digital Audio Workstation (DAW) and start tweaking knobs, it helps to get inside the minds of the original game sound designers. What we hear as "retro" isn't just a lo-fi effect; it's the sound of developers brilliantly working around severe hardware limitations. This is the heart and soul of chiptune.
The entire sonic palette of early games was built on a few simple, electronically generated waveforms. There were no samples of real-world instruments. Every sound was synthesized in real-time by a dedicated chip inside the console.
The core principle of retro sound design isn't nostalgia—it's ingenuity. Every iconic bleep, jump, and explosion was a creative triumph over technical constraints, turning limitations into an unforgettable aesthetic.
This meant sound designers had to be incredibly resourceful. Think about the Commodore 64's legendary SID chip, released way back in 1982. It gave composers just three channels to work with, spanning nine octaves, and only four waveforms: square, triangle, sawtooth, and noise. That was it. You had to make everything from that—bouncy jumps, alien laser fire, and the entire soundtrack. This scarcity forced creativity, pushing programmers to manipulate the hardware directly to squeeze out unique sounds. You can dive deeper into the history of game sound design to see just how clever these pioneers were.
Getting a feel for these four core building blocks is the first real step. Each one has a distinct personality and was the go-to for specific sounds in classic games.
Here's a quick reference to get you started on the fundamental waveforms and their common uses in classic video games.
| Waveform | Sonic Characteristic | Common Game Sound Examples |
|---|---|---|
| Square Wave | Bright, buzzy, somewhat hollow | Melodies, lead lines, coin collect sounds, character jumps |
| Triangle Wave | Soft, round, pure (flute-like) | Basslines, mellow melodies, menu chimes |
| Sawtooth Wave | Rich, buzzy, aggressive | Intense musical leads, powerful FX, synthesized brass stabs |
| Noise | Random static, non-pitched | Snares, hi-hats, explosions, wind, engine rumbles |
Mastering these simple shapes is your key to unlocking that genuine retro audio magic. By combining and manipulating them with envelopes and modulation, those early composers and sound designers built entire universes of sound, and now you can too.
You don't need to hunt down a dusty Commodore 64 or NES console to start making authentic chiptune. Thankfully, today's software puts the power of an entire retro arcade right at your fingertips, blending classic synthesis techniques with the speed and convenience of a modern workflow. This approach really gives you the best of both worlds: deep, hands-on control and incredibly fast sound generation.
The heart of any modern retro setup is usually a handful of specialized VST (Virtual Studio Technology) instruments inside your Digital Audio Workstation (DAW). These plugins are built from the ground up to perfectly emulate the sound chips of vintage hardware. They give you direct access to the essential building blocks—oscillators that generate the core waveforms, envelopes that shape a sound's volume over time, and LFOs (Low-Frequency Oscillators) that introduce all that wonderful warble and movement.
When you’re learning how to create retro game sounds, picking the right synth makes all the difference. While most DAWs come with basic synths that can pump out simple square and triangle waves, dedicated chiptune VSTs are specifically designed for the aesthetic.
Here are a few popular choices that nail that authentic sound:
If you're looking to expand your toolkit even further, exploring a 3dsynth app can open up unique interfaces and synthesis methods, which might just inspire some new creative directions for your retro audio.
Manual synthesis gives you total control, but let's be honest—sometimes you just need a specific sound now. This is where AI tools completely change the game. Platforms like SFX Engine let you sidestep the entire manual synthesis process and generate complex, ready-to-use effects from a simple text prompt.
This is where your creativity starts with just a description. The real magic is in translating your sonic idea directly into a finished audio file without ever touching an oscillator or an envelope.
For instance, instead of spending ten minutes tweaking a synth to get a decent laser sound, you could just type:
"8-bit laser shot with a fast decay and a quick downward pitch drop"
In seconds, you’ll get multiple variations to audition and drop right into your project. This approach is insanely efficient for populating a game with dozens of unique sound effects like UI blips, item pickups, and enemy actions. It lets you stay focused on the creative vision rather than getting bogged down in the technical details.
You can learn more about different tools in our guide to the best sound design software. By combining traditional VSTs for your main musical themes with AI for rapid SFX generation, you can build a flexible and incredibly powerful workflow for any retro-inspired project.
Alright, you've got the tools. Now for the fun part: actually making the sounds. This is where we get our hands dirty, moving from theory to practice and building a library of sound effects that basically defined a generation of gaming. Think of it like learning to cook; once you get the hang of the core ingredients and techniques, you can start experimenting and making your own sonic recipes.
We'll start with the most fundamental sounds—the bleeps, bloops, and bangs that every retro game needs. For each one, I’ll break down how to build it from scratch using synthesis and also give you a simple text prompt you can use with an AI tool like SFX Engine to get there even faster.
Today's workflow gives you a choice: you can either go deep and tweak every synth parameter yourself for a truly custom sound, or you can use descriptive prompts to generate high-quality audio in seconds. Neither way is wrong; it just depends on your project's needs.
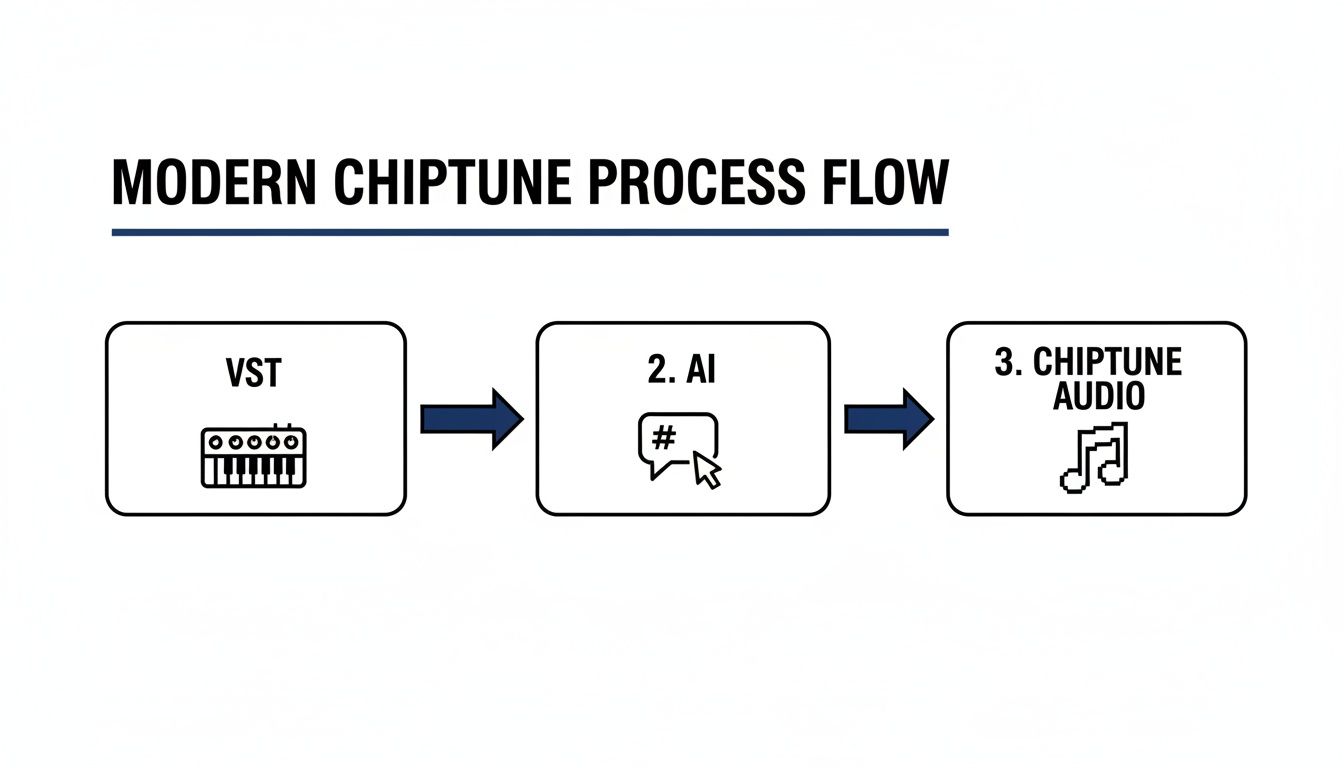
This diagram really shows how modern designers can leverage both detailed synthesis and fast, prompt-based generation to get the job done.
First up, the classic character jump. It needs to be short, sharp, and feel positive. The perfect ingredient for this is a square wave due to its bright, slightly buzzy character. The real magic, though, is in the pitch envelope—that rapid upward sweep is what sells the "jump" feeling.
Here's the recipe:
Nail that, and you'll get a snappy "bwip!" that feels agile and instantly responsive. If you're short on time, you can just tell an AI what you're after.
SFX Engine Prompt: “8-bit jump sound, square wave, fast upward pitch bend, very short decay, retro video game style.”
Next, let's make that addictive sound of grabbing a coin or power-up. This needs to be high-pitched, pleasant, and almost bell-like. A triangle wave is your best friend here, since its pure, rounded tone doesn't have the harsh edge of a square wave.
The secret is a high starting pitch and a very quick fade-out. It’s less about a big pitch sweep and more about creating a tiny, sharp sonic event.
Here’s how to do it:
This combo gives you that signature, satisfying "ping!" that makes players want to collect every single item on the screen.
SFX Engine Prompt: “Retro coin collect sound, triangle wave, high pitch, very short and plucky, 8-bit game style.”
For more aggressive effects like explosions or laser blasts, we need different building blocks. Explosions are all about chaos, which makes the noise waveform the perfect source. To get that "boom," run the noise through a low-pass filter and automate the cutoff frequency with a quick downward sweep.
Lasers, on the other hand, are often built from a sawtooth or square wave. That classic "pew" sound comes from a super-fast downward pitch sweep. You can create this by routing a fast-decaying envelope to the oscillator's pitch. This was a go-to technique in the NES era, which, starting in 1983, standardized a 5-channel sound chip that forced developers to get creative with frequency sweeps.
For example, the iconic sword slash in The Legend of Zelda was just a pulse wave decaying from 2 kHz to 500 Hz in under 50 ms—an amazing feat of audio programming on a tiny cartridge. You can learn more about the history of early game audio development and the brilliant minds behind it.
To tie it all together, here’s a quick-glance table comparing the old-school synthesis approach with modern AI prompts for creating these classic sounds. You can see how the detailed parameters of synthesis translate directly into simple, descriptive language for an AI.
| Sound Effect Type | Key Synthesis Parameters | Example SFX Engine Prompt |
|---|---|---|
| Jump | Square Wave, Fast Upward Pitch Sweep (~70ms), Short Decay | “8-bit jump, square wave, quick rising pitch, short and plucky” |
| Coin Collect | Triangle Wave, High Pitch, Very Fast Decay (~60ms), No Sustain | “Retro coin collect blip, triangle wave, high-pitched, percussive” |
| Laser | Sawtooth Wave, Fast Downward Pitch Sweep (~100ms), Short Release | “Sci-fi laser pew, sawtooth wave, fast falling pitch, 8-bit” |
| Explosion | Noise Wave, Low-Pass Filter with Downward Sweep, Medium Decay | “Chiptune explosion, white noise, low-pass filter sweep, crunchy” |
| Power Up | Square Wave with Arpeggiator (Upward, 1/16th notes), Short Decay | “8-bit power up sound, fast upward arpeggio, square wave, bright” |
Whether you’re a synth veteran or just starting out, both paths lead to fantastic retro sound effects. The best tool is simply the one that gets your creative idea out of your head and into your game the fastest.
With these fundamental recipes in your toolkit, you're more than ready to start building your own audio assets. Remember, these are just starting points. Don't be afraid to experiment with different decay times, sweep ranges, and waveforms to find your own signature sound. For more ideas on how to grow your collection, check out our guide on building a versatile game sound effects library.
So you've got your waveforms and envelopes down. Now it's time to add that extra layer of magic—the stuff that separates a good sound from a truly memorable one. These are the tricks sound designers used back in the day to squeeze every last drop of character out of severely limited hardware.
One of the most iconic techniques is using arpeggios to fake chords. Old consoles couldn’t play multiple notes on a single sound channel, so composers got clever. They'd rapidly cycle through the individual notes of a chord, creating a shimmering, energetic sound that instantly screams "8-bit."
Think about the classic "power-up" sound. It's almost always a fast, rising arpeggio played on a square wave. That single, brilliant trick conveys excitement and progress using only one monophonic channel. It’s a perfect case of creative genius born from technical limitations.
You can replicate this easily. Just set your synth's arpeggiator to a high speed, like 1/16th or 1/32nd notes, and feed it a simple major chord. The result is instant retro gratification, perfect for item pickups or any positive UI feedback.
Let's be honest, authentic retro audio isn't clean. It's wonderfully imperfect. To capture that signature crunch, you have to intentionally degrade your sound, and that’s where effects like bitcrushing and sample rate reduction are your best friends.
My advice is to apply these effects gently at first. Dial them up until you find that sweet spot right before the sound becomes an unusable mess. Just the right amount adds a layer of authenticity that a squeaky-clean modern sound just can't replicate.
Nothing screams "amateur" more than a static, lifeless tone. The secret to avoiding this trap is modulation—using one signal to control another to create movement and complexity.
Your most powerful tool here is the Low-Frequency Oscillator, or LFO. It’s just a slow, repeating waveform you can assign to almost any parameter in your synth to make things interesting.
Here’s another pro tip: layer a short burst of noise right at the very beginning of your sound. This adds a percussive "click" or "thump" to the attack, giving it a much punchier and more defined feel. It works wonders for menu blips and weapon sounds. Once you start combining these subtle but powerful methods, your sounds will stop just sounding retro and start feeling genuinely authentic.

Alright, so you’ve designed some killer retro sounds. That’s a huge win, but it's only half the battle. Now comes the part that a lot of creators overlook: getting those sounds prepped and ready for a game engine. This is where your hard work actually becomes usable for developers and avoids a ton of technical headaches down the line.
This is the bridge from your creative space to the final product. It’s all about making smart choices on file formats, quality settings, and how you organize everything. Every decision here affects not just how your sounds are heard, but also the game's performance and final file size.
When you’re ready to export, you’ll face the classic choice: compressed or uncompressed audio? There’s no single "best" answer—it really depends on what the sound is doing in the game.
A common rookie mistake is exporting everything as a high-quality WAV. While the audio fidelity is perfect, using it for a 3-minute music track is just going to bloat the game's download size. Here's a solid rule of thumb I always follow: WAV for SFX under 3 seconds, and OGG for everything else.
Before you smash that export button, there are a couple of housekeeping steps that will save you and your team a lot of grief.
First up is normalization. This is a simple process that boosts the volume of your sound so that its loudest peak hits a specific target, usually just below 0 dB to prevent any nasty digital clipping. Normalizing ensures all your sounds have a consistent perceived volume, so one effect doesn't blow out a player's speakers while another is barely a whisper.
Clean, consistent file naming is an absolute lifesaver, too. Trust me on this. A clear, descriptive system like SFX_Player_Jump_01.wav or MUS_Level_01_Loop.ogg makes your audio library a breeze for anyone to navigate. It seems like a small thing, but it makes a world of difference in a professional workflow.
If you want to dig deeper into the technical side, we have a whole guide on how to implement sound effects in Unity that walks through many of these practical steps.
As you start exploring chiptune, you'll inevitably run into some common questions. It’s one thing to learn the theory, but it’s another thing entirely to work through the unique quirks of mimicking old-school hardware. Let's tackle some of the most frequent hurdles that pop up when you're trying to create authentic retro game sounds.
Remember, this whole process is part art, part science. If your first attempts don't sound exactly like you remember from your favorite childhood games, don't sweat it. The original composers spent ages pushing incredibly limited hardware to its absolute breaking point.
The main distinction comes down to the underlying technology and, as a result, the complexity of the sound. The 8-bit era, think of the classic Nintendo Entertainment System (NES), was all about real-time synthesis. Dedicated sound chips generated simple waveforms—like square, triangle, and noise—on just a few channels. This is what gives us that iconic, raw "chiptune" sound.
When the 16-bit era arrived with consoles like the SNES and Sega Genesis, the approach shifted to sample-based synthesis. Instead of generating sounds from scratch, these machines played back short, pre-recorded audio clips of instruments. The quality was much higher, allowing for more realistic and textured sounds across way more audio channels.
Here's a simple way to think about it: 8-bit audio is like an electronic musician creating music live from basic synth shapes. 16-bit is more like a DJ using a sampler to trigger and manipulate tiny recordings. One is about raw, on-the-fly creation; the other is about cleverly arranging pre-recorded audio.
Absolutely. You don't need a folder full of expensive plugins to get that classic sound. Most modern Digital Audio Workstations (DAWs) you're probably already using—like Ableton Live, FL Studio, or even the free Cakewalk—have everything you need.
They all come with built-in synthesizers that can easily produce the basic waveforms at the heart of retro audio. The secret isn't a specific "chiptune" VST; it's knowing how to shape a synth's oscillators, envelopes, and LFOs to get that distinctive character.
Better yet, free AI tools like SFX Engine can give you authentic retro sounds just by typing in a simple description, letting you bypass manual synthesis altogether. So while specialized plugins can speed things up, they are definitely not a requirement.
Subtle variation is the key to making your audio feel dynamic and less like a machine gun. One pro trick is to create three or four slightly different versions of the same core sound. For a jump sound effect, for instance, you could make a few variations with tiny adjustments to the pitch or the decay time.
Then, the game engine can be programmed to randomly pick one of these versions each time the player jumps. It’s a simple but incredibly effective way to break up the monotony and make the game’s soundscape feel more alive.
Another great technique is to use a very slow, subtle LFO. Assigning it to the pitch creates a gentle vibrato, or mapping it to the filter cutoff can produce a soft, sweeping effect. This adds a constant, almost unnoticeable movement that prevents the sound from feeling static and dead. You can also use AI to get this result instantly by generating multiple variations from a single prompt.
Ready to jump past the learning curve and get amazing retro audio right now? SFX Engine uses AI to turn your ideas into unique, royalty-free sound effects in seconds. Get started for free and bring your project to life today!