October 6, 2025 · Kuba Rogut
Learning to create your own sound effects is a huge step forward for any creative project. While stock libraries are convenient, nothing beats custom audio for breathing unique life and personality into your work—whether it’s for a game, film, podcast, or app. It’s the difference between a generic template and a piece of art tailored to your vision.
This guide is your roadmap. We’ll walk through the creative and technical steps to take a simple idea and turn it into a professional, impactful sound effect. It's time to stop just finding sounds and start truly designing them.
Creating a sound from scratch generally follows a well-defined path. I've found it helpful to think of it in four distinct stages, each with its own goal.
This table breaks down the entire process, from the initial spark of an idea to the final, polished file you'll use in your project.
| Stage | Objective | Key Activities |
|---|---|---|
| 1. Brainstorming | Define the sound's purpose and character. | Concepting, gathering references, listing keywords. |
| 2. Generation | Create the raw audio building blocks. | Recording foley, using synthesizers, generating with AI. |
| 3. Editing & Layering | Shape and combine sounds into a cohesive whole. | Trimming clips, layering textures, applying basic effects. |
| 4. Mastering & Exporting | Finalize the sound for professional use. | Compression, equalization, normalization, exporting to format. |
Following these stages provides a structured workflow that ensures you cover all your bases and end up with a high-quality asset every time.
Custom sound effects are the backbone of believable, engaging worlds. They provide crucial feedback, set the mood, and subtly guide the audience's emotional journey. A thoughtfully designed sound can make an environment feel vast and desolate or tight and claustrophobic.
The secret to great audio is intentionality. Every sound, from a character's footstep to a futuristic laser blast, should serve the story and enhance the overall experience. It's not just noise; it's a narrative tool.
This entire process is part of the much broader discipline of sound design, which covers the entire auditory experience of a project. If you want to get a better handle on the theory behind it all, you can explore what sound design is in our detailed article.
The need for high-quality, unique audio is blowing up. The global sound effects market was valued at around $1.25 billion and is on track to nearly double by 2033. This isn't just a random statistic; it shows how much value creators are placing on immersive audio across all media.
Ultimately, learning to make your own sound effects gives you a massive advantage. You get complete creative control, ensuring every single audio cue perfectly matches your vision and elevates your project from good to truly unforgettable.
Before you ever touch a microphone or type a single prompt into an AI, the real work begins. Great sound design isn't about capturing noise; it’s about crafting a feeling. This initial stage—conceptualization—is where you decide what your audio is before you figure out how to make it.
Skipping this step is like trying to build a house without a blueprint. Sure, you might end up with four walls and a roof, but it won't be intentional or cohesive. A little time spent upfront defining your project's needs will pay off tenfold down the line.
So, what’s the vibe? Are we talking about a gritty sci-fi shooter that needs the jarring clang of metal and visceral, bone-crunching impacts? Or are we in a whimsical cartoon world filled with bubbly pops, zips, and zaps? The answer completely changes your sonic approach.
The goal here is to build a sound palette—your creative North Star for the project. Think of it as a curated library of textures, tones, and sonic qualities that will define the audio landscape.
To get started, let’s get specific. Don't just think "door sound." Break it down. We'll use two very different examples to show how this works: a heavy mechanical bunker door and a shimmering magical portal.
What goes into a Mechanical Door sound?
And what about a Magical Portal?
Answering questions like these is the essence of sound design. You’re building a story around the sound itself, giving it a history and a reason for being.
This level of detail is absolutely critical in interactive media. In video games, for example, audio isn't just background noise—it's player feedback, world-building, and emotional storytelling all at once. The game sound design market, currently valued around $0.28 billion, is projected to more than double to $0.68 billion by 2033. This explosion in growth shows just how much the industry is investing in high-quality, deeply contextual audio experiences. You can dive deeper into the data on the growth of game audio design on businessresearchinsights.com.
A sound effect without context is just noise. The conceptualization phase is what transforms that noise into a meaningful piece of the narrative, giving it weight, purpose, and emotional impact.
Ultimately, laying this foundation ensures your final sound isn't just clean, but correct. A clear vision makes every subsequent step—from generation and editing to the final mix—infinitely easier. It's the difference between a sound that is simply heard and one that is truly felt.
Once your concept is locked in, it's time to actually make some noise. This is the generation phase—where you create the raw audio that will eventually become your finished sound effect. There are three main ways to get there, and honestly, the best sound designers I know often mix and match all of them.
Your choice really comes down to the needs of your project, the gear you have on hand, and the specific vibe you're trying to capture.
The most timeless method is simply to record the world around you. This breaks down into two classic techniques:
This approach gives you a level of realism that's hard to beat. If you need the sound of a real car door slamming, well, the most direct way is to go record one.
But the real magic happens when you get creative. Snapping a stalk of celery can produce a shockingly convincing bone-breaking sound. Crinkling a plastic wrapper can double as a crackling fire, and I've seen a bag of flour dropped on the floor used to mimic the thud of a heavy body fall.
A few tips from the field:
This infographic shows the kind of essential gear you'll find in a professional recording setup.
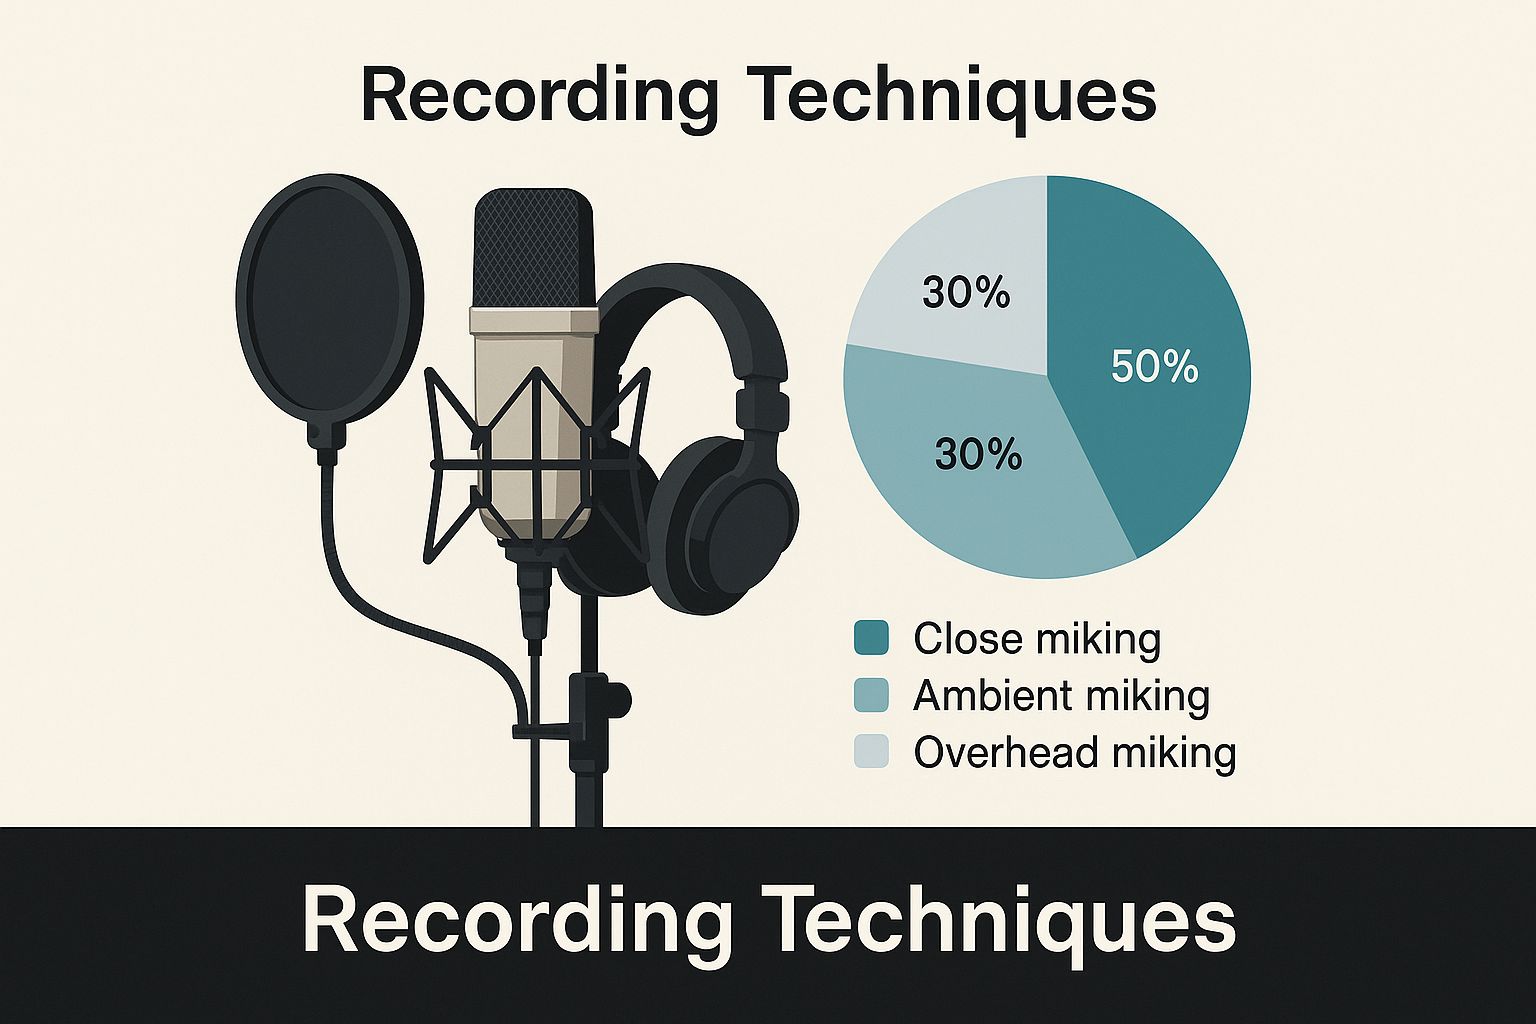
As you can see, the focus is always on capturing clean, high-fidelity audio. That’s the foundation for everything else.
Sometimes, the sound you need just doesn't exist in the real world. You can't exactly record the warp drive of a futuristic starship or the zap of a wizard's spell. This is where synthesis becomes your best friend.
Synthesis is the art of creating sounds from scratch using software or hardware synthesizers. Instead of recording sound waves, you're generating them electronically with oscillators, filters, and other modules. This gives you god-like control over every single sonic detail.
Synthesis is like sonic sculpting. You start with a raw block of sound—a simple sine, square, or sawtooth wave—and chip away at it, shaping it into something entirely new. It's perfect for sci-fi, fantasy, or any abstract audio.
For example, a classic laser blast is a great starting point. You can create one by starting with a high-pitched sawtooth wave, then using an envelope to shape it into a sharp "zap" that quickly fades. Add a touch of distortion, and you've got an iconic sci-fi effect.
If you want to get your hands dirty with the technical side of things, our guide on how to create sounds walks through more specific examples.
The newest tool in the sound designer's kit is AI sound generation. Platforms like SFX Engine let you create incredibly complex, high-quality audio just by describing it with text. It blends the instant gratification of a sound library with the custom-tailored feel of creating something from scratch.
This is an incredible advantage for creators who might not have a professional microphone setup or a deep understanding of synthesis. You can skip hours of setup and knob-twisting and generate completely unique, royalty-free sounds in seconds.
The trick to getting great results from AI is writing a great prompt. Be descriptive. Use evocative language.
The more detail you feed the AI, the closer it will get to the sound in your head. It’s a game-changer for quick brainstorming and for generating textures that would be a nightmare to record or synthesize manually.
Each method of creating sound effects has its own set of strengths and is better suited for different tasks. There's no single "best" way; experienced sound designers learn to pick the right tool for the job.
| Method | Best For | Pros | Cons |
|---|---|---|---|
| Recording (Foley/Field) | Hyper-realistic, organic, and natural sounds. | Unmatched authenticity and detail; captures real-world nuance. | Requires quiet spaces and good equipment; can be time-consuming. |
| Synthesis | Sci-fi, fantasy, UI sounds, and abstract textures. | Total creative control; creates sounds that don't exist in reality. | Can have a steep learning curve; may sound "digital" if not done well. |
| AI Generation | Rapid prototyping, unique textures, and quick custom effects. | Incredibly fast and easy to use; generates unique, royalty-free options. | Less precise control than synthesis; quality depends heavily on the AI model. |
Ultimately, many of the best sound effects are born from a combination of these techniques. You might record a real-world sound, layer it with a synthesized element, and then use AI to generate a unique texture to blend in.
Whether you’ve just recorded the perfect take, synthesized a sci-fi hum, or generated a wild texture with SFX Engine, that raw audio file is just the beginning. Think of it as a block of marble waiting to be sculpted. The real artistry comes alive in post-production, where you clean, shape, and combine those raw materials into something truly powerful.
This is where your Digital Audio Workstation (DAW) becomes your playground. Tools like Audacity, Reaper, or Logic Pro are absolutely essential for turning basic recordings into professional-grade assets that feel right at home in a film, game, or podcast.
Before you can get creative with layering and effects, you have to start with a clean foundation. This initial cleanup phase is non-negotiable if you're aiming for a polished, professional sound. It’s all about preparing your audio clips so they are free of distractions and ready to be combined.
Once your sounds are in the DAW, the real work begins. If you’re looking for a deep dive into the fundamentals, these tips on editing audio are a great resource—the principles apply just as well to sound effects as they do to dialogue.
Nearly every clip you work with will need these essential tweaks:
Think of these cleanup steps as quality control. A clean, properly prepped clip is infinitely easier to blend and manipulate when you get to the fun part.
Here’s where you truly start to design. A single, isolated sound rarely has the complexity and punch needed for a big moment. Layering is how we solve that—it's the process of stacking multiple sounds to create a single, cohesive, and much richer result.
Let's take a classic example: a giant’s footstep. A simple "thump" might get the point across, but it won’t feel colossal. A professional sound designer thinks in layers, building the effect piece by piece.
| Layer | Sound Source | Purpose |
|---|---|---|
| Transient | A car trunk slamming | Creates the sharp, initial impact of the foot hitting the ground. |
| Body | A slowed-down thunderclap | Provides the deep, booming weight and power of the step. |
| Texture | A rockslide or gravel crunch | Adds the realistic detail of the giant disturbing the ground. |
| Sweetener | A subtle, deep bass drop | Enhances the low-frequency energy for that cinematic feel. |
When you combine these, you get a sound far more evocative and believable than any single recording could ever be.
Layering is the core of creative sound design. It’s about deconstructing an idea into its sonic components—impact, body, texture, and tail—and then finding or creating sounds to represent each part.
This approach works for just about anything. A magical spell could be a mix of crackling fire, a reversed cymbal swell, and a shimmering synth pad. A sci-fi door might be a pneumatic hiss, a heavy mechanical clank, and a subtle electronic hum. It's all about a creative combination of textures.
Of course, just piling sounds on top of each other will create a chaotic, muddy mess. The real skill is making each layer occupy its own space and work harmoniously with the others. We do this with a few essential audio plugins.
Equalization (EQ) EQ is your sonic chisel. It lets you boost or cut specific frequencies in any sound. If two of your layers are fighting for space in the low-mid range (a common spot for muddiness), you can use an EQ to gently scoop out those frequencies in one sound to make room for the other. This simple trick brings instant clarity.
Compression A compressor tames the dynamic range of a sound—the gap between its loudest and quietest moments. When you apply a compressor across several layers, it can "glue" them together, making them feel like a single, unified effect instead of a stack of separate recordings.
Reverb Reverb is what makes a handclap sound different in a tiny bathroom versus a huge cathedral; it simulates a physical space. Adding the right amount of reverb to your finished sound is crucial for placing it in a believable environment, making it feel grounded and connected to the world of your project.
You’ve done the hard part. You’ve generated, tweaked, and layered your way to a sound that feels just right. Now comes the final, crucial step: mastering and exporting. This is what separates a good sound from a professional one, ensuring it hits hard and sounds great everywhere, from a high-end cinema to a pair of cheap earbuds.
It's tempting to skip this last mile, especially when you're excited about your new creation. I've seen it happen countless times—a sound that's incredible in the studio falls completely flat in the final mix because it wasn't properly prepped.
In sound design, mastering isn't about some mystical, complex process. It's really about two things: controlling dynamics and maximizing loudness without wrecking your sound. You want your effect to slice through a dense mix of dialogue and music, and for that, you need a limiter.
Think of a limiter as a brick wall for your audio. It sets a ceiling that your sound’s volume absolutely cannot pass, which lets you boost the overall level without causing nasty digital clipping.
Mastering is your final quality check. It’s what gives your sound consistency and impact, transforming it from a cool idea into a professional-grade asset that's ready for any project.
If you want to dive deeper, our complete guide on how to master audio walks through all of this with more detail and practical examples. It's an essential skill to develop.
Before you hit that export button, take ten seconds to name your file properly. Trust me, this is a gift to your future self. A well-organized sound library is a lifesaver, while a folder full of files named "FinalExplosion_V3_FINAL.wav" is a productivity nightmare.
I swear by a simple, descriptive convention: Category_SubCategory_Descriptor_Variation.wav.
Weapons_SciFi_LaserBlast_Heavy_01.wavAmbiance_Forest_Night_CricketsWind_01.wavUI_Button_Click_SoftPlastic_03.wavThis system makes your library searchable and instantly easy to navigate. You'll find exactly what you need in seconds instead of wasting half an hour auditioning mystery files.
Okay, it's time to send your sound out into the world. The format and settings you pick here are critical and depend entirely on the final destination.
Here’s a quick rundown of the go-to formats and when to use them:
| Format | Bit Depth | Sample Rate | Best For |
|---|---|---|---|
| WAV | 24-bit | 48 kHz or 96 kHz | This is the gold standard for film, TV, and high-quality games. Always export your master file in this format. |
| MP3 | (N/A) | 44.1 kHz | Perfect for web, podcasts, and mobile games where you need to keep file sizes small. Stick to a high bitrate like 320 kbps. |
| OGG | (N/A) | 44.1 kHz | A fantastic alternative to MP3 for web and games. It often sounds better at smaller file sizes. |
For almost any professional work, a 24-bit, 48 kHz WAV file is the industry-standard deliverable. It gives you pristine audio quality without a ridiculously large file size. From this high-quality master, you can always create smaller, compressed versions like MP3s or OGGs whenever you need them.
Even with a solid plan, jumping into sound design for the first time can feel a little overwhelming. Hitting a technical snag or a creative wall is just part of the process, so don't sweat it. Let's walk through some of the questions I hear most often from folks just starting out.
Think of this as your go-to troubleshooting guide. These are the common hurdles that trip people up, and getting a handle on them now will make your entire workflow smoother and boost your confidence as you learn the ropes.
Honestly, the best software to start with is whatever you can get your hands on easily. You absolutely do not need a massive, expensive program to start making great audio. A free Digital Audio Workstation (DAW) like Audacity or Apple's GarageBand is a perfect place to start. They have all the core tools you need for trimming clips, layering sounds, and adding basic effects.
Once you feel you're hitting the limits, you might consider something like Reaper. It's a powerhouse DAW that's become an industry favorite, and it’s famous for being incredibly affordable. For pure sound generation, though, AI tools have become a beginner’s secret weapon.
Platforms like SFX Engine completely sidestep the need for fancy recording gear or deep knowledge of synthesis. You just describe a sound, and it generates something high-quality and unique. It’s an incredible way to get professional-sounding raw material from day one.
Nope. Not at all. While a pro-level condenser mic will definitely give you cleaner, more detailed recordings, the microphone on a modern smartphone is surprisingly capable. The real secret isn't the gear; it's how you use it.
What truly matters is your technique:
Focus your energy on creative "sourcing"—finding interesting things to record around your house—instead of worrying about expensive equipment. You can always upgrade your gear down the line.
The trick to making audio that doesn't sound like it was pulled from a generic stock library is all about layering and creative processing. Professionals almost never use a single recorded sound by itself for a big moment. The real magic happens when you combine different, sometimes unexpected, elements to create something entirely new.
For example, a cool "magic shield" effect could be a mix of bacon sizzling in a pan, a cymbal crash played in reverse, and a low, humming synth tone. Then you can use effects like pitch-shifting, reverb, and delay to completely transform those ordinary sounds into something otherworldly. AI generation is also a fantastic way to get unique textures that you can then chop up, layer, and process further, guaranteeing the final product is 100% yours.
This one trips up a lot of people, but the distinction is actually pretty simple.
"Sound effects" (SFX) is the big umbrella term. It covers any audio in a project that isn't dialogue or music—from massive explosions and sci-fi laser blasts to the gentle chirping of crickets.
"Foley", on the other hand, is a specific type of sound effect. It's named after Jack Foley, a sound-effects pioneer, and involves an artist in a studio performing and recording sounds that are perfectly synchronized to the action on screen. Think of it as the sounds of human interaction with the world.
So, you could say all Foley is a sound effect, but not all sound effects are Foley. It’s a specialized craft focused on bringing the small, human-centric details of a scene to life.
Ready to stop searching for the perfect sound and start creating it? SFX Engine gives you the power to generate custom, royalty-free sound effects in seconds with AI. Describe any sound you can imagine, and bring your unique audio vision to life today. Get started for free at sfxengine.com.