January 3, 2026 · Kuba Rogut
Unreal Engine's audio system is a beast—a powerful, all-in-one suite of tools for creating, controlling, and mixing your game's sound. The best way to think about it is like having a full-blown digital audio workstation (DAW) built right into the engine. This means you can handle everything from one-off sound effects to intricate, adaptive musical scores without having to constantly jump between different pieces of software.
To really get a handle on Unreal's audio system, let's use an analogy: picture a high-tech recording studio. At the very center of it all is the Audio Engine. This is your master sound engineer, the brains of the operation, responsible for processing, mixing, and pushing out every single sound in your game in real-time. This engine sits on top of a whole hierarchy of audio assets that all work in concert to build your game's soundscape.
This system is a massive leap from what we had in older versions of the engine. The modern audio architecture, unveiled at the 2017 Game Developers Conference, was a ground-up redesign. It introduced a modular, multiplatform foundation built on key pillars like the sound class system, a proper mix system, and detailed attenuation settings—all designed to meet the complex demands of modern games.
Let's break down the fundamental assets you'll be working with. Each one has a very specific job, kind of like the different instruments in an orchestra. Getting these basics down is absolutely essential, and if you're totally new to this, our guide on game audio basics for beginners is a great place to start.
Here's a quick look at the core components and what they do.
| Component | Analogy | Primary Function |
|---|---|---|
| Sound Wave | A single instrument recording | The raw .wav or .ogg audio file. It's your source material. |
| Sound Cue | A musical score or arrangement | A node-based asset for combining and controlling Sound Waves with logic. |
| Sound Class | A section of the orchestra (e.g., strings, percussion) | A container for grouping and controlling entire categories of sounds. |
This table gives you the high-level view, but let's dig a little deeper into how they work together.
A Sound Wave is the simplest piece of the puzzle. It's just the raw audio file—a footstep, a gunshot, a piece of dialogue. It’s the sound itself, imported directly into the engine.
A Sound Cue is where the magic really starts. If the Sound Wave is a single recorded note, the Sound Cue is the sheet music that tells the musician how to play it. Inside the Sound Cue editor, you can use a visual, node-based system to combine multiple Sound Waves, randomize their pitch and volume, add effects, and define all sorts of complex playback rules. This is how you turn a simple, static sound into a dynamic, living event.
Finally, you have the Sound Class. Think of this as a group channel on a mixing board or even just a folder. You might create a "Weapons" class for all your gunfire sounds or an "Ambiance" class for all your environmental audio. This lets you control the volume, pitch, and effects for entire categories of sound all at once, which is incredibly powerful.
This diagram shows how everything flows from the top down.
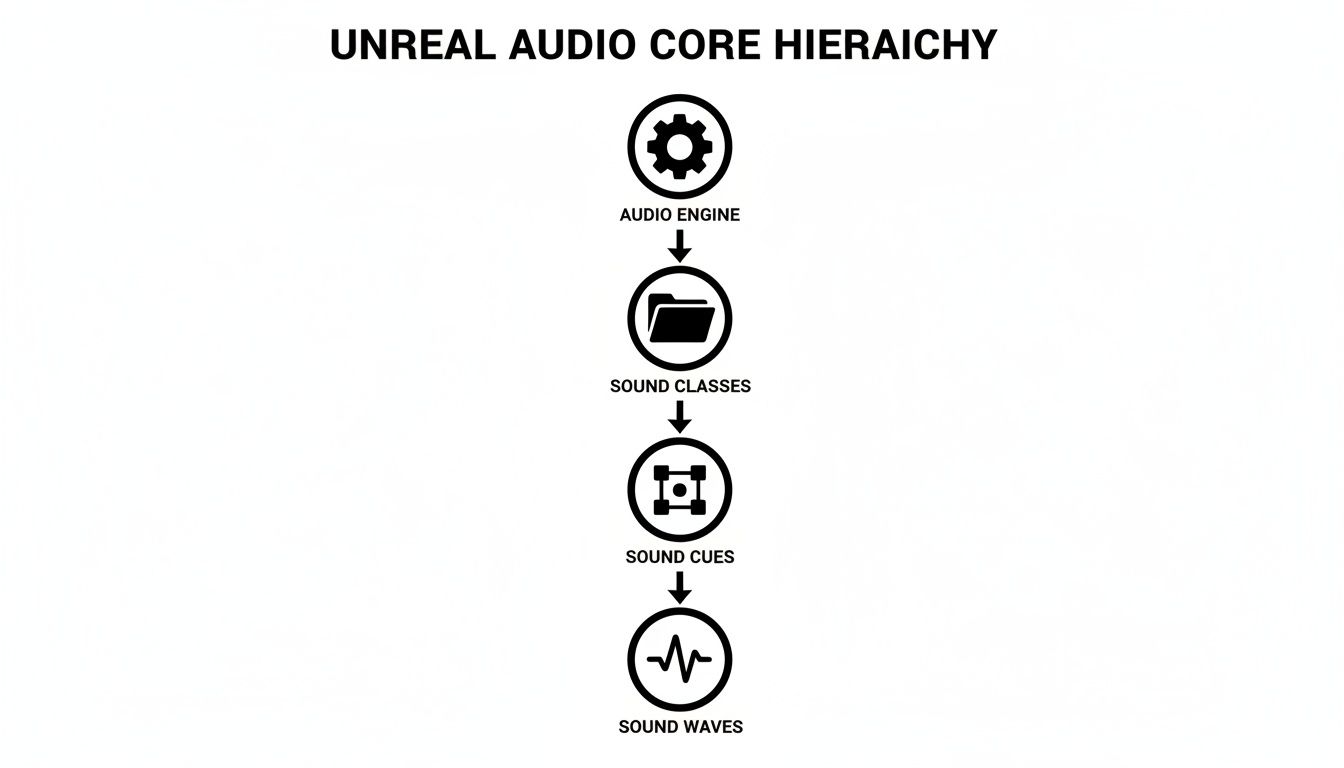
As you can see, high-level controls from the Audio Engine and Sound Classes cascade down, influencing how individual Sound Cues and their source Sound Waves are played back.
By organizing audio this way, developers gain immense control. You can, for example, lower the volume of all sound effects during a dialogue sequence by simply adjusting the "SFX" Sound Class, rather than tweaking hundreds of individual assets.
This level of organization is the first step toward creating a clean, professional, and immersive mix. Once you master these core components, you've built the foundation for a scalable and manageable audio framework that can handle any project, no matter how big it gets. From here, you can start diving into more dynamic behaviors and really start shaping the final mix.
If a Sound Wave is the raw audio file, think of a Sound Cue as the brain that decides what to do with it. A Sound Wave is just a single, static clip—like one recorded note. The Sound Cue is the sheet music, the director, the performer all rolled into one. It tells the engine how, when, and why to play that sound, turning a simple file into a dynamic, living part of your game world.
This magic happens inside the Sound Cue Editor, a powerful node-based system that looks a lot like Unreal's Blueprint editor. Instead of writing code, you visually connect different logic nodes to manipulate your sounds. This is fantastic because it puts complex audio design directly into the hands of sound designers and artists, no programmer needed.
This is what the Sound Cue Editor looks like in action. You can see how different nodes are wired together to create a more complex audio event.
The audio signal flows from the source Sound Waves on the left, gets processed by the logic nodes in the middle, and finally goes to the output on the right.
You don't need to know every single node to get started. In fact, just a handful of them do most of the heavy lifting for creating varied and interesting soundscapes. Mastering these core nodes will dramatically elevate the quality of your game's audio.
Here are three of the most important ones you'll use constantly:
It's when you start combining these nodes that the real power emerges. You can chain them together to create systems that feel truly alive. For example, you could use a Random node to pick one of five footstep sounds, then immediately run it through a Modulator to slightly alter its pitch. Just like that, no two steps will ever sound identical.
Let's walk through how to build a basic but highly effective footstep Sound Cue. Our goal is simple: create a footstep sound that doesn't sound like a machine gun of identical thumps.
Footstep_Gravel_01, Footstep_Gravel_02, and Footstep_Gravel_03. Make sure each one is a slightly different performance.SC_Footstep_Gravel.Now, every time this Sound Cue plays, it will first pick a random gravel footstep, then slightly change its pitch and volume. This simple two-node setup creates a far more natural and believable effect, which is a core skill for making the Unreal Engine audio system explained in this guide work for you.
A great game mix isn't just about individual sounds. It’s about how they all sit together—how they blend, contrast, and combine to create a cohesive, powerful experience. This is where you move from just placing sounds to truly designing a soundscape. To do that, you need to control entire groups of sounds at once, and in Unreal Engine, the Submix system is the tool for the job.
Think of a Submix as a group channel or a bus on a professional mixing console, but built right into the engine. Instead of slapping a reverb effect on every single footstep, gunshot, and ambient sound individually (which would be a performance nightmare), you can route them all to a single Submix. This lets you process whole categories of audio together, giving you a consistent sound while saving a ton of CPU.
For example, a standard professional setup would involve creating separate Submixes for:
Organizing your audio this way is fundamental to a clean, manageable mix. It suddenly becomes simple to make broad adjustments, like automatically ducking the music and SFX volumes whenever a character speaks.
A Submix by itself is really just a routing destination. The magic happens when you start applying effects. This is done in the Submix Graph, a node-based editor that should feel familiar if you've used the Sound Cue editor. Here, you can chain together a series of real-time audio effects called Submix Effect Presets.
You can apply all the standard studio effects you'd expect:
Let's say all your indoor weapon sounds are routed to an "Indoor_Weapons" Submix. Inside its Submix Graph, you could add a specific reverb preset that perfectly mimics the acoustics of that interior space. Now, every single gunshot has a realistic echo that feels completely grounded in the game world.
At first glance, Submixes and Audio Buses seem pretty similar, but they have very different jobs. Getting this distinction right is the key to unlocking some of Unreal's more advanced audio tricks.
Here’s the simplest way to think about it:
A classic use case for an Audio Bus is side-chaining. Imagine you want the game's high-energy music to dip in volume automatically every time a massive explosion goes off, making the impact feel even bigger.
Now, whenever that explosion sound plays, the signal hits the bus, which activates the compressor on the music track and "ducks" the volume. It’s this kind of dynamic interaction, made possible by using Submixes and Audio Buses together, that separates a good mix from a truly professional one.
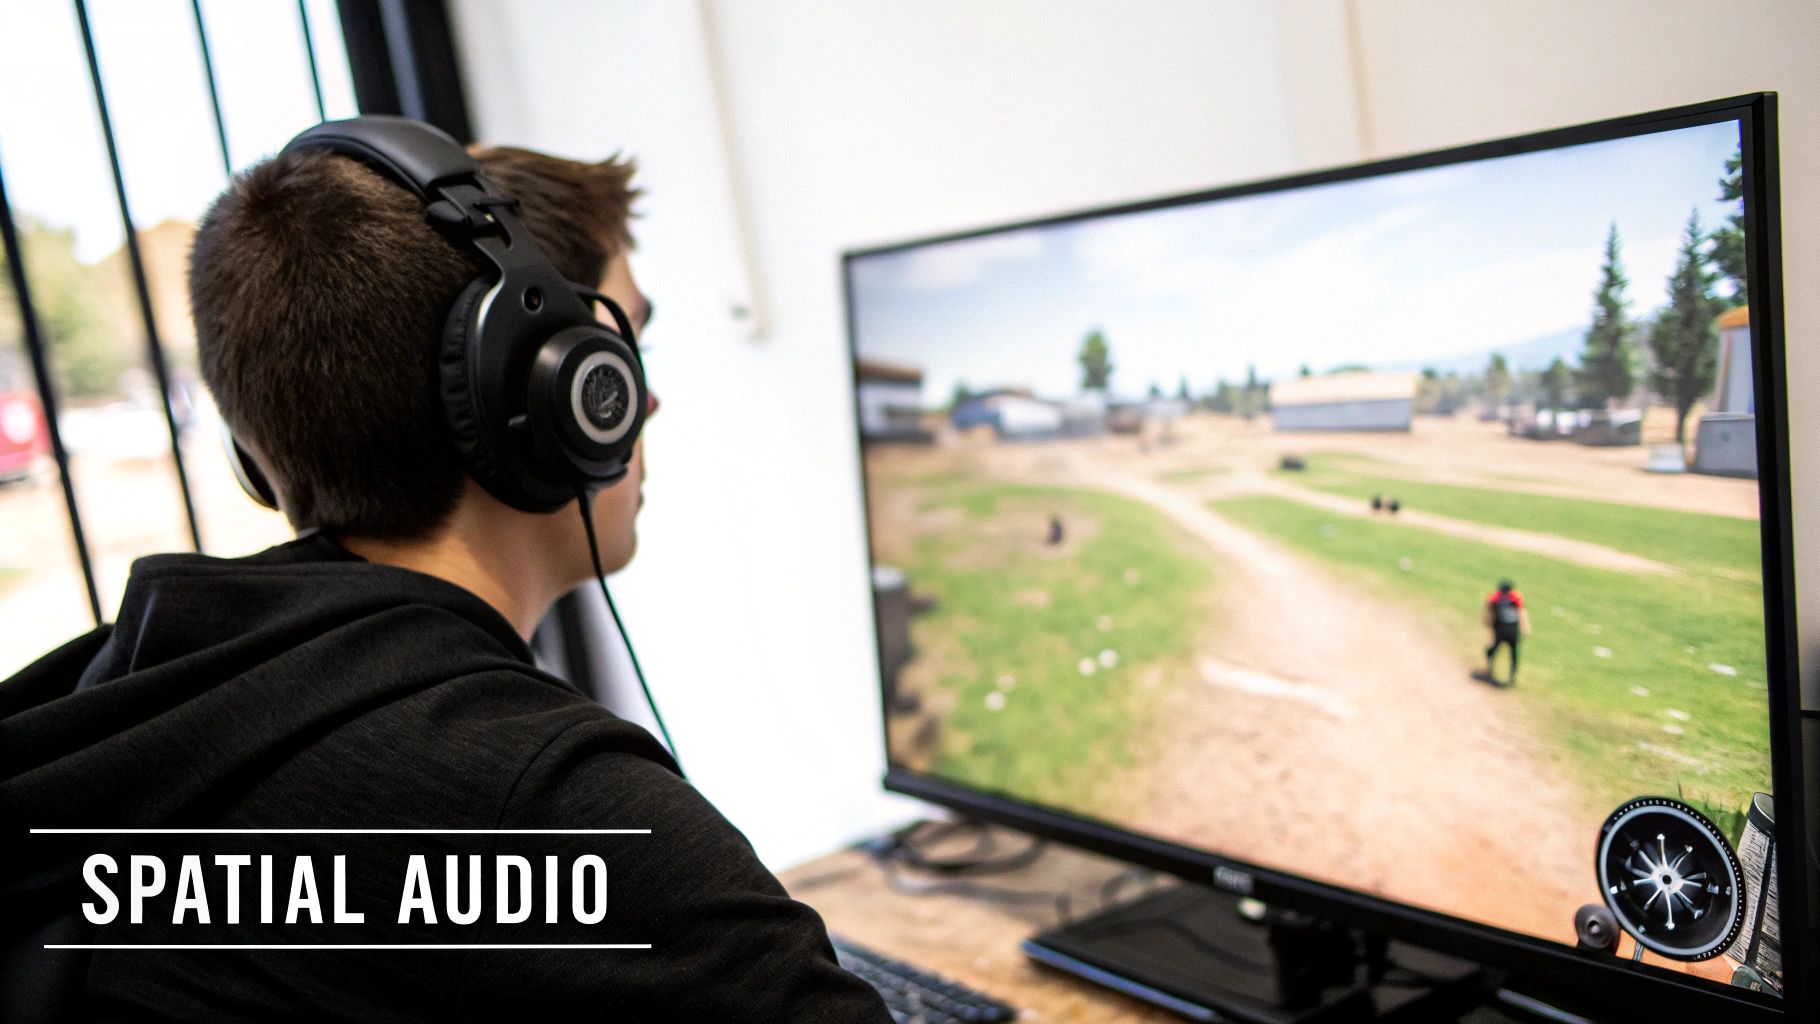
How does a game trick your brain into knowing an explosion just happened to your left, or that a whisper is coming from right behind you? It all comes down to two concepts that work hand-in-hand to create a convincing 3D soundscape: spatialization and attenuation.
Spatialization is really the art of placing a sound in 3D space. I'm not just talking about simple left-right panning, but creating a full 360-degree sphere of audio around the player. Unreal Engine pulls this off using some pretty sophisticated algorithms that mimic how our own ears and brain figure out where a sound is coming from. It’s what gives every sound a distinct location and makes the world feel real.
Then you have attenuation, which is all about how a sound changes over distance. Think about it: a distant shout isn't just quieter, it also sounds different—more muffled, with less of the sharp, high-frequency detail. Unreal’s attenuation settings let you meticulously copy this behavior, defining how a sound’s volume, pitch, and overall character change as you move closer or farther away.
Think of Attenuation settings as the physics engine for your audio. You'll find them on any component that makes noise, and they give you incredibly fine-grained control over how that sound exists in the world. By tweaking these parameters, you define not just how far a sound can be heard, but how it behaves within that range.
Here’s what you can control:
A well-configured attenuation setup is the difference between a sound that feels "placed" in the world and one that feels truly part of it. For instance, you could make a distant gunshot sound thin and tinny, but as you get closer, you can have the bass frequencies swell, giving it a powerful, chest-thumping impact when you’re standing right next to the source.
Not every sound needs the same level of spatial precision. Unreal gives you different ways to spatialize audio, and each has its own use case and, importantly, a different performance cost. Knowing when to use each one is critical for building an experience that's both immersive and runs smoothly.
The jump to native ambisonic soundfield rendering, which started as a beta in Unreal Engine 4.25, was a huge step forward. When Epic showed it off in the UE5 tech demo back in May 2020, it pulled in 13.25 million YouTube views. This system allowed for things like massive cavern rockfalls that felt directionally anchored to a spot in the world—a massive improvement over older methods that could spike CPU usage by up to 300%.
A solid understanding of spatial audio is the bedrock of building immersive virtual reality experiences. For anyone looking to apply these audio principles to real-world projects, especially in the enterprise VR space, exploring strategies to develop VR applications for enterprise success can show how these concepts translate. The core principles of creating believable sound in games are the perfect launchpad for anyone building compelling virtual worlds, whether for fun or for professional training.
If Sound Cues are the powerful arrangers of your game's audio, then Metasounds are the composers. They represent a monumental shift in thinking—moving beyond simply playing pre-made audio files to actually creating sound from scratch, right inside the engine.
This isn't just a minor feature; it's a completely different way to approach sound design. Instead of being tied to the limitations of a static .wav file, Metasounds give you a low-level, node-based playground for generating audio procedurally. Think of it as having a full-blown digital synthesizer and effects rack built directly into Unreal, ready to be automated by anything happening in your game.
This procedural method means your soundscapes can be truly alive, reacting to game parameters with a nuance that pre-recorded clips could never achieve. We're already seeing developers use Metasounds for everything from hyper-realistic vehicle engines that respond to torque and RPM, to intricate musical scores that evolve with the player's choices. If you need a refresher on getting basic audio into your project first, take a look at our guide on how to add audio in Unreal Engine.
When you first open the Metasound Editor (or Metasound Graph), it might feel familiar, sharing a visual language with Blueprints and the Sound Cue editor. But under the hood, it’s a high-performance, sample-accurate Digital Signal Processing (DSP) powerhouse. The nodes here are far more fundamental—you're not grabbing a "Play Sound" node, but rather nodes that generate sine waves, produce white noise, or perform complex math on an audio signal.
The workflow is built around a really intuitive signal flow:
EngineRPM, WindSpeed, PlayerHealth—and then drive them from Blueprints or C++.White Noise generator, run it through a Band-Pass Filter, and then hook that filter’s cutoff frequency directly to your WindSpeed input.A huge performance benefit of Metasounds is that all this complex sound generation is pushed directly onto the audio thread. This keeps heavy audio calculations from ever touching your game's main thread, resulting in better overall performance and a smoother frame rate, even with incredibly dynamic soundscapes.
Let’s make this concrete with a classic example: creating procedural wind that reacts to the player's movement. Using a simple looping .wav file for wind is a fast way to make your environment sound repetitive and fake. A Metasound, on the other hand, can generate wind that never repeats itself.
Here’s a simplified look at how you'd build it:
White Noise node. This gives you the raw, hissy foundation for the wind sound.Filter node, maybe a low-pass or band-pass. By controlling the filter's cutoff frequency, you can shape the character of the wind from a low, bassy rumble to a sharp, high-pitched whistle.Input node to your Metasound Graph and name it something like PlayerSpeed. Back in your character's Blueprint, you'd get the player's current velocity and feed that value into this input on every frame.PlayerSpeed input to the filter's frequency parameter in the Metasound Graph.And that's it. Now, when the player is standing still, the low PlayerSpeed value keeps the filter closed, producing a soft, ambient breeze. But as they start to sprint, the value shoots up, opening the filter and transforming the sound into a rushing, howling gale. It happens seamlessly and dynamically, creating an immersive effect that feels completely tied to the player's actions. This is why Metasounds are such a game-changer.
A breathtaking soundscape means nothing if it tanks your game's frame rate. Crafting audio that is both rich and efficient is a critical balancing act, but thankfully, Unreal Engine gives us a whole suite of tools to keep things running smoothly.
It really comes down to smart asset management. Every sound you import has a cost, both in memory and on the CPU, so the first step in optimization is understanding and managing that cost. This means making conscious choices about compression, voice counts, and how your audio actually gets loaded into the game.
The engine's long history is built on this kind of scalable performance. Unreal's audio advancements have scaled across the industry, contributing to its massive adoption over the years. You can learn more about the engine's impressive evolution and impact on Wikipedia.
One of the first calls you'll have to make is picking the right compression format. This choice directly hits your file size and how much CPU power is needed to decompress the sound in real-time. For most sound effects, you're looking at a trade-off between two main formats.
Beyond compression, you also have to decide how sounds get loaded. Should a sound be loaded entirely into RAM for instant playback, or should it be streamed from the disk?
Loading to RAM is best for small, critical sounds that need zero latency, like the player's weapon fire. Streaming is ideal for huge files like music tracks or long dialogue segments, as it keeps memory usage way down by only loading small chunks at a time.
What happens when twenty machine guns all fire at once? Without any limits, the audio engine would try to play every single sound, completely overwhelming the CPU and your player's ears. This is where Sound Concurrency saves the day.
This powerful setting lets you define rules for how many instances of a specific sound can play at the same time. You can set a maximum count and then decide what happens when that limit is hit—like stopping the oldest sound to make room for the newest one. This is how you prevent audio chaos and keep performance stable during the most intense moments.
Similarly, you have to manage the global voice count. A "voice" is just a single instance of a sound playing. Unreal Engine has a hard limit on how many voices can play concurrently, and if you exceed it, sounds will start getting culled unexpectedly.
By using the built-in Audio Profiler, you can watch your voice count in real-time, see which sounds are the most expensive, and hunt down any performance bottlenecks. It’s a diagnostic approach that, when combined with smart concurrency and compression, ensures your game's audio remains a powerful asset, not a performance liability.
As you start working with Unreal Engine's audio tools, a few common questions always seem to pop up. Let's tackle some of the most frequent ones I hear from developers trying to bridge the gap between theory and actual implementation.
This is a great question, and it helps to think of it like this: pre-recorded samples versus a live synthesizer.
A Sound Cue is your go-to for arranging existing audio files. It’s a visual editor where you take your imported .wav files (Sound Waves) and apply logic. You can layer them, randomize which one plays, or add basic effects. It’s all about manipulating audio that’s already been recorded.
A Metasound, on the other hand, is a full-blown procedural audio engine. Instead of playing back a file, it generates sound from scratch using digital signal processing (DSP) building blocks like oscillators, filters, and noise generators. This is perfect for sounds that need to react dynamically to the game in real-time, like a sci-fi weapon that changes pitch as it charges up or a vehicle engine that seamlessly revs and idles.
Use Sound Cues for dynamic playback of your existing assets and Metasounds when you need truly procedural, synthesized audio.
Hearing the same footstep or gunshot over and over is one of the fastest ways to shatter a player's immersion. Thankfully, Unreal gives you some simple but powerful tools to fight this.
For the best results, use these two together. Start with a Random node selecting from a handful of similar-but-different recordings, and then pipe that result into a Modulator for even more natural, organic variation.
This one trips a lot of people up. It's easy to get them confused, but they serve two very different purposes. It all comes down to processing versus routing.
A Submix is like a group fader on a mixing console. Its whole job is to group similar sounds (like all dialogue, or all explosions) so you can apply effects to them all at once. Need to add a bit of reverb to every weapon sound in the game? A Submix is the tool for that.
An Audio Bus, however, is all about sending audio from one place to another. Think of it as an invisible audio cable. Its most common use is for more advanced techniques like side-chaining, where the volume of one sound source affects another. A classic example is making the background music automatically "duck" or lower in volume whenever a character speaks.
Need to fill your game with unique sounds without spending weeks in a recording studio? With SFX Engine, you can generate custom, royalty-free sound effects in seconds using AI. It's built for developers who need high-quality, specific audio on demand. Find the perfect sound for your project right now at https://sfxengine.com.