December 13, 2025 · Kuba Rogut
Picture a sonic scalpel, a tool so precise it lets you surgically sculpt any sound imaginable. That's exactly what a parametric EQ is. It's an indispensable audio processor that gives you total control over the tonal balance of a track, all by manipulating three core elements: frequency, gain, and Q/bandwidth.
A parametric equalizer, often just called a "parametric EQ," is hands-down the most flexible and precise type of equalizer in modern audio production. Forget the fixed sliders of a graphic EQ; using one of those is like painting with a broad brush. A parametric EQ is more like a surgeon's scalpel, built for accuracy.
Instead of just turning up "the bass" or "the treble," you can zero in on a very specific frequency and adjust it without affecting everything around it. This is the kind of detail that separates amateur mixes from professional ones, whether you're polishing a lead vocal or cleaning up dialogue for a film.
This incredible precision comes from how its three main controls work together.
A parametric EQ gives you independent control over three critical parameters for each "band" or filter point you create.
Here’s a look at a typical parametric EQ interface. You can see how multiple adjustable bands combine to create a completely custom EQ curve across the frequency spectrum.
Each of those colored dots represents a band, and you can drag them up/down (Gain), left/right (Frequency), and adjust their width (Q) to shape the sound. Mastering these three controls is the gateway to unlocking your sound's full potential.
To make it even clearer, here’s a quick breakdown of how these three controls function.
| Parameter | What It Controls | Simple Analogy |
|---|---|---|
| Frequency | The specific pitch or tone to be adjusted (measured in Hz). | Tuning a radio to a specific station. |
| Gain | How much the selected frequency is boosted or cut (in dB). | The volume knob for that single station. |
| Q/Bandwidth | The width of the frequency range being affected. | Adjusting the focus of a spotlight from wide to narrow. |
Once you get a feel for how these three interact, you'll start to see—and hear—the possibilities.
A parametric EQ doesn't just change what you hear; it changes how you listen. It trains your ear to identify specific sonic problems and provides the exact tool needed to solve them with surgical precision.
By giving you complete command over the audio spectrum, a parametric EQ opens the door to both creative sound design and critical problem-solving. It's the go-to tool for everything from carving out space in a dense mix to adding character and punch to sounds you've created with a tool like SFX Engine.
To really get a handle on sound shaping, you need to understand the three core controls of a parametric equalizer: Frequency, Gain, and Q. We've touched on what they are, but now let's dig into how they work together. It’s best to stop thinking of them as separate knobs and start seeing them as one powerful, surgical tool for both fixing problems and getting creative.
Each control really just answers a simple question. Frequency asks, "What exact tone am I trying to change?" Gain asks, "How much louder or quieter should that tone be?" And Q (or bandwidth) asks, "How wide or narrow should this change be?" Getting good at answering these questions is what makes a parametric EQ so incredibly useful.
Think of the Frequency control as your targeting system. It lets you home in on the exact tonal center you want to adjust, measured in Hertz (Hz). For example, a bass guitar might sound muddy because of a buildup around 250 Hz. Or maybe you've got an annoying, high-pitched whistle from a mic stand that's sitting right at 3000 Hz.
Imagine you’re listening to a full orchestra, but the piccolo is just a little too shrill. A simple graphic EQ might only give you a broad "highs" slider, which would mess with the violins and cymbals, too. A parametric EQ, on the other hand, lets you zero in on that specific piccolo frequency and tame it without affecting the instruments around it. That's the kind of precision you need for a clean, professional mix.
Once you've locked onto a frequency, the Gain control is all about how much you change it. Measured in decibels (dB), you can either boost the signal (positive gain) or cut it (negative gain). A subtle +3 dB boost can bring a vocal forward, making it feel more present, while a deep -12 dB cut can practically erase a distracting electrical hum.
A great workflow to get into is starting with subtractive EQ—cutting frequencies to clean things up—before you even think about boosting. When you carve out the junk you don't want, you create space and clarity. You'll often find you don't need to boost nearly as much afterward.
The most natural-sounding mixes are almost always built on a foundation of careful cuts, not a ton of boosts. It’s far more effective to remove problematic frequencies than to try and mask them by making other things louder.
This diagram gives you a great visual breakdown of how Frequency, Gain, and Q all work together.
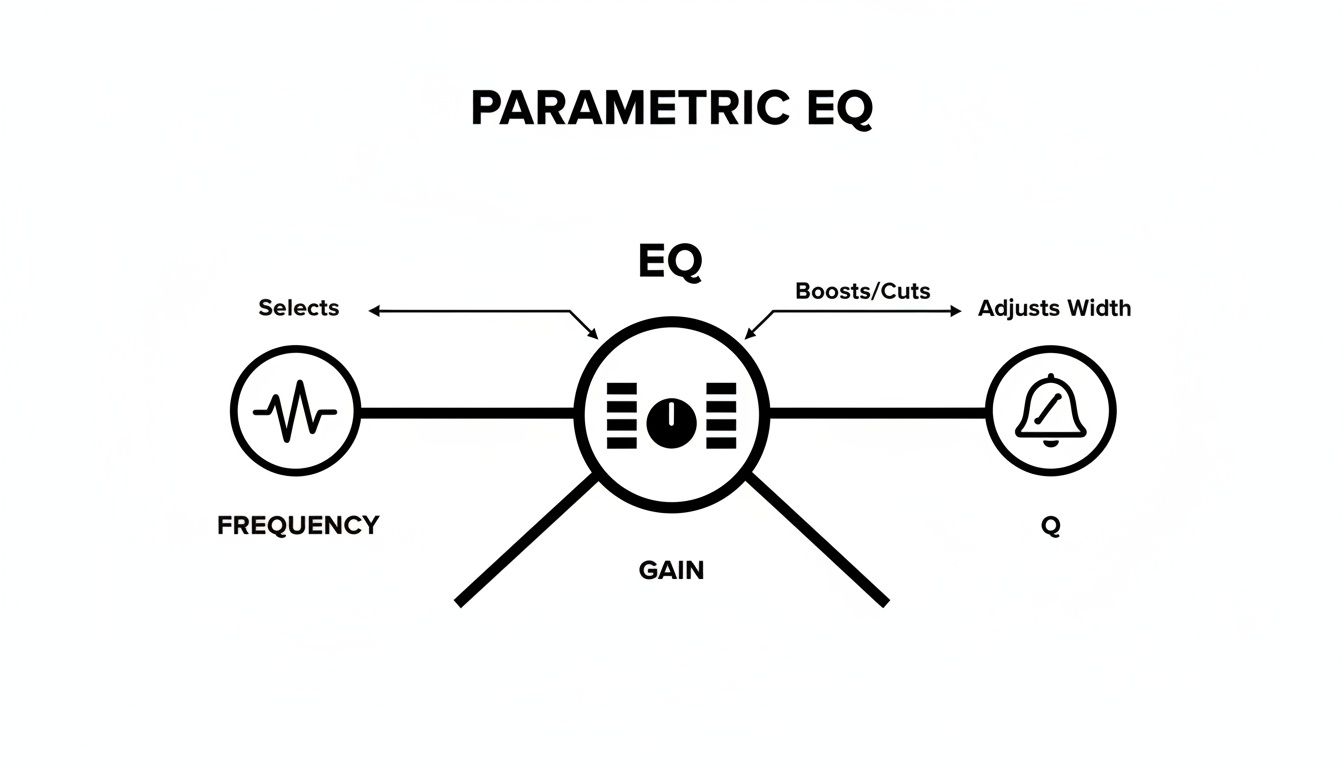
As you can see, each parameter—pinpointing a frequency, deciding how loud it should be, and defining how wide the adjustment is—is just one part of a single, unified process.
The Q control, sometimes called bandwidth, is what really gives a parametric EQ its surgical reputation. It dictates how many neighboring frequencies get pulled along for the ride when you make a gain adjustment.
A good analogy is a spotlight. A low Q is a wide floodlight that illuminates the whole stage. A high Q is a tight, focused spotlight on just one person. Knowing which one to use is everything.
Beyond the standard bell curve, nearly every parametric EQ comes with two other critical tools: High-Pass Filters (HPF) and Low-Pass Filters (LPF). These don't just tweak a frequency in the middle—they completely remove everything below or above a certain point.
Using an HPF on nearly every track that isn't a bass or kick drum is one of the oldest tricks in the book for a reason. It prevents all that low-end mud from building up, which leaves you with a much clearer and more powerful low end in the final mix. Getting comfortable with these fundamental controls is your first real step toward pro-level sound design.
To really get why the parametric EQ was such a huge deal, you have to picture what audio engineers were working with before it came along. For a long time, the go-to tool was the graphic equalizer—a workhorse, for sure, but a bit of a blunt instrument compared to what we have now.
Imagine trying to perform delicate surgery with a butter knife. That’s kind of what it was like.
Graphic EQs gave you a row of sliders, but each one was hard-wired to a specific frequency. A common 10-band graphic EQ, for example, gave you just 10 spots to work with across the entire frequency spectrum. This was fine for making broad-stroke changes, like tweaking the overall sound in a live venue, but it fell short for the kind of detailed, surgical work needed in a recording studio.
You could boost "the mids," sure, but you couldn't pinpoint that one annoying, nasal frequency in a singer's voice or get rid of a specific ringing overtone from a snare hit. You were stuck with the preset frequencies, which often meant you'd end up boosting or cutting nearby frequencies you didn't want to touch. This frustration created a real need for something much more precise.
That demand for surgical precision is what pushed the technology forward. The big moment came in 1969 thanks to a young engineer named George Massenburg. While working at a studio in Baltimore, he came up with a completely new kind of equalizer that gave engineers total control over three key things: frequency, gain, and bandwidth (Q). This was a level of control that was simply unimaginable with the old fixed-band EQs. For a deeper dive, check out the full story on the birth of the parametric equaliser.
Massenburg’s idea was built on sophisticated filter principles that allowed for continuous, sweeping adjustments. He had a working prototype by 1970 and officially introduced his invention to the world at the 1972 Audio Engineering Society (AES) convention. The industry immediately knew it was a game-changer.
This new "parametric" control meant engineers were finally free. They were no longer locked into the fixed frequencies of old hardware. For the first time, they could sweep through the spectrum, find the exact troublesome frequency, and surgically carve it out with a super-narrow Q—all without messing up the sound around it.
The arrival of the parametric EQ didn't just add a new tool to the box; it completely changed how people approached audio. It gave engineers the power to shape sound with a level of accuracy that was previously out of reach, turning mixing from an art of broad approximations into one of surgical precision. It quickly became an essential piece of kit in recording studios, broadcast booths, and live sound rigs everywhere.
Let's break down the difference:
This fundamental shift made modern mixing techniques possible. The idea of "carving out" a specific frequency space for each instrument so it sits perfectly in the mix? That's a direct result of the parametric EQ. It wasn't just a new gadget; it was a whole new philosophy for working with sound, and it set the standard we all follow today.
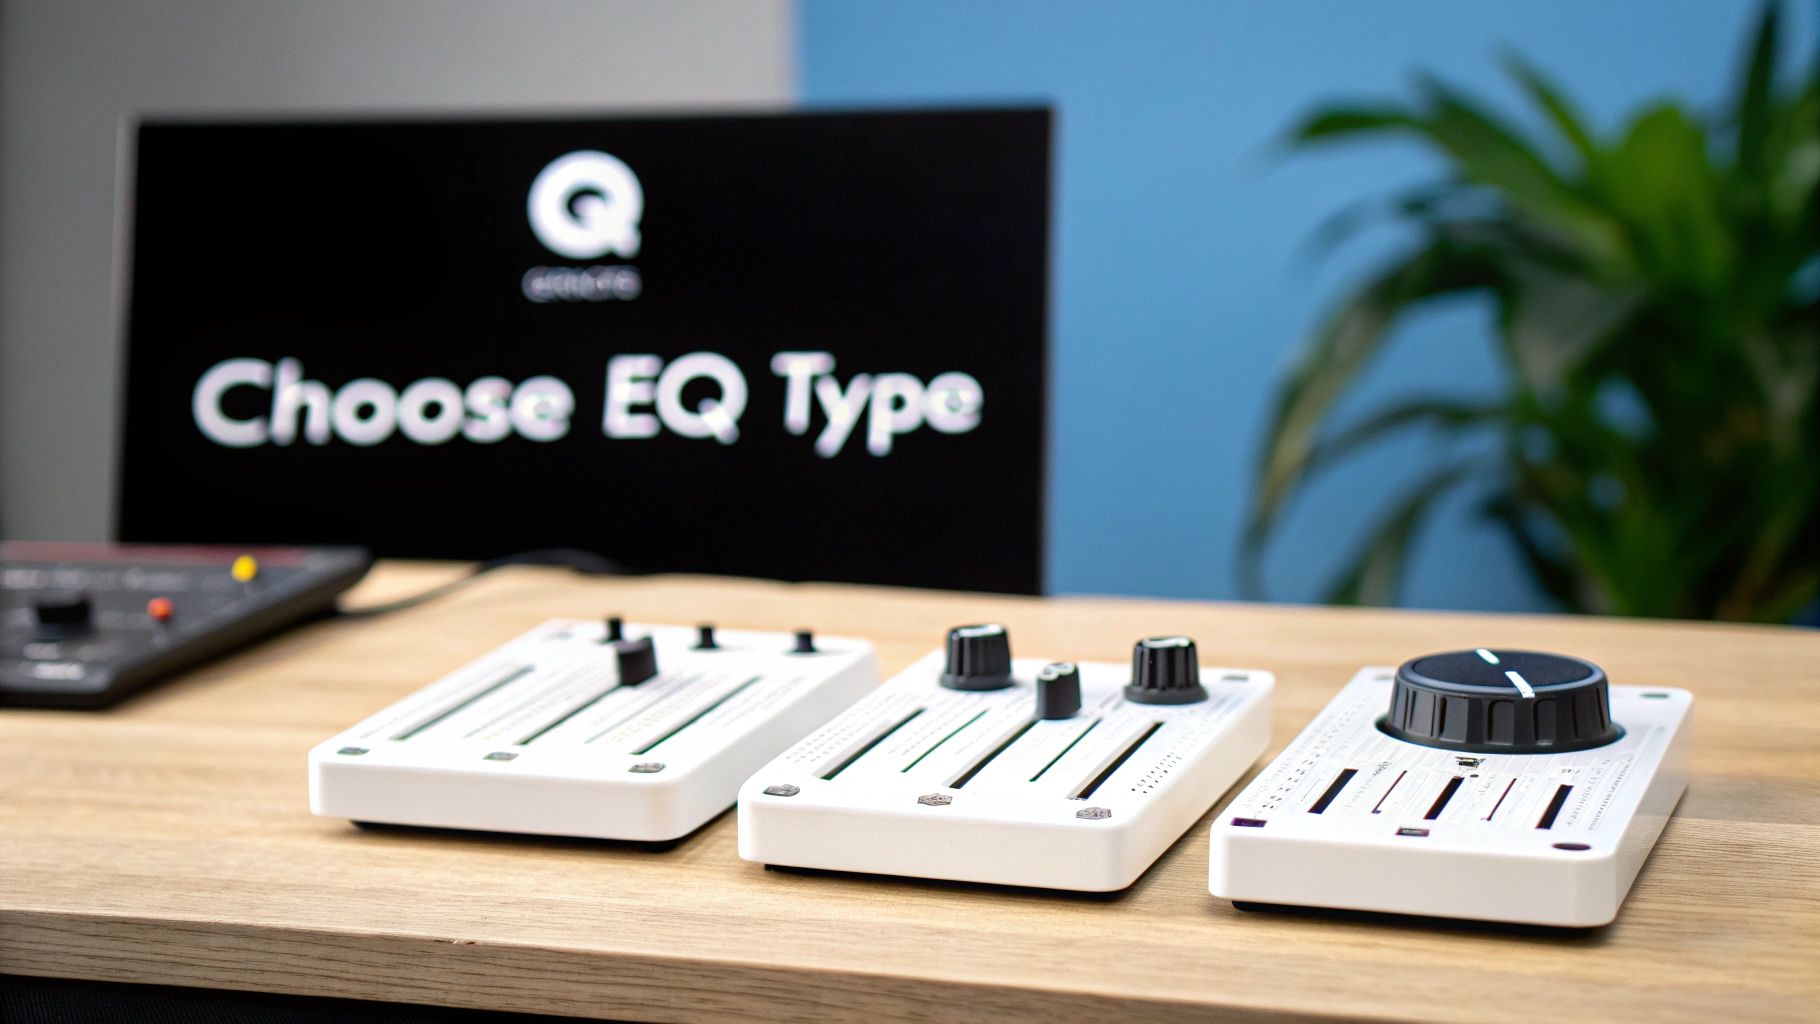
Knowing how a parametric EQ works is one thing, but knowing when to use it is a game-changer. While its precision is incredible, it’s not always the best or only tool for every audio task. Getting a feel for its strengths compared to other EQs, like graphic and shelving types, will make your workflow faster and far more effective.
Think of your EQs like a toolbox. You wouldn't use a tiny screwdriver to hammer a nail, right? In the same way, you wouldn’t grab a broad-stroke graphic EQ for the delicate surgery required to remove a nasty resonant ring from a snare drum. Each tool has its purpose, and a mark of any skilled audio pro is knowing which one to reach for.
This is where you can really appreciate why the parametric EQ was invented in the first place. It was a direct answer to the limitations of earlier EQs. While George Massenburg is often credited with popularizing the concept, the first patent was actually filed by Daniel Flickinger back in early 1971. His design used custom circuits to achieve what was impossible before: sweepable frequency selection and adjustable bandwidth. This was a massive leap from the fixed-band graphic EQs of the 1960s. You can dive deeper into this foundational audio tech over at sound-au.com.
A parametric EQ is your go-to tool for precision work. Period. Its three-way control over frequency, gain, and Q makes it perfect for surgical adjustments that other EQs just can't pull off. It shines when you need to solve specific problems without messing up the surrounding audio.
Reach for a parametric EQ when you need to:
A parametric equalizer is the audio equivalent of a magnifying glass and a pair of tweezers. It lets you find and fix tiny imperfections that, once removed, can dramatically improve the overall clarity and impact of your sound.
A graphic EQ is all about speed and broad strokes. With its fixed frequency sliders, it’s not meant for sonic surgery but for quickly shaping the overall tonal balance of a complex sound. It’s the best friend of live sound engineers who need to tune a PA system to a room in minutes.
The sliders give you a visual "graph" of the EQ curve, so it’s easy to see what you’re doing at a glance. You might use one to quickly tame feedback-prone frequencies in a live venue or to add some overall brightness to a finished mix.
Finally, a shelving EQ is the simplest of the bunch. Instead of creating a bell-shaped curve, it boosts or cuts all frequencies above or below a certain point. A "high shelf" acts like a master treble control, and a "low shelf" works as a master bass control.
They’re perfect for making gentle, wide-ranging adjustments to the top or bottom end of your sound. For instance, you could use a high shelf to add a touch of sparkle to an entire mix or a low shelf to roll off some unnecessary sub-bass rumble from a vocal track. In fact, most parametric EQs include shelving filter options on their outermost bands.
To help you decide which tool to grab from the toolbox, here’s a quick head-to-head comparison.
| EQ Type | Key Features | Best For | Limitations |
|---|---|---|---|
| Parametric EQ | Fully adjustable Frequency, Gain, and Q/Bandwidth. | Surgical problem-solving, detailed mix adjustments, and precise tonal shaping. | Can be slower to set up; requires a good ear to find frequencies. |
| Graphic EQ | Fixed frequency bands with adjustable gain sliders. | Fast, broad adjustments for live sound, room tuning, and quick tonal balancing. | Lacks precision; can affect nearby frequencies unintentionally. |
| Shelving EQ | Boosts or cuts all frequencies above or below a set point. | Gentle, wide-ranging bass and treble adjustments on a track or full mix. | Only affects the high and low ends; cannot adjust mid-range frequencies. |
Once you understand the strengths of each, you can move beyond simply knowing what is parametric eq to understanding its place in a complete audio toolkit. This lets you tackle any audio challenge with the right approach, saving time and getting much better results.
Knowing what the knobs do is one thing, but applying that knowledge to fix real audio problems is where the magic truly happens. A parametric EQ isn't just some technical tool; it's a creative brush that helps you tell a story, whether you're working with music, dialogue, or sound effects.
So, let's step away from the theory and dive into some practical, actionable techniques you can start using right now. Think of these workflows as battle-tested starting points—solid settings you can tweak and adapt for your own projects.
This level of precision is exactly why parametric EQs took over professional studios in the 1980s. As the industry moved from analog to digital, the need for surgical sound shaping skyrocketed. Unlike the old graphic EQs with their clumsy, fixed bands, legendary hardware like the SSL E Series EQ gave engineers complete control to make the razor-sharp cuts required for clean, punchy mixes. This technology was so influential it was used on over 70% of UK Top 40 hits between 1980 and 1989.
In any mix, clarity is king. Your parametric EQ is the number one tool for carving out a dedicated space for every instrument, preventing your track from turning into a chaotic wall of sound.
1. Clearing Out Low-End Muddle
One of the most common mix issues is a muddy, indistinct low end where the kick drum and bass guitar are fighting for the same sonic real estate. A parametric EQ can fix this in a heartbeat.
2. Adding Vocal Presence and Air
Want a vocal to slice through a busy mix without just cranking the fader? The secret is using subtle boosts to highlight the frequencies that matter most.
For a deeper dive, take a look at our guide on the https://sfxengine.com/blog/best-equalizer-settings-for-music, which is packed with tips for a huge range of instruments.
For anyone working with video, audio quality is just as crucial as the visuals. A parametric EQ is your go-to for cleaning up dialogue and location sound to meet professional broadcast standards.
1. Enhancing Dialogue Clarity
Let's be honest—location sound is almost never perfect. Background noise, weird room reflections, and less-than-ideal mic placement can leave dialogue sounding muffled and hard to understand.
In video editing, subtractive EQ is your best friend. Your first instinct should always be to cut problematic frequencies, not boost pleasant ones. A clean track is a clear track.
2. Taming Distracting Room Hum
Every so often, a recording is cursed with a specific, constant hum from fluorescent lights or electronics. A parametric EQ can surgically remove it.
To make sure your carefully mixed audio survives the export process, it’s also a good idea to understand what a video codec is and how it impacts audio quality.
In game development, sound isn't just window dressing—it’s a fundamental part of the experience. A parametric EQ is what helps you shape sound effects to build immersive and believable worlds.
Once you get the hang of a parametric EQ's main controls, you'll inevitably start running into practical questions. This is where the theory hits the road, and the real nuances of shaping sound start to appear. Nailing down the answers to these common sticking points is the key to moving from just knowing what the knobs do to understanding how to use them with confidence and creativity.
Think of this section as your go-to reference guide. We'll tackle the most frequent hurdles that producers, editors, and sound designers face, clarifying key concepts and offering some straightforward advice you can use in your day-to-day work.
This is probably the first big question people ask when picking their tool. The answer really boils down to one thing: precision versus speed.
You'll want to reach for a parametric EQ when you're doing surgical work that requires pinpoint accuracy. It’s the right tool for hunting down and removing a specific, annoying resonant frequency, fixing tonal problems in a dialogue recording, or carefully carving out space for an instrument in a busy mix. The fact that you can control frequency, gain, and Q independently makes it the undisputed champion for detailed problem-solving.
A graphic EQ, on the other hand, is built for broad, quick adjustments where getting it done fast is more important than surgical precision. Think about tuning a PA system to a room before a live show or making some general tonal tweaks to a finished master track. If a parametric EQ is a scalpel, a graphic EQ is more like a paintbrush—both are incredibly useful, but for very different jobs.
Getting this distinction right is fundamental to a professional workflow. The names themselves are pretty self-explanatory, but how you apply them makes a huge difference in the final sound.
Subtractive EQing is simply the process of cutting or turning down the volume of specific frequencies. This is almost always the best place to start. Why? Because you’re removing problematic junk from the sound, which in turn creates more headroom and leads to a cleaner, more natural-sounding mix. For example, making a few small cuts in the low-mid frequencies on several instruments can instantly clear up the "muddiness" that was clouding your entire track.
Additive EQing is the opposite—it’s about boosting frequencies to emphasize a sound's good qualities, like adding a little "air" to a vocal or more "punch" to a kick drum. It’s definitely effective, but boosting too much or in the wrong places can introduce weird phase issues and make a sound feel unnatural. A great workflow is to first use subtractive EQ to clean everything up, then follow up with small, musical boosts where they're really needed.
A clean mix is almost always built on a foundation of careful cuts. By removing what you don't need, you naturally reveal the clarity and impact of what you want to hear.
The best way to do this is a classic technique called frequency sweeping. It’s a simple but incredibly powerful way to train your ears to connect specific frequencies with the tonal characteristics you're hearing.
Here’s the process:
You can use the exact same technique to find the sweet spots, too. Sweep around to find the frequency that adds the warmth, presence, or clarity you’re looking for, then dial back to a much more subtle boost with a wider Q. For more advanced tips on this, check out our guide on how to reduce background noise from a microphone.
Yes, absolutely! In fact, you should. This is a standard pro-level technique called serial equalization, and it lets you separate different EQ jobs for way more control.
For instance, you might put one parametric EQ right at the start of your plugin chain to handle purely corrective tasks. This is where you’d use those surgical, subtractive cuts to clean up the raw audio—getting rid of any hum, room resonances, or other noise before it hits anything else.
Then, after other processors like compressors or saturators, you could place a second parametric EQ at the end of the chain. This one would be for broader, more creative shaping—think gentle, musical boosts that help the track sit perfectly in the final mix. Separating your tasks like this keeps your workflow clean, organized, and much more effective.
Ready to shape your own unique sounds? At SFX Engine, we provide a free, AI-powered sound effect generator that gives you complete creative control. Design custom, royalty-free audio for your films, games, or music projects by simply describing what you want to hear. Start creating for free at sfxengine.com and bring your sonic vision to life.