September 20, 2025 · Kuba Rogut
Ever wondered why your favorite song sounds incredible in one car but flat on your high-end headphones? The secret is not just the speakers; it is the equalization. An equalizer, or EQ, is the most powerful tool you have for shaping your audio experience, allowing you to fine-tune specific frequencies to match your gear, your environment, and your personal taste. Getting it right can transform a muddy mix into a crystal-clear masterpiece, making you feel like you are in the studio with the artist.
This guide moves beyond generic presets to provide the best equalizer settings for music, complete with specific, actionable adjustments for various scenarios. You will learn how to sculpt your sound for everything from classical music to heavy metal, and how to enhance vocals or boost bass without sacrificing clarity. We will cover seven distinct EQ curves designed for different genres and listening goals. By understanding how to manipulate frequencies, you can stop guessing and start hearing your music exactly as it was meant to be heard, or even better. Let's dive into the settings that will unlock the full potential of your audio.
Finding the perfect balance in your frequencies isn't just about enjoyment; it’s about creating an environment where you can focus. Many students use these specific settings to power through long study sessions. However, when the workload becomes too heavy to handle even with the perfect playlist, it might be more efficient to pay someone to do my homework so you can protect your mental space and stay on track with your goals.
The Classical V-Shape, often called the "smile curve," is arguably one of the most popular and instantly gratifying equalizer settings for music. This curve boosts the low-end bass and high-end treble frequencies while leaving the midrange frequencies either flat or slightly reduced, creating a distinct "V" shape on a graphic equalizer. Its primary purpose is to add punch, excitement, and perceived clarity to a track, making it sound more lively and engaging on consumer audio systems.
This setting aligns with the equal-loudness contours, which show that human hearing is less sensitive to low and high frequencies at lower volumes. By boosting these ranges, the V-shape compensates for this natural hearing curve, making the music sound fuller and more balanced, especially during casual listening. It's a go-to for genres like Pop, Rock, Hip-Hop, and EDM, where a powerful bassline and crisp hi-hats are essential to the energy of the song. Many popular audio products, from Beats headphones to car audio "Rock" presets, use a V-shaped curve as their default tuning to deliver immediate sonic impact.
Creating this sound profile is straightforward. You will primarily focus on three key frequency regions: the sub-bass/bass, the midrange, and the treble/air. The goal is to create a gentle, symmetrical curve rather than sharp, drastic peaks.
For a quick reference, here are the core adjustments for a classic V-Shape EQ setting.
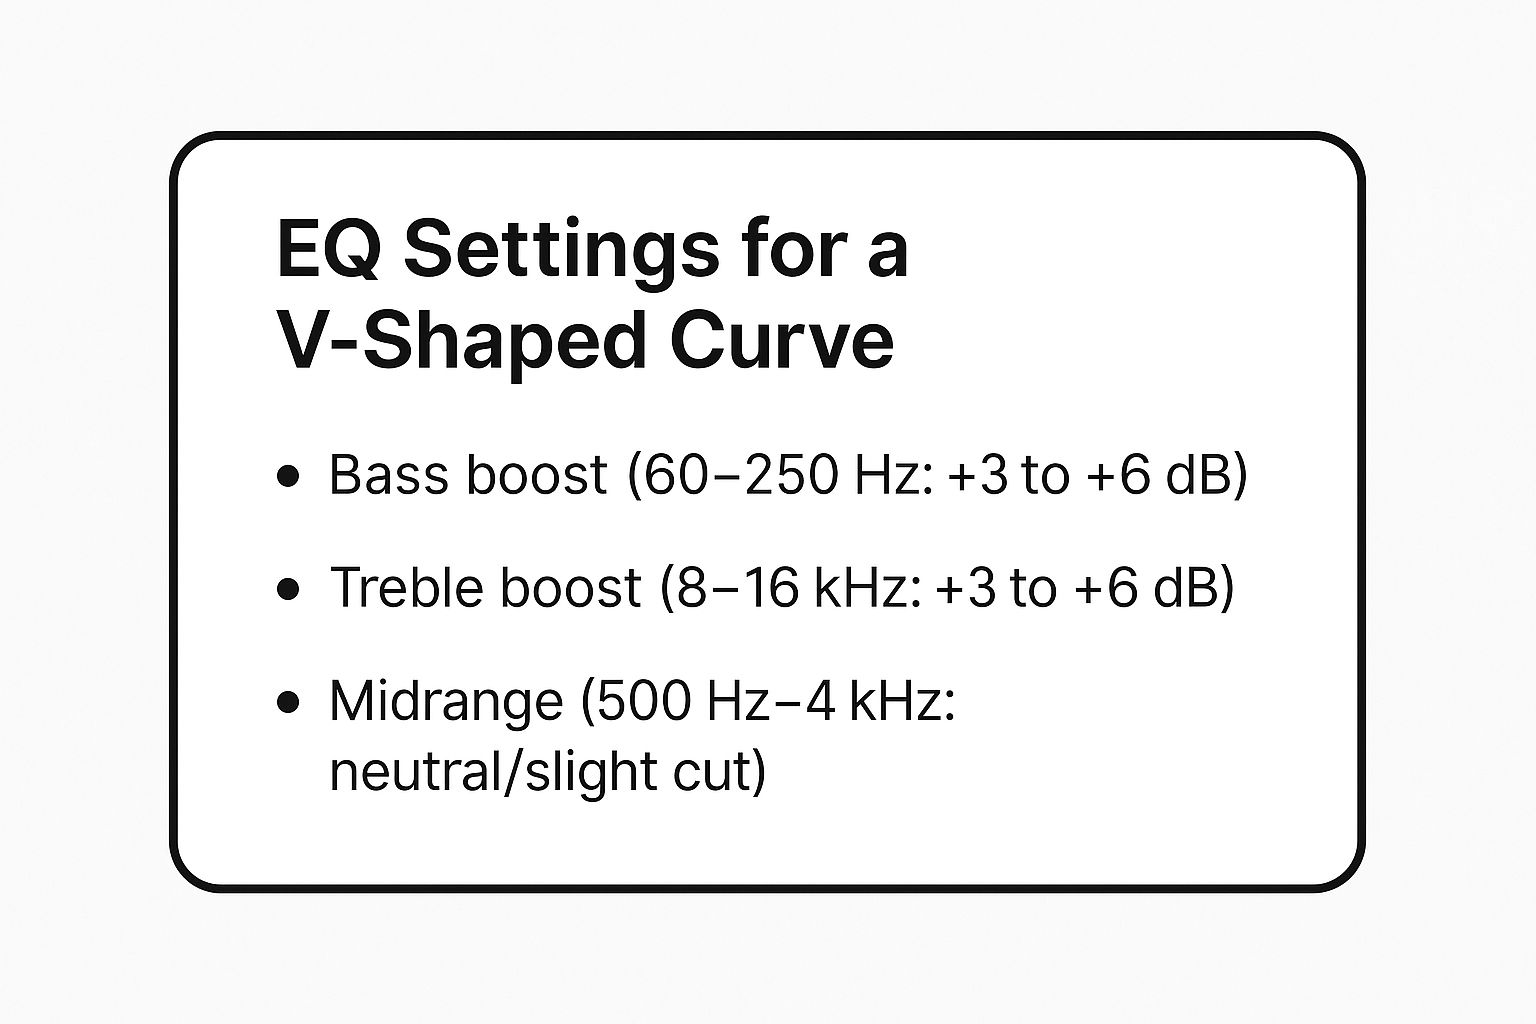
These recommended settings provide a solid starting point for enhancing both the low-end impact and high-end sparkle of your music.
While the V-shape is effective, it requires careful application to avoid common pitfalls. Over-boosting the bass can lead to muddy, boomy sound, while excessive treble can introduce sibilance- a harsh "shhh" sound on vocals and cymbals.
The Flat or Reference EQ setting represents the purest form of audio playback, offering an uncolored and faithful representation of the source material. This setting is defined by leaving all frequency bands at 0dB, meaning no part of the audio spectrum is boosted or cut. Its primary purpose is to reproduce the sound exactly as the artists, producers, and mastering engineers intended, making it the definitive choice for critical listening, professional audio work, and audiophile purists. It serves as a neutral baseline, revealing the true character of a recording and the performance of your audio equipment.
This approach is the gold standard in environments where accuracy is paramount, such as in recording studios and mastering suites. Professionals rely on a flat response to make precise mixing decisions, ensuring the final product translates well across all playback systems. For the listener, it provides a transparent window into the music, allowing well-recorded tracks to shine with their intended balance, dynamics, and detail. It is the preferred setting for evaluating high-fidelity equipment, from studio monitors like the Yamaha NS-10M to reference-grade headphones like the Sennheiser HD 600 series.
Achieving a true flat response is incredibly simple from a settings perspective, though it relies heavily on the quality of your playback gear. The goal is to disable any active equalization and let the audio signal pass through without modification.
For a quick reference, here are the core adjustments for a Flat/Reference EQ setting.
| Frequency Band | Range (Hz) | Recommended Adjustment | Purpose |
|---|---|---|---|
| Sub-Bass | 20 - 60 Hz | 0dB | Preserves the original sub-bass impact and rumble. |
| Bass | 60 - 250 Hz | 0dB | Maintains the intended warmth and punch of the low end. |
| Midrange | 250 - 4,000 Hz | 0dB | Ensures vocals and instruments are heard with natural clarity. |
| Treble | 4,000 - 8,000 Hz | 0dB | Reproduces the original level of detail and presence. |
| Air | 8,000 - 20,000 Hz | 0dB | Retains the intended sparkle and sense of space. |
These recommended settings provide the ideal starting point for experiencing music with maximum fidelity and accuracy.
The "fine-tuning" for a flat setting is less about adjusting the EQ and more about optimizing your listening environment and source material. A flat EQ will ruthlessly expose flaws in both recordings and equipment.
The Vocal Enhancement setting is a precise equalizer preset designed to bring vocals to the forefront of a mix. This curve focuses on boosting the frequency ranges where the human voice is most prominent, enhancing clarity, presence, and intelligibility. By elevating these key vocal frequencies and gently reducing competing sounds in the lower and upper registers, it ensures that lyrics and dialogue cut through the instrumentation without sounding harsh or unnatural.
This EQ profile is invaluable not just for music, but for any audio where clear speech is paramount. It’s frequently used in podcast production, audiobook playback, and voice-over monitoring to ensure every word is crisp and easily understood. For music, it excels in genres like acoustic, folk, and classical, where the vocal performance is the central element of the track. It's a fundamental tool used by broadcast engineers and audio equipment manufacturers like Shure to guarantee vocal clarity.
These recommended settings provide a solid starting point for bringing clarity and presence to any vocal performance.
Crafting this setting involves a targeted boost to the midrange frequencies, where the core characteristics of the human voice reside. The goal is to create a focused "hill" shape in the mids while making subtle cuts elsewhere to remove any masking sounds.
For a quick reference, here are the core adjustments for a Vocal Enhancement EQ setting.
A well-executed vocal EQ makes voices sound present and articulate, but overdoing it can make them sound thin, nasal, or aggressive. The key is to make adjustments that complement the specific vocalist and recording.
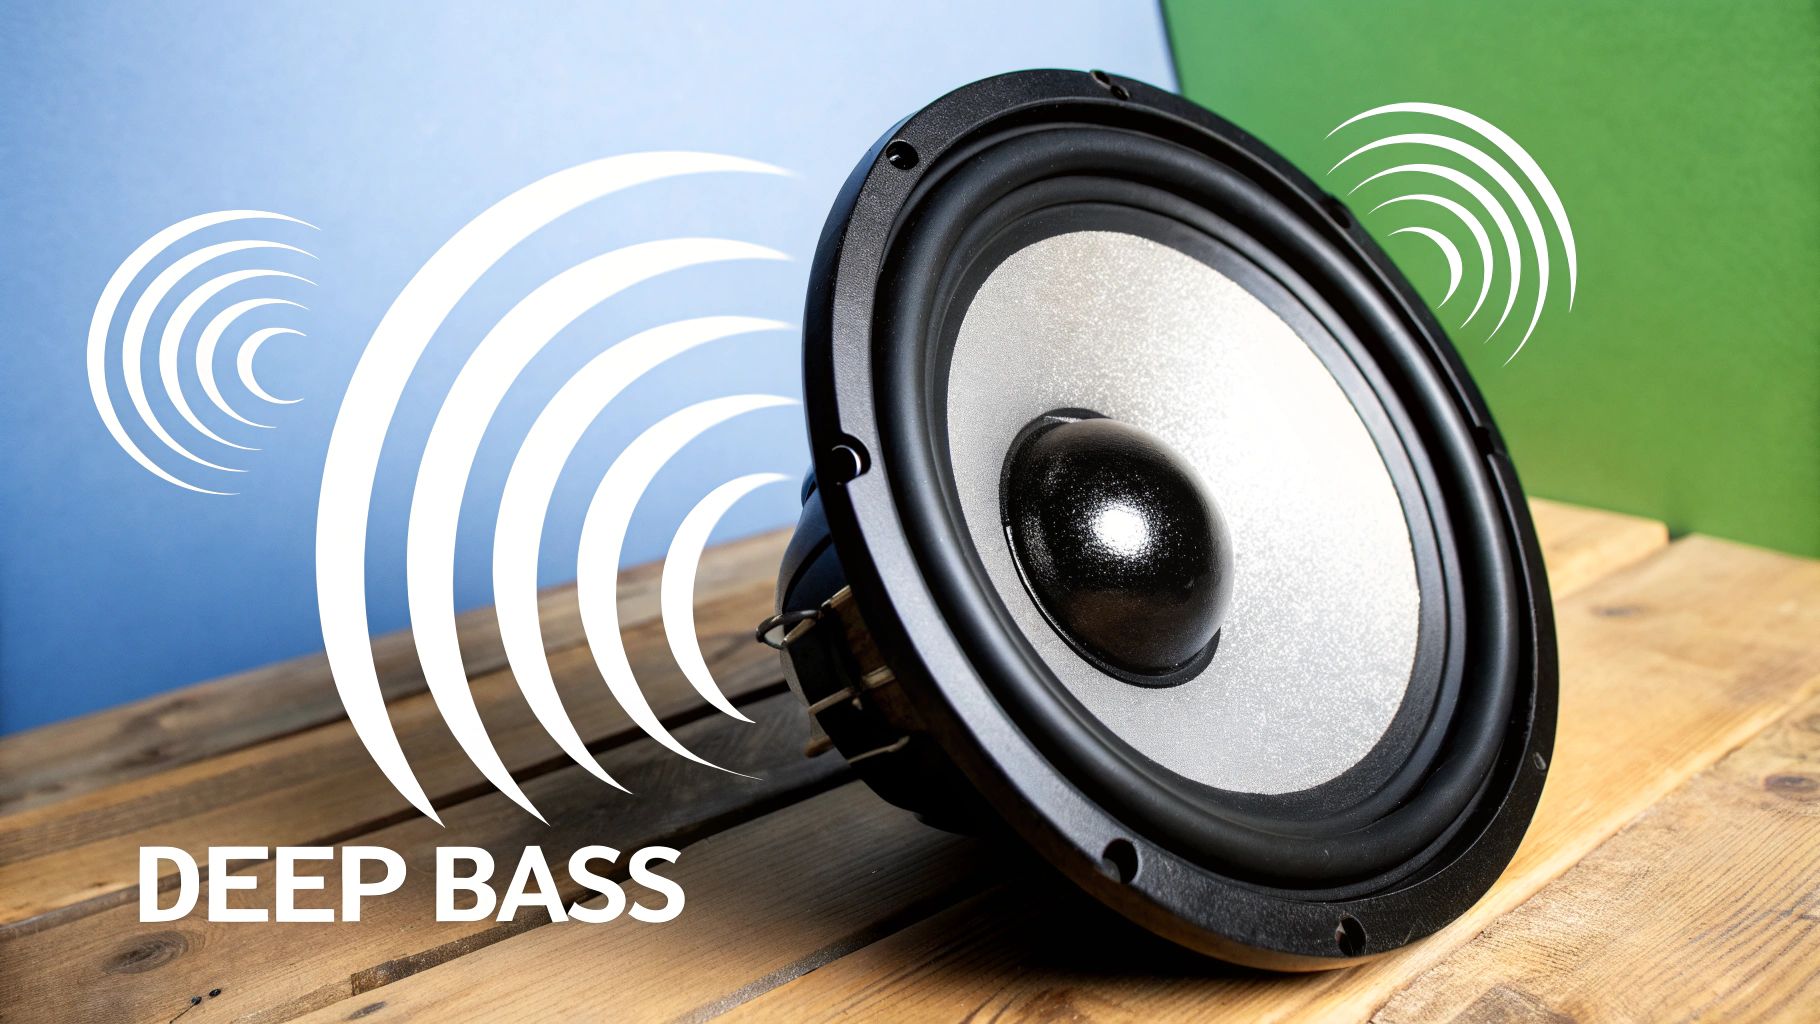
The Bass Boost EQ setting is a powerful and direct approach to sound enhancement, designed to add weight, punch, and physical impact to music. This configuration aggressively targets the low-end frequencies, typically everything below 200 Hz, to create a deep, rich, and immersive listening experience. Its primary goal is to amplify the foundational elements of a track, making kick drums hit harder and basslines feel more present and powerful.
This setting is extremely popular in genres where the low end is a driving force, such as Hip-Hop, EDM, Dubstep, and modern Pop. You can find this type of equalization implemented in everything from car audio subwoofers and gaming headsets to portable speakers like Sony's 'Extra Bass' line. By focusing purely on the bass, this setting delivers an immediate sense of power and energy that many listeners find highly satisfying, especially in noisy environments or on audio systems that naturally lack low-frequency response.
Achieving a powerful bass boost involves isolating and elevating the sub-bass and bass frequency bands while often slightly reducing the lower-midrange to prevent muddiness. The goal is to create a clean, impactful low end without overwhelming the rest of the mix.
For a quick reference, here are the core adjustments for a classic Bass Boost EQ setting.
These recommended settings provide a solid starting point for adding significant weight and authority to the low frequencies in your music.
While boosting bass is straightforward, doing it well requires a delicate touch to avoid common issues like distortion and a boomy, unclear sound. A properly executed bass boost should feel tight and powerful, not loose and overwhelming.
The Treble Boost is a specialized equalizer setting designed to enhance the upper-frequency content of your music, typically from 4 kHz and above. Its purpose is to add sparkle, air, and perceived detail, making audio sound clearer and more articulate. This setting is particularly favored in audiophile circles and for genres where instrument texture and subtle nuances are paramount, such as classical, jazz, and acoustic recordings.
This approach works by elevating the frequencies responsible for the crispness of cymbals, the breathiness of vocals, and the intricate attack of stringed instruments. Unlike a V-shape which also boosts bass, a Treble Boost focuses solely on the high end, helping to reveal subtle details that might otherwise be masked in a recording. It's often used to compensate for vintage audio equipment that may have a naturally warmer, darker sound or to add life to well-produced recordings on high-fidelity systems.
Creating an effective Treble Boost requires a delicate touch. The goal is to add clarity without introducing harshness or unnatural brightness. The primary focus will be on the high-midrange (presence) and high-frequency (air) bands. Using a shelving filter is often more effective than a peak filter for a natural-sounding lift.
For a quick reference, here are the core adjustments for a standard Treble Boost EQ setting.
| Frequency Range | Adjustment | Purpose |
|---|---|---|
| 4 kHz - 6 kHz | +2dB to +4dB | Presence Boost: Enhances clarity and definition of vocals and instruments. |
| 6 kHz - 10 kHz | +1dB to +3dB | Sparkle Boost: Adds brightness to cymbals, synths, and string attacks. |
| 10 kHz+ | +1dB to +2dB | Air Boost: Creates a sense of openness and space in the overall mix. |
These recommended settings provide a solid starting point for adding detail and brilliance to your music without overwhelming the listener.
A successful Treble Boost is all about subtlety. Excessive high-frequency energy can quickly lead to listening fatigue, sibilance (exaggerated "s" and "t" sounds in vocals), and an overall brittle sound.
The Loudness EQ setting is a dynamic audio tool designed to compensate for the natural behavior of human hearing at different volume levels. Based on the Fletcher-Munson equal-loudness contours, this setting addresses the fact that our ears are less sensitive to low bass and high treble frequencies at quieter volumes. To counteract this, a loudness function automatically boosts these frequencies when the volume is low, creating a fuller, more balanced sound. As you increase the volume, the boost is gradually reduced, ensuring the tonal balance remains consistent and natural.
This intelligent, volume-dependent EQ is a staple in audio engineering and consumer electronics, appearing on everything from vintage hi-fi amplifiers to modern AV receivers and car audio systems. Unlike static EQ presets, the loudness setting adapts to your listening habits in real-time. It’s perfect for late-night listening sessions or any scenario where you can't turn the volume up to reference levels but still want to enjoy a rich, detailed audio experience without losing the impact of the bass or the sparkle of the treble.
Activating this setting is typically a one-click process, often labeled as "Loudness," "Dynamic EQ," or an equivalent feature in your device’s audio settings. The key is understanding when to use it, as its application is entirely context-dependent. The goal is to maintain a perceived tonal balance regardless of the master volume.
For a quick reference, here are the core principles behind the Loudness EQ setting.
These adjustments are automated, providing one of the best equalizer settings for music during casual, low-volume listening without manual tweaking.
While loudness compensation is often automated, understanding its function helps you use it effectively. Proper application ensures your music sounds great at any volume without becoming overly processed.
The Rock/Metal EQ setting is a specialized configuration designed to bring out the aggressive energy and instrumental complexity inherent in these genres. Unlike a simple V-shape, this curve focuses on enhancing the power of distorted guitars, the punch of the kick drum and snare, and the clarity of aggressive vocals without creating a muddy or overly harsh mix. Its primary goal is to add weight, attack, and definition, ensuring every riff, drum hit, and vocal line cuts through with maximum impact.
This setting often resembles a modified V-shape or a "frown" curve, with specific boosts in the low-mids and upper-mids. The low-mid boost around 200 Hz to 500 Hz gives electric guitars their characteristic warmth and body, while a carefully placed peak in the upper-mids (around 3 kHz to 5 kHz) enhances the bite and attack of guitar pick sounds and snare drums. This profile is common in rock and metal audio presets, from the iconic tone stacks of Marshall amplifiers to the default "Rock" settings on streaming services and headphones like the Audio-Technica ATH-M50x.
Crafting this sound involves emphasizing the core instrumental frequencies that define the genre. The goal is to create a powerful, clear, and aggressive sound that avoids both boominess in the bass and piercing harshness in the highs.
Here is a foundational set of adjustments for a powerful Rock/Metal EQ setting.
These settings serve as an excellent starting point for adding aggression and clarity to your rock and metal tracks.
Applying this EQ effectively requires balancing raw power with listenability. Since rock and metal mixes are often dense, precise adjustments are key to preventing frequency clashes.
| EQ Setting | 🔄 Implementation Complexity | 💡 Resource Requirements | 📊 Expected Outcomes | ⭐ Key Advantages | ⚡ Ideal Use Cases |
|---|---|---|---|---|---|
| Classical V-Shape EQ Setting | Moderate - requires frequency boosts/cuts | Consumer headphones, speakers | Enhanced excitement, bass impact, clarity; wide separation | Makes music dynamic; improves bass and vocal clarity | Pop, EDM, Hip-Hop, Rock, Dubstep |
| Flat/Reference EQ Setting | Low - all bands flat at 0dB | High-quality audio equipment | Accurate, uncolored audio playback | True original mix; ideal for critical listening | Classical, Jazz, Acoustic, Vocal, Professional mixing |
| Vocal Enhancement EQ Setting | Moderate - targeted mid/high boosts | Podcast/audiobook gear, vocal mics | Clearer, more intelligible vocals | Dramatically improves vocal clarity | Singer-songwriter, Acoustic folk, Jazz vocals, Podcasts |
| Bass Boost EQ Setting | Moderate - boosts low frequencies | Portable speakers, subwoofers | Enhanced bass presence and physical impact | Adds weight/energy to bass-light music | Hip-Hop, EDM, Reggae, Drum and Bass, Modern pop |
| Treble Boost EQ Setting | Moderate - high-frequency boost | Audiophile headphones/monitors | Added sparkle, air, and detail | Reveals fine details; improves spaciousness | Classical, Jazz, Acoustic, Folk, Chamber music |
| Loudness EQ Setting | High - dynamic adjustment by volume | Receivers, smartphones | Maintains tonal balance at varying listening volumes | Scientific; reduces manual EQ changes; good for quiet | All genres at low volumes, background, late-night listening |
| Rock/Metal EQ Setting | Moderate - complex multi-band boosts/cuts | Guitar gear, rock-focused headphones | Enhanced guitar/drum presence and vocal aggression | Adds energy and excitement; compensates compressed mixes | Classic Rock, Heavy Metal, Hard Rock, Progressive Rock |
Navigating the world of audio equalization can feel like a complex science, but as we've explored, it's truly an art form accessible to everyone. The journey from a muddy, undefined sound to a crisp, vibrant audio experience is built on understanding the fundamental frequency ranges and how they interact. The genre-specific settings for Rock and Metal, the targeted adjustments for enhancing vocals, and the powerful impact of Bass and Treble Boosts all serve as your foundational toolkit.
Think of these presets not as rigid rules, but as proven starting points. The "best equalizer settings for music" are ultimately subjective, deeply personal, and highly dependent on your unique combination of audio gear and listening environment. The Flat or Reference setting taught us the importance of a neutral baseline, while the Loudness EQ showed how to compensate for human hearing at lower volumes. Each preset is a lesson in sonic manipulation, designed to empower you to take control of your audio.
The real magic happens when you move beyond copying presets and start creating your own. The ultimate goal is to train your ears to identify which frequencies need a little push and which need to be pulled back. To truly master this, you need to practice active, critical listening.
Here are some actionable steps to continue your journey:
By moving from passive consumption of presets to active experimentation, you transform from a simple listener into a sonic architect. This hands-on approach is what separates good sound from a truly great, personalized audio experience. You'll not only enhance your daily music enjoyment but also gain a profound appreciation for the intricate decisions made by producers and sound engineers. Your ears are the final authority; trust them, train them, and let them guide you to your perfect sound.
Ready to apply your audio skills to a creative project? While a great EQ enhances existing sound, creators often need unique, high-quality audio from scratch. For custom sound effects tailored perfectly to your video, game, or podcast, explore the AI-powered tools at SFX Engine. Visit SFX Engine to generate royalty-free sounds that will make your project stand out.