January 4, 2026 · Kuba Rogut
Adding sound effects to your Godot project is pretty straightforward at its core. You'll bring in your audio files, add a special node to your scene to play them (AudioStreamPlayer, AudioStreamPlayer2D, or AudioStreamPlayer3D), point that node to your sound file, and then tell it when to play using a script. Once you nail this basic loop, you open up a world of possibilities for creating immersive, reactive game audio.
Before you start dropping explosion sounds and laser zaps into your game, let's talk about setting up a solid foundation. Trust me, spending a little time organizing things now will save you from massive headaches later. Great audio isn't just about picking cool sounds; it’s about managing them efficiently and making smart technical choices from the get-go.
Think of it as three key actions: getting your files in order, importing them the right way, and picking the correct nodes for the job.
This diagram gives you a quick visual rundown of those essential first steps for getting your audio workflow up and running in Godot.
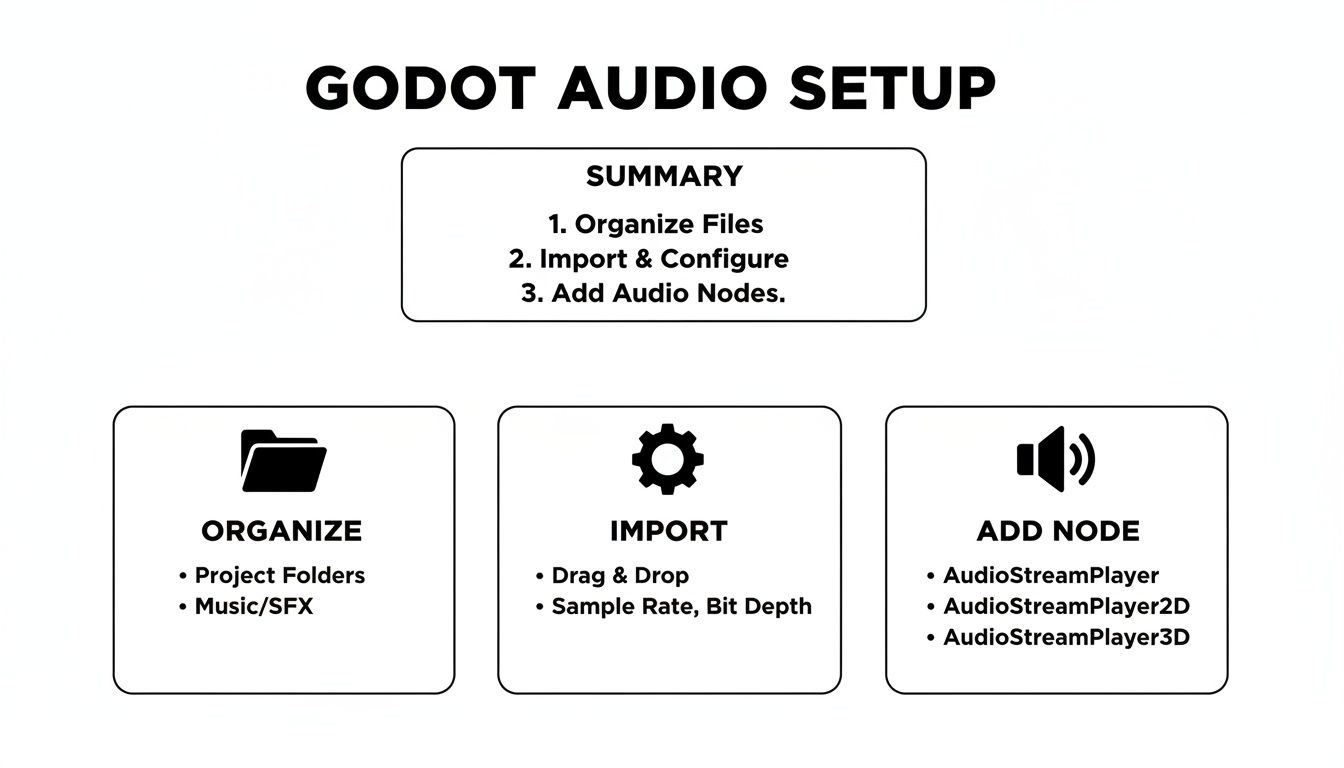
Each of these steps, from creating a dedicated folder for your sounds to choosing the right player node, builds on the last. Get this part right, and the rest of the process becomes much smoother.
One of the first decisions you'll make is what audio format to use. Godot handles a few, but for game development, the choice usually boils down to WAV vs. OGG Vorbis.
Making the right call here is a balancing act between quality, file size, and performance.
This table breaks down the essentials to help you decide which format fits your needs for different types of sounds.
| Format | Best For | Pros | Cons |
|---|---|---|---|
| WAV | Short, repetitive sounds (e.g., footsteps, UI clicks, gunshots). | Highest quality (uncompressed); no decompression overhead. | Very large file sizes; can bloat the final game build. |
| OGG Vorbis | Longer audio (e.g., music, ambiance, dialogue, complex effects). | Excellent compression; much smaller file sizes. | Minor quality loss; requires CPU to decompress (usually negligible). |
| MP3 | Background music or assets where size is critical. | Good compression; widely supported. | Not ideal for looping due to inherent gaps; less efficient than OGG. |
Ultimately, a mix is best. Use WAV for tiny, high-frequency sounds where performance is king, and lean on OGG for pretty much everything else to keep your game's download size reasonable.
Alright, you've got your sounds in the right format. The next step is to get them into your project. I always recommend creating a dedicated sfx or audio folder right inside your Godot project to keep things tidy.
Once you drag your files into Godot's FileSystem dock, the engine’s import system kicks in. If you click on an audio file, you’ll see the Import tab pop up. This is where you can tweak crucial settings, like telling Godot whether a sound should loop or not.
Now, let's talk about memory, because Godot is pretty clever here. When you use a compressed format like OGG Vorbis, Godot has to decompress it to play it. This means an OGG file will take up significantly more RAM than its file size on disk—a good rule of thumb is about 10 times more. So, a 1MB OGG file might occupy 10MB in memory.
For longer audio clips like background music, Godot automatically streams them directly from the disk instead of loading them into RAM all at once. This is a lifesaver for keeping your game’s memory footprint low.
A solid audio pipeline often goes beyond just sound effects. If you're working with a lot of dialogue, for instance, managing those assets can be a job in itself. That’s where tools like audio transcription software can become surprisingly useful for documenting and organizing voice lines.
Once your audio files are prepped and sitting in your project folder, it's time to actually make them play in your game. This is where Godot's AudioStreamPlayer nodes step in. Think of them as the workhorses for all your sound effects.
Getting a handle on the different types is the key to building a believable audio landscape for your players.
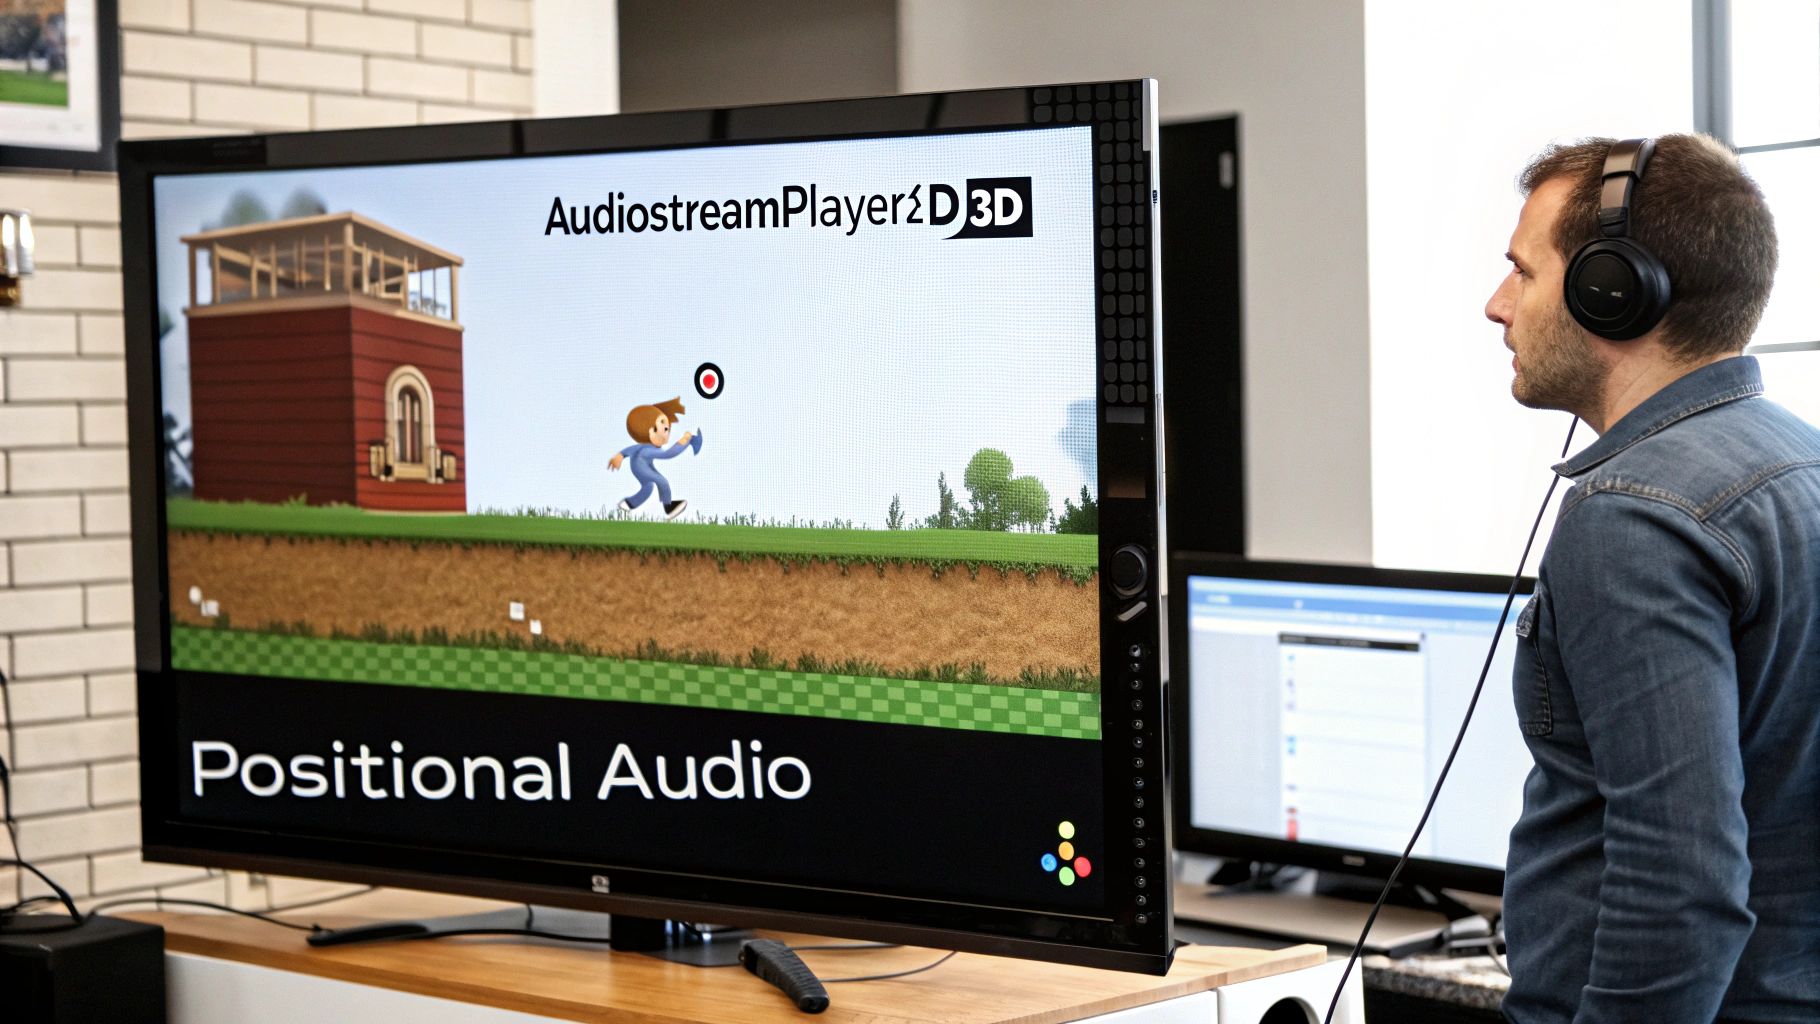
Essentially, these nodes are invisible speakers you place directly into your scenes. You simply load a sound file into one, and then you can trigger it whenever you need to—usually through code or an animation event. The two you'll be using most often are AudioStreamPlayer2D and AudioStreamPlayer3D.
The choice here is pretty straightforward. You just have to ask: does the sound's position in the game world actually matter? If the answer is no, then AudioStreamPlayer2D is what you want.
Even in 2D games, where you'll almost always use AudioStreamPlayer2D, you can still create a sense of depth. By manually adjusting the node's volume property based on an object's distance from the camera, you can convincingly fake a 3D effect.
Let's walk through a common scenario. Say you have a player character who can jump. The first thing you'd do is add an AudioStreamPlayer node as a child of your player scene. Then, in the Inspector panel, you'll find the "Stream" property—just drag and drop your jump sound file right into it.
Now for the code. In your player's script, you can trigger the sound with just a couple of lines.
@onready var jump_sound_player = $JumpSoundPlayer
func _physics_process(delta): # Check for the jump input and make sure the player is on the ground if Input.is_action_just_pressed("ui_accept") and is_on_floor(): # Play the sound! jump_sound_player.play()
That’s all there is to it. The script listens for the jump input, and if the conditions are right, it calls the play() method on our sound node. Adding responsive sound effects in Godot really is that simple. While the specifics can vary between game engines, the core concepts are universal. You can get a broader look at these fundamentals in this guide on how to add sound effects to a game.
When you're working with AudioStreamPlayer3D, the secret to immersion is attenuation—how a sound fades out as you move away from it. Godot gives you great control over this in the Inspector, under the "Attenuation" section. The most critical property here is Unit Size.
Pro Tip: Think of
Unit Sizeas the radius of your sound's "loud" zone. It determines how far the sound travels before it really starts to fade. A smaller value, like 10-20, means the sound drops off quickly, which is perfect for localized effects like a footstep. A larger value will make the sound audible from much farther away, like a siren. You'll want to spend some time tweaking this setting to make your 3D world feel just right.
Just playing a sound is easy. But building a rich, immersive sonic landscape for your game? That's a whole different ballgame. To get that professional polish, you need to master Godot’s Audio Bus system. Think of it as a virtual mixing board right inside the engine, letting you group and control sounds together.
Here's the practical difference: instead of tweaking the volume of ten different explosion sounds one by one, you can send them all to a single "SFX" bus. Now you can adjust the volume of all explosions at once, slap an effect on the whole group, or mute them with a single line of code. It's a massive workflow improvement.
Getting started is simple. Just pop open the "Audio" tab at the bottom of the Godot editor. You'll see the "Master" bus, which is the final output for all audio in your game. From here, you can start building out your own sound categories.
For most games, a good starting point looks something like this:
To connect a sound to a bus, just select your AudioStreamPlayer node. In the Inspector panel, you'll find a "Bus" dropdown—simply pick the one you want. This bit of organization is the foundation of a clean and manageable mix.
Separating your audio into buses is also a huge win for your players. It makes creating individual volume sliders in your settings menu incredibly straightforward. You just adjust the bus volume, not hundreds of individual sound nodes.
Now for the fun part. Each audio bus can have a whole stack of real-time effects applied to it, completely changing the character of every sound that passes through. Since its audio system overhaul, Godot comes packed with over 10 built-in processors you can drop onto any bus.
You'll see pros using a Compressor, for instance, to automatically lower music volume when dialogue kicks in—a technique called "ducking" that's found in about 65% of multiplayer games to prioritize voice chat.
A few must-try effects from my own experience include:
If you're looking to create truly realistic acoustic spaces, you might want to explore more advanced techniques. To get a handle on how impulse responses can be used for incredibly detailed environments, check out our guide on what is convolution reverb.
Let's be honest: static sounds are the enemy of immersion. The hundredth time a player hears the exact same footstep or sword swing, the illusion breaks. The world starts to feel fake, and that's something we want to avoid. To really pull players in, we need to make our audio feel alive and dynamic, and that means diving into scripting.
We have to move beyond just calling play() on an audio node. The real magic happens when we start adding a layer of unpredictability to avoid what's known as "auditory fatigue"—that feeling of boredom or irritation that sets in when sounds get too repetitive.
One of the easiest wins for more natural sound is to simply play a random sound from a collection. Instead of having just one footstep sound, record or generate five slightly different versions. Each time the player takes a step, your code can pick one at random. Instantly, the experience feels less robotic.
Another great trick is to modify a single sound on the fly. You can tweak the pitch and volume of an AudioStreamPlayer node right before it plays, which can make one sound file feel like many.
pitch_scale property works wonders. I find a range between 0.9 and 1.1 is often the sweet spot—it creates enough variation to be noticeable without sounding weird.volume_db keeps every sound from having the same impact. It makes environmental noises and weapon impacts feel much more organic.For anyone making a retro-style game, this idea can be pushed even further. The release of the GodotSfxr add-on in January 2022 was a game-changer. It lets you generate classic 8-bit sound effects right in the editor, or even at runtime. This means your scripts can actually tweak the generator's properties on the fly, creating totally unique sounds every single playthrough.
Think about a game with a lot going on—a bullet-hell shooter, for instance. If you're creating a new AudioStreamPlayer node for every single bullet fired, you're going to hit performance problems. Instantiating nodes isn't free, and doing it hundreds of times a second is a perfect recipe for lag spikes.
The professional way to handle this is through sound pooling. Instead of creating and destroying nodes constantly, you create a batch of them up-front and reuse them. When a node finishes playing its sound, it just goes back into the "pool," ready for the next request.
A typical workflow for a sound manager using this pattern looks something like this:
AudioStreamPlayer nodes—say, 16 or 32—and keeps them in an array.finished signal fires. The manager catches this signal and marks the node as free again, ready to be used for the next effect.This approach massively cuts down on the performance overhead of playing sound effects in Godot, keeping the game running smoothly even in the most chaotic scenes. It’s a core optimization technique you’ll want in your toolbox for any serious project.
Let's be honest: finding the perfect sound effect can be a real drag. You know exactly what you need—that specific thump of a heavy metal door scraping on stone, or the exact shimmer of a magical healing spell—but you end up wasting hours scrolling through generic sound libraries. It's a total momentum killer.
This is where AI tools have completely changed the game for me. Instead of searching, you're creating. You can generate custom, high-quality audio from a simple text prompt, getting a game-ready file in minutes.
This approach is a massive time-saver, especially during prototyping. Instead of settling for a sound that's just "close enough," you can craft the precise audio texture your scene demands. It's a lifesaver for unique magic systems, sci-fi tech, or weird environmental noises that just don't exist in a standard sound pack.
The process itself couldn't be more straightforward. You jump into a tool like SFX Engine, describe the sound you're imagining, generate a few different takes, and just pick the one that works best.
The real skill here is learning how to write a good prompt. The more specific and descriptive you are, the better your results will be. Always think about the material, the action, and the environment.
See the difference? That level of detail gives the AI the context it needs to create something far more believable and immersive. If you want to get really good at this, check out some guides on how to use an AI sound effect generator to master your prompt-writing skills.
Okay, let's talk about the serious stuff. While the creative freedom of AI is amazing, the legal clarity it can offer is just as critical. The internet is littered with sound libraries that have confusing, tangled licenses. Some are fine for personal projects but not for commercial ones, while others demand attribution that's awkward to cram into your game's credits. It's a minefield.
For any serious project, using an AI sound service that grants a clear, commercial, royalty-free license isn't just a good idea—it's essential. This guarantees that every sound you generate is 100% yours. You can use it in your game, your trailer, or anywhere else without worrying about legal headaches or hidden fees down the line.
This modern workflow for creating sound effects in Godot isn't just about moving faster. It’s about building your project on a solid, legally-sound foundation so you can focus on what really matters: making a great game.
Once you get the hang of playing basic sound effects in Godot, you'll quickly run into some more advanced—and frankly, more common—real-world problems. Getting sounds to play is the easy part; making them behave correctly in a dynamic game is where the real work begins.
This section tackles some of the most frequent questions I see developers ask. We'll cover everything from stopping a specific sound on command to figuring out why your 3D audio isn't fading with distance. These are the practical hurdles you’ll need to clear to create a truly polished audio experience.
This is a classic. You've got an engine loop, a spell effect, or some other sound that needs to stop right now. The solution is simple: you just need a direct reference to the AudioStreamPlayer node that's making the noise.
Once you have that reference, a quick call to the stop() method does the trick. For example, $AudioStreamPlayer.stop() will silence that node instantly.
If you're using a more advanced setup like a sound pooling system, the principle is the same. You'd find the specific active player node you want to shut down, call its stop() method, and then you can pop it right back into the pool, ready to be used again.
The answer here is unequivocal: use Godot's built-in Audio Bus system. Don't even think about trying to manage the volume of every single AudioStreamPlayer individually—that way lies madness.
Instead, route all your sound effects to a dedicated "SFX" bus. Once you've done that, you have a single, central point of control. Adjusting the volume of that one bus affects every single sound effect in the game. This is exactly how you should build a volume slider in your settings menu.
The code for this is beautifully simple:
AudioServer.set_bus_volume_db(AudioServer.get_bus_index('SFX'), volume_db). That one line gives you—and your players—total control over the SFX mix, keeping it neatly separated from music, UI sounds, or anything else.
This is probably the most common trip-up for anyone new to 3D audio in Godot. If your sounds are just as loud a mile away as they are up close, the culprit is almost always the attenuation settings on your AudioStreamPlayer3D node.
First, a quick sanity check: make sure you're actually using an AudioStreamPlayer3D, not the 2D version. It's an easy mistake to make.
Next, head to the Inspector and find the "Attenuation" properties. The setting you're looking for is Unit Size. This property essentially tells Godot how quickly the sound should lose volume over distance. If Unit Size is set too high, the falloff will be so gradual that you won't hear a difference within your scene's scale. A good starting point is to try lowering it to a smaller value, like 15 or 20, which will make the fade much more pronounced.
You absolutely can, and this is the core idea behind building a sound manager or a pooling system. You can create an AudioStreamPlayer entirely in code, play a sound, and have it clean itself up without ever touching the scene editor.
Here's the general flow:
var player = AudioStreamPlayer.new().player.stream = load('res://sfx/your_sound.ogg').add_child(player).player.play().Now for the most important part: memory management. If you don't clean up, you'll have a game full of orphaned nodes. The best way to handle this is to connect to the node's finished signal, which fires when the sound is done playing. This one line tells the node to automatically remove itself from the scene and memory: player.connect('finished', player, 'queue_free').
Struggling to find the perfect sound? Skip the endless library searches and create exactly what you need with SFX Engine. Generate custom, royalty-free sound effects from a simple text prompt and supercharge your Godot audio workflow. Try it for free at https://sfxengine.com.